T-Mobile REVVL Plus- How to Take Apart & Replace LCD Glass Screen Replacement By Serg Tech
Hello everyone so we're going to be taking apart completely to replace the screen assembly on your Alcatel rebel plus, so we're going to be completely taken apart, this T-Mobile rebel plus in order to replace the screen assembly on it. So if you have a cracked screen, this video should help you out, so we're going to be using a small Phillips head screwdriver, and we're also going to be using a plastic prying tool. All right, so first thing we're going to need to do. Are we're gonna, see a small opening under the T-Mobile logo back here we're going to wedge it up with the prying tool. When you see a small slight opening, you can hold it open with your finger now and then swipe the prying tool right under it, and then you can let go of your finger now. So next up we're just gonna completely go around the entire back here of the phone it's going to be held down with some adhesive, so if you prefer, you can give it a little of heat.
Once most of the clips are released, you can lift from the bottom. It's going to be held done with some more adhesive over here towards the top. Another thing you may want, you're going to want to do is hold it down the fingerprint scanner with one finger so that when you pull up on the back that doesn't rip the flex cable holding it down so continue to lift, be back, removing any leftover adhesive, that's stronger and pull off completely. So, as you can see, here is the flex cable for the fingerprint scanner. So we can push down on the little button here, and it will come right off so let's place there and remove the back cover.
So next up we're gonna need to be removing 24 small Phillips head screws. So let's go ahead and do that now, so also it's going to have one screw hidden under a white sticker like you can see up here. Let's remove that one as well. We're gonna need to move the fingerprint scanner out of the way, because there's going to be two screws hidden under this sticker. So we have one here on the right-hand side, and we're going to want to remove the tape here so that we can get to the other one and, as you can see here, there's going to be another screw here on the left side as well.
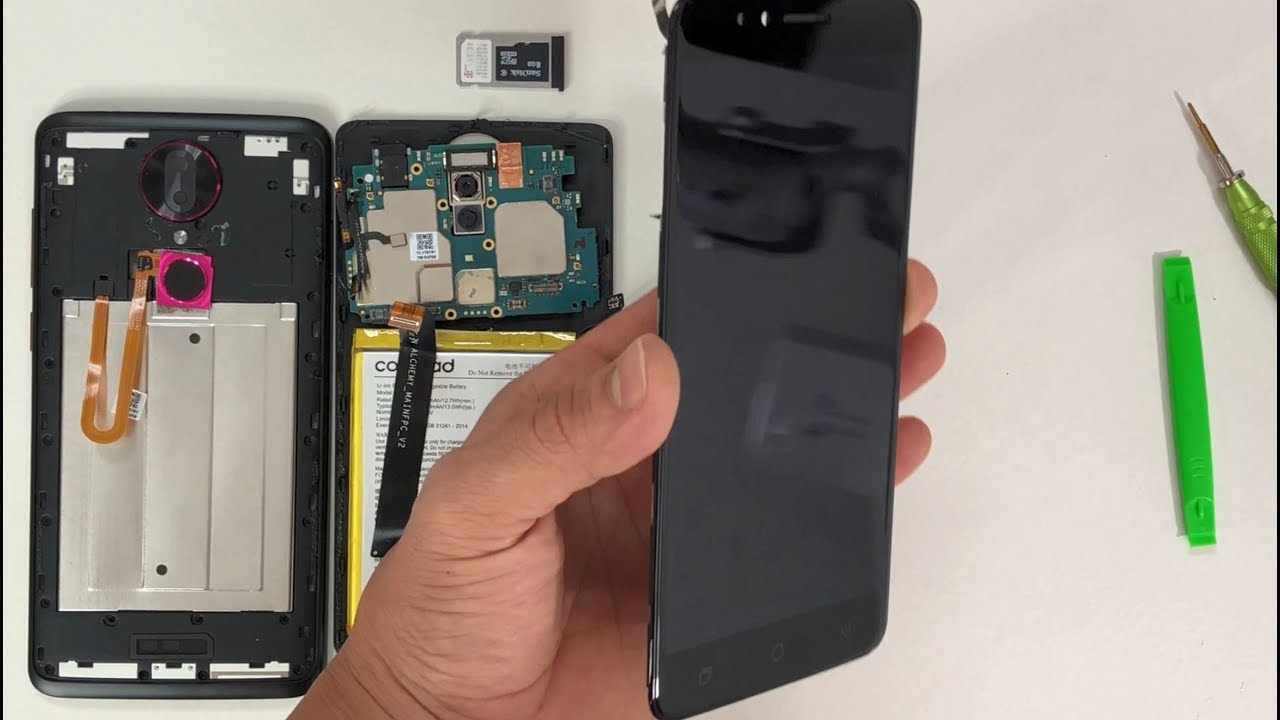
Let's go ahead and remove the SIM card and SD card tray. If you haven't done that already so next step is we're going to need a plastic prying tool to squeeze between the front screen assembly of the phone and the back housing, and we're going to wedge up releasing all the clips to separate them both once all the clips are removed, you can go ahead and pull up on it, and it will come out completely be careful with the flex cable here, that's still connected for the fingerprint scanner. Let's go ahead and disconnect that cable, and it comes out completely alright. So next up, let's go ahead and disconnect the battery to release any energy flowing through the phone disconnect this flex cable right here, which is for the LCD cable. This one right here as well, which connects to the bottom charging port.
Let's connect the cable here for the volume, rockers and power button, and this one appeared for the front cameras. Let's connect the bottom cable here for the charger port connector we're going to remove one small Phillips head screw, holding down the charging port here. Let's get that out of the way and let's go ahead and disconnect this antenna. Cable right here, which connects to the bottom charging port move that out of the way, and we can go in and pry up on the charging port here, lifting it up gently pull up on it, and it will come out completely. We're going to need to remove two more small Phillips head screws holding down the motherboard at the top.
Let's go ahead and remove those, and then we can go ahead and pry up on the motherboard to release them it from the clips of the frame holding it down. Be gentle wiggle it around. Once the clips are released, it will come out completely OH next up to remove the battery. You may want to give it some heat with a hairdryer heat gun or set it on a hot plate, as I like to do and then once it's hot enough, don't overheat it, so you don't burn it. We're going to use a prying tool to pull up on the battery and carefully remove the adhesive holding it on to the frame so give it some pressure upwards to lift the battery until it comes off completely, then you can just pull it off with your hands and there's your battery for your rebel plus, alright.
So next up with disconnect the flex cable here, which connects the charger port to the motherboard at the top, you can just pull up on it gently it's held down with a little of bad adhesive. Then we can go ahead and wedge under the power button. Flex! Cable! Here you need to do it with something very thin and be very careful that you don't rip it. So you have to kind of wedge under it. Here's the volume rocker coming out as well pull up on it, and it will come out completely.
Then you can pull it off with your fingers. There's your power button and volume rockers here is these the ear speaker. We can go ahead and pull up on that as well with the prying tool, lift on it and gently, and it will come out in one piece and let's put that down. So that is your all the small parts on your housing. This right here is the cable for your digitizer.
The touch function of the screen, and this long cable right here is for your LCD for the display of the screen. So, if you're going to buy an LCD screen assembly which comes with just a glass not with the frame you're going to want to give it some heat here on the screen to loosen up the adhesive and then pry up with a prying tool. This old screen and place the new one in make sure the digitizer cable comes into this hole and the LCD cable comes in through this hole right here, or you can buy the entire screen assembly in one piece like this, which will make your life a lot easier. It should only cost a few dollars more, maybe five, ten dollars more, and it will be easier to put everything back together once you're ready, just place everything back in reverse order. You alright guys so hope you enjoyed the video.
If you did, please give it a like. Remember: click on the subscribe button down below and on the bell to receive notifications on future videos, so we're going to be doing a giveaway when we get to a hundred thousand subscribers of a brand-new smartphone of your choice. So stick around guys till next time. Peace, ciao.
Source : Serg Tech
Phones In This Article
Related Articles


Comments are disabled
Latest Articles


