Smashed OnePlus 7 Pro Restoration By Hugh Jeffreys
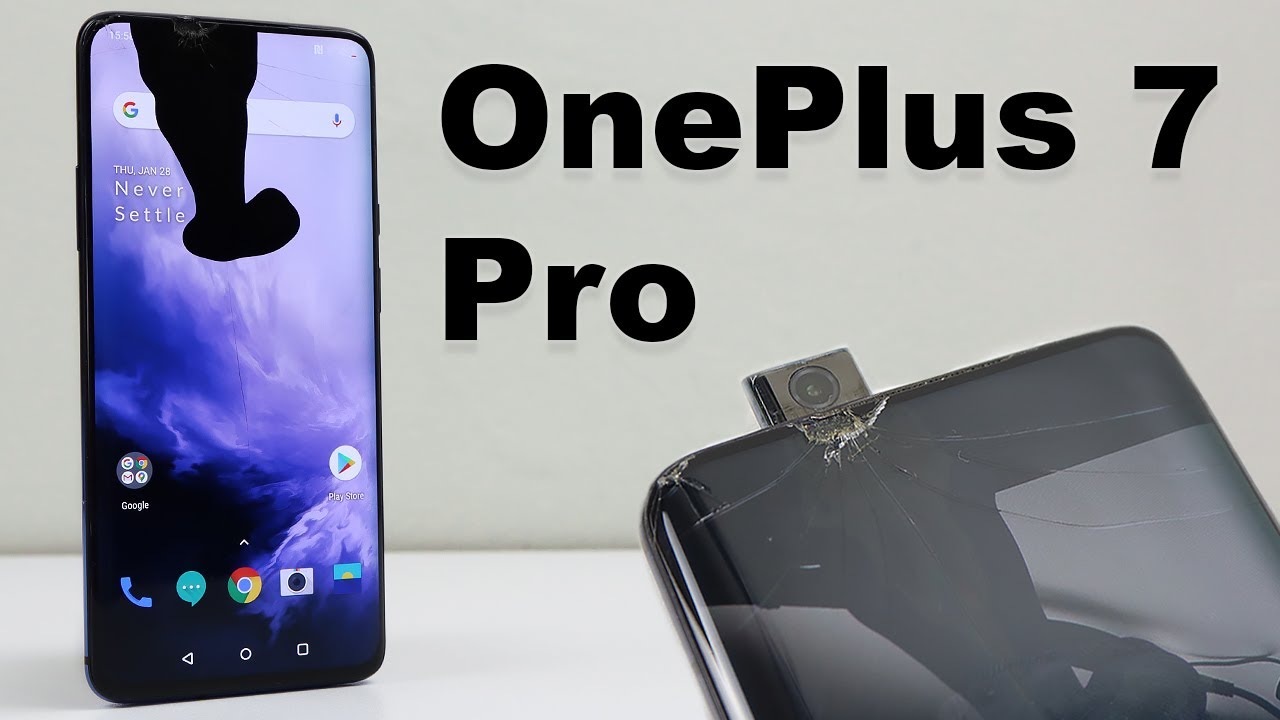
Hi guys welcome back to another huge Jefferies video in this video we're going to be restoring this OnePlus 7 pro. This is a top-end model with dual sim capability: 256 gigs of storage and 12 gigs of ram. As you can see, the glass is cracked, with the OLED badly damaged, underneath, while still functional it's hard to use like most Chinese phones. OnePlus is not common here in Australia, so I imported this particular phone from the US. Unlike a lot of other flagship phones, this one doesn't have an unbearable notch or a hole in the screen for its selfie camera. Instead, the camera pops out of the frame when needed.
I think that makes this phone one of the coolest that I have come across. But what I'm more interested in is how repairable this device is to find out we'll need to open it and to do that I'll start by heating, the phone on a heat plate to soften the adhesive securing the back. A heat gun could also be used to achieve similar results after a minute or two. The back is now nice and warm, which should allow us to be able to slightly lift it up just enough with the suction cup, to insert a plastic pick from here we can slice through the adhesive. Alcohol can also be used to help with this process.
This OnePlus put up quite a fight with its very rubbery adhesive. Thankfully I cut through it successfully and didn't crack the back in the process. I could carefully lift the panel just enough to be able to access the cable underneath to detach it before removing the back panel entirely there's a piece of tape over the connector itself and once the bracket is dislodged, I can simply unplug the flex cable, which connects to the LED flash on the glass once inside. I noticed a screw fall out of the mid-frame. Furthermore, I suppose it was just never screwed in right.
One interesting thing that caught my eye was OnePlus, stating on their battery that the battery was not removable, but two centimeters to the right you'll find a battery pull tab and a diagram showing you how to remove the battery proceeding. I can now remove 14 Phillips screws from the plastic mid-frame and NFC antenna, so we can access the motherboard I'll. Also remove the eight screws securing in place the speaker assembly at the lower portion of the phone with both of those removed. We can now get a good look inside our OnePlus 7 pro. Some interesting things of note is the USB charging port is modular from both the main and secondary board, although this makes it slightly harder to replace, as its cable now runs under the battery.
The pop-up selfie camera also occupies a large amount of space towards the top, with both the camera and motor being easily replaced, if necessary, with the phone open. We can also get a look at how the camera mechanism works. While it's a moving part, it's pretty simple, and I don't see it as a common area of failure before we go any further. It's a good idea to test out a new display panel, so I'll disconnect the battery and the old display connection. A new display was supposed to come with a frame attached, but almost 400 and 59 days later.
What I received was a display without a frame, so we're going to have to work with what we got connecting the display and battery connections. I can confirm the display works. It looks like a refurbished panel, so it's going to be as close to the original screen as possible. After confirming the touch works and the OLED has no burn-in, I could power off the device and continue with the repair I'll disconnect the battery and the display for now. Next I'll remove the motherboard while not strictly necessary, removing it will prevent any damage.
When we remove the display there are several cables and antenna wires that will need to be unplugged. Some of these wires are routed in metal clips along the motherboard, so it's important to detach them as well up by the selfie camera is a bracket that will need to be removed. It's latched into position with a red piece of rubber with it out of the way I can unplug the camera cable unfastening, two more Phillips head screws. I can remove the motherboard down at the lower portion of the phone I'll need to do the same process by removing several cables and antenna wires, as well as one Phillips head screw after taking out the sim card tray, we can remove the second board now, it's finally time to remove our front display assembly. It's not screwed into position.
Rather, it is glued into position, so we'll need to use heat just like the back to be able to separate it from the frame. There are ways to remove this display without destroying it. However, as this one is unusable, it doesn't matter after making my initial entry with a metal tool. I could use plastic picks to work around the perimeter of the display. The glue used is the same as the back.
This makes the removal process quite challenging. I ordered a display with a frame to avoid having to do this, but, as we know, I didn't receive a display with a frame upon lifting the display you can see. It just fell apart and started to separate, and that's because it's heavily glued in the middle as well, which makes the removal process even more challenging with it removed. You can see the two halves of the display. What we're left with is just the frame from here.
We can remove all the old adhesive to prep it for our new display panel. The camera looking object at the lower part of the frame is actually the optical fingerprint reader. It reads: fingerprints through the display the most time-consuming part of this whole repair is just removing the adhesive from the frame and back panel. It's really stuck on there, and it reminds me of the adhesive used on the Microsoft Surface. Pro 4.
, as I hadn't planned to do a display only replacement. I didn't have the pre-cut adhesive template to install this meant. I had to improvise. Furthermore, I wanted to test between using regular and liquid adhesive, so I applied both to the top of the frame and reattached the old screen. This way, I could test how strong each adhesive method was.
I pressed the display into place and left it for about an hour and a half and came back to test it out attempting to remove the regular adhesive it proves firm, but not impossible to remove compared to the liquid adhesive. It comes off really easily granted. It may not be fully dry, yet I didn't have any more time to test the adhesive. I'm using also fits the display panel perfectly just like the original, so I'm actually going to be using a mix of two I'm going to use regular adhesive for both the sides and top and a small portion of liquid adhesive down at the bottom, given how small the bezels are, the flex cable coming out of the bottom of the screen is very small and very fragile. There is only a small ridge used for adhesive, so this is where I'll be applying my liquid adhesive, and I believe this is how it was done.
Originally it's now time to install our display removing the protective film I can press it down into place. You may have also noticed a small hole in the back that lines up with our fingerprint reader. So it can see the fingerprint, through the display, after pressing it down into place, we can now start reassembling the internals of the phone I'll start with the secondary board down here at the bottom positioning it into place. I can fasten the one Phillips head screw and connect the various flex cables and antenna wires back to it. Proceeding we can clean off all the old crusty thermal paste on both the mid-frame and the back of the motherboard, of course, replacing it with some new thermal paste to ensure proper contact between the motherboard and the heat pipe.
Underneath at this point, I can reinstall the motherboard reconnect, the flex cables and the antenna wires before we can test out our phone to ensure our new display panel is still working with that I can reconnect the battery and test out the phone pressing and holding the power button. We eventually see the OnePlus logo booting into the operating system. You can see the OLED panel is working perfectly, and we haven't damaged it during installation. I can shut down the device disconnect the battery and proceed reassembling. The device fastening the two Phillips head screws into position.
I can reconnect our battery and attach the plastic frame on top. I can then proceed by reinstalling, the 14 Phillips head screws, securing it down into place next I'll reinstall, the speaker and its appropriate screws, while replacing the display was challenging, it's still good to see Phillips head screws used rather than security screws. Seen in many other phones. The last thing we need to do is reattach the back panel. To do this, we'll need to remove all the old adhesive from our back panel, as well as the frame of the phone before we reattach the two halves.
This proved very time-consuming. Even when using adhesive remover, I wasn't able to apply too much pressure, while scraping for fear that I'd shatter the curved glass. Eventually I got enough of the adhesive removed that I could install the new template. Aligning everything up. I can press it into place with a spider next I'll repeat the same process to remove the adhesive on the frame of the phone afterwards, it's now time to reattach the two halves I'll start by connecting the flex cable for the LED flash to the phone carefully sitting down.
The back panel will allow me to reattach the bracket which goes on top. This bracket is similar to the one for the selfie camera it latches into position and uses a rubber piece to stop it coming unplugged with it attached. I can reapply the tape on top and remove the protective film from the back panel from here. I can line the back panel up with the frame and press it down into position. One last thing I wanted to do was clean out the mute switch on the side of the phone.
It was clogged with quite a bit of dirt and grime, so I got a little brush in there to clean it out as best I could, while not perfect, you can see it's made a considerable difference from before. Finally, I can remove the protective film from the new display panel, and we're done, so this is it the OnePlus 7 pro one very nice, looking very powerful phone now back in a fully operational state, getting my hands on an OnePlus phone proved very challenging and took over a year to find one both carrier unlocked and for a reasonable price that shipped to Australia. Unlike the Samsung Galaxy a51, this optical fingerprint reader works correctly after a display, replacement and isn't disabled or require any form of calibration. As I said earlier, this particular phone has 12 gigs of ram and 256 gigs of storage. Not only does this phone have an almost edge-to-edge display, but it also runs at 90 hertz to make on-screen movement very smooth, and on that note this has been a huge Jeffries video if you like what you saw hit that subscribe button and consider checking out the phone restoration playlist for more videos.
Just like this one and if you're looking for any tips or what tools I used to repair devices be sure to check out my website, link for which is down the description. That's all for this video, and I'll catch. You guys next time.
Source : Hugh Jeffreys
Phones In This Article

Related Articles


Comments are disabled
Latest Articles


