Smartphone Photography - Google Pixel Photography 📱 DIY in 5 Ep 52 By Kingston Technology
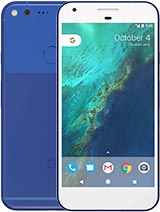
Dang, is that a Pixel in your pocket or are you just happy to see me? Seriously though, that's a nice phone. Hey guys! Welcome back. I’m Trisha Hershberger and In this episode of DIY in 5 we share some tips & tricks on taking awesome photos on your Google Pixel. Don’t forget to subscribe and check out our other smartphone photography videos. So let’s talk High Dynamic Range or HDR. One of the most impressive parts of the Pixel’s camera is the HDR mode.
This takes multiple shots at different exposures and then combines them into a single image with better contrast, colors, and dynamic range than you get with a normal picture. To set HDR+ to auto, open up the camera app and tap HDR+ Auto. Next, the Pixel has a trick to help with composing your shot as well. We’ve talked about the rule of thirds before and this next tip just helps reinforce that. By turning the gridlines on, you can compose shots by placing your subject at a strategic location in the photo.
The grid will act as a guide, helping you align the horizon with the top or bottom third, instead of leaving it in the middle, to create interesting shots that aren’t always just centered. To turn it on, tap on the grid button and choose the grid size. You can choose between 3x3, 4x4, and golden ratio. Easy peasy! One of the most frustrating things in the world is when the perfect shot goes right on by because you couldn’t get your camera up and running fast enough! Open! Open! Open! Mr. Gyllenhaal, wait! Damn it! The Pixel has some quick shortcuts to open up the camera app.
You can long-press the camera’s app icon and it will bring up shortcuts to take a selfie or record video. Or you can double-press the power button and the camera app will open. When you want to switch between the rear and front camera, double twist the phone toward or away from you. Twist again to go back to the previous camera. Kinda cool.
You can turn this feature off if it’s not your thing. Go to phone settings, then moves, then flip command and turn it off. When you first get your phone, the volume button will act as a shutter release. You can change this to shutter, zoom or other camera-related tasks by going to the camera setting and selecting volume key action. Customization is the best.
Speaking of customization, let’s talk about shooting modes to give your shot that individual touch. Google’s camera app might not have all the filters & effects you want, like on Instagram or Snapchat, but they do have some cool features. It has slow motion, panorama, photo sphere, and lens blur. Lens blur is probably the most unique out of all of the modes. Tap the shutter icon and take a picture of the object you want to use the blur mode with.
You can adjust the blurriness after you take the photo. And of course, you can customize picture and video quality by opening Camera settings and switching to your preferred resolution. You should put the front and back camera at the highest settings: front is at 8 megapixel and back is at 12.3 megapixel. The video camera is defaulted to record in 1080p. But, with free, unlimited storage at full quality, there is no reason to have 4K turned off! Bring it in, a little bit closer.
Yeah, that's the sweet 4k I'm talking about! To turn on 4K, go to camera settings, then select back camera video resolution. Nothing ruins a sweet video like a shaky cam. If you are simply panning around while you are recording your video, the stabilization feature on it is quite impressive. If you plan on moving the phone and walking around, you may want to turn off the image stabilization since it tends to skip around a lot. Play with it and see how you feel.
If you decide you want to disable the feature, go to camera settings, then video stabilization and turn it off. Well, those are MY tricks for the pixel camera, do you have any that you recommend? Any cool shots you’ve taken using the photo sphere or lens blur modes? Let us know in the comments below or share them with us online using #DIYin5. That’s it for this week’s episode! But before you go, if you want to step up your smartphone photo game with some accessories, check out this video here where we show you our top picks to make your photos even better. I’m Trisha Hershberger and I’ll see ya next time!.
Source : Kingston Technology

