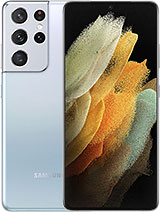
Samsung Galaxy S21 Ultra Whitestone Dome Glass Install and Review By AndroidStud

What's up buddy people, android stud here, and today I have the white stone, dome glass for the galaxy s21 ultra, I'm going to show you how to do it, quick and easy. This is a little of a different design than they've had in the past, they've improved if it's a little less nerve-wracking, as you could say, a little less steps. You still have to follow step by step when installing this, or you're going to get yourself in trouble. But it's I think it's one of the best screen protectors out there, in my opinion, so and the other cool thing is, it comes with two screen protectors in this pack. I'll leave a link down in the description, so you guys can. If you want to pick this up, you can uh from white stone dome, but it's really, really excellent.
Also, I want to remind you, if you're not subscribed to the channel you're, not part of the party people go ahead and hit that subscribe. Button hit that like button and also hit that notification bell, so you can get more videos like this in the future, all right! So the first step you want to do is you want to turn off your galaxy s21 ultra? Are you want to install these strips on here on the sides of your s21 ultra to protect any liquid from going into any kind of openings on your phone, and it's real simple to do you just put it on the two sides and on the top and bottom of the device, all right after you put it on the top and bottom and the four sides, the liquid protectors here on the sides that they that come in the package? The other thing you want to do is you want to make sure you take off any kind of screen protector that you had on there, so I'm going to go ahead and take off mine that I had installed, which is a regular plastic, flimsy one, not a glass protector, so we're going to go ahead and take that off, and the next thing you want to do. Are you want to wipe down your phone with this alcohol swab that comes inside the package from white stone dome, so you're going to go ahead and wipe that all down you'll probably have to do this again, depending on how much you handle the phone, but you go ahead and wipe that down then you're going to grab the microfiber cloth that they give you inside the package go ahead and dry it off all right. The next thing you're going to do is you're going to get your little rig here from white stone dome. Now, there's a little plastic piece here that you're going to go ahead and take off, I think from the bottom, yes from the bottom.
That allows you to cover the speaker. This is pre-applied, so you could take it off. Okay, the next thing you're going to do is you're gonna, wind up your jig, so you're going to take this little blue piece here and cover it all the way all the way over this part here, so that it stops it from moving okay once it snaps into place. You're going to wind up your jig all the way till it stops winding. Okay, all right.
The next thing you're going to do is you're going to set your phone in here. So what I do is I flip it upside down. I take the s21 ultra and just snap it into place, make sure the top is the top and the bottom is the bottom, see how it snaps into place. There's your speaker on the top there you're going to go ahead and put down the little adhesive there. So it covers the speaker, and then you're good to go.
Then I give it another little wipe here with the swab, the microfiber cloth to make sure there's no dust, particles or anything in here- that's going to cause it to have any kind of bubbles uh after the installation. So you go ahead and do all that make sure it's nice and dry. You also have these dust remover stickers. In case you have any dust next you're going to take this bridge. Put it right here in the middle, then you're going to use your glue stick here.
This is the adhesive that goes on the screen, make sure you have a level surface. If you don't, you make sure that the bubble of adhesive remains in the middle before you apply the screen protector, so you go ahead and unscrew the pink top. It's not going to come out until you unscrew the other side. So don't worry so go ahead and put that in there, and then you unscrew the bottom, and it's going to come out onto the device and let that for about 30 seconds, make sure all the adhesive comes out, and you're good to go all right next thing: you're going to remove your bridge with your glue, stick so go ahead and hold down on your rig and then pull up on this. Put that to the side.
You see how the bubble is pretty much in the middle. That's where you want it. Then you grab your screen protector, and they give you two of these, and you rip off the adhesive here on the back, and then you're going to put it inside. What I do is I go from the bottom, and then you just let it go like so, and then you're going to grab your this piece here is like a weight and there's a little handle here that you can grab, go ahead and put that there and let it sit right there right in the middle okay and here's where the magic happens. You have everything set up, ready to go, and then you don't have to do anything.
You just watch the magic happen. Furthermore, you pull on your lever here. What I like to do is hold the rig and then pull on the lever and let it go and there's the magic. Now that's pretty cool. Now you get rid of the top piece here.
Put that to the side. You don't need that anymore, and then you just let that adhesive go completely cover the device. So you want to wait anywhere from two to five minutes, but just make sure that it has completely covered the device. Now some has come out on the side, which is not a big deal. That's why they have you cover up the phone on the side, and also they have these pre-applied absorbers here on the side for the glue in case anything leaks out all right.
So after you let that adhesive sit you're ready to take off the little weight here. The guide put that to the side. Now I had to wait a little extra time because mine here on the bottom took a little while, but don't worry about it if it doesn't go fully and as long as you have it in the center, and it doesn't go fully to where the whole device you're going to have to be patient, let it cover the whole device. It will eventually get to every single part of the screen. So don't worry about it all right.
The next thing you're gonna, do is you're going to hit your UV light on top of these 15 seconds on the top and bottom, and also in the middle, is what I do just for extra giggles. Now you hit the light once for 15 seconds, go ahead and put it on there all right after you cure with the UV light. You want to go ahead and take this off, and then you want to go ahead and pop your device out like so, and then what you want to do is just want to wipe down the sides just in case any of that adhesive got on the phone at all, but um. I doubt it with the way they set it up that you're going to have any issues with this. Now this installs came out pretty good.
As you can see, and I will say they have improved the installation to make it a little easier, a little less nerve-wracking and stressful. For me, it's still nerve-wracking. So I understand, if you're doing this, but I think if you follow these installation steps in this video you're going to be fine. So after you do that, you want to wipe that down. What I like to do is you want to press here for 30 seconds for the fingerprint okay make sure you take off these um liquid protectors here on the top and bottom of the device make sure you guys take it off all the sides and the top so that you can wipe down the device again, and then you're going to cure it this time in the top middle and bottom for 60 seconds, so go ahead and put that down you're going to hit the double button twice: 60 on the bottom, 60 in the middle 60 on the top go ahead and give it a nice wipe around the sides again, and then you should be good, take your microfiber cloth and then what you're going to do is you're, going to set up your fingerprint reader again, new, get rid of the other ones and set it up.
Fresh boom looks like a perfect installation. The fingerprint reader works no problem. Let's try that again boom all right. One of the other things that came in the box, uh with your screen protector and all the accessories are. These two deals here: they're like it's interesting they're like a padded like a padding that goes on the back of your phone.
What you do is you stick it on the back here uh and what it is that if you take off this plastic, and it'll. Stick to the back. I'm not gonna. Do it because I have a deep brand skin, but you could stick this on the back. I guess some people would use it.
I wouldn't really use it and then what you would do is this comes off your back. Okay and you can use this to wipe down your white stone dome and then this is sticky. So if you have anything like any kind of uh, you know anything that would stick to the top, then you would use it, and then you would put this back inside here on the back of your device, which would be here, so it comes with two of those. I wanted to make sure that I showed those, so I don't know if you're into that, but you get them in the box. I highly recommend this from white stone, dome glass.
It's a premium screen protector. This is not the fake. This is the real deal so hit them up, and I'd like to thank white stone dome for sending these out to me. So I can review on the channel big shout out to them for being part of the video and sponsoring this video today so, but make sure you jump down in the in the description pick one of these up in white, stone, dome I'll leave some links down for the s21 ultra s21, plus and s21, just the small boy. So if you guys want to jump in, if you have any questions about installing this leave them down in the comment, or you have any advice or tips on how to do this even better than I did, but I think I did a pretty good job- that's gonna! Do it man thanks so much for watching the video that is the white stone, dome the galaxy cs21 ultra peace party people, so you.
Source : AndroidStud
Phones In This Article
Related Articles


Comments are disabled
Latest Articles


