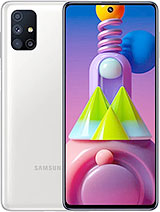
Samsung Galaxy M51 Disassembly Teardown Repair Video Review By PBKreviews
You're watching the Samsung Galaxy m51, disassembly first make sure to remove the sim tray, and then we're going to use a hairdryer or a heat gun to heat up the backplate and loosen up the adhesive underneath then we're going to use a plastic pry tool to pry the backplate off. So here you have your backplate, and it's plastic. There are 15 Phillips screws which need to be removed once the screws are removed. We're going to disconnect this flex cable over here from the main board, and then we're going to separate the pack housing from the mid-frame and the back housing itself is also plastic. You have your NFC antenna located over here. You also have some more antenna, flex cables, one here and one here.
On the other side, you have some graphite film over here to help transfer heat. You also have some more antenna flex cables on the inside towards the top portion. Every loudspeaker down here, there's some rubber gaskets over here, where the charger port is the speaker area as well as the headphone jack. Your fingerprint reader and power button is located right here, as well as your volume keys right here now we're going to disconnect the battery cable. Now we're going to disconnect the flex cable that connects your main board to your sub board.
We have one wire cable. We need to pop off from the main board, as well as the sub board on the bottom. Let's disconnect the front facing camera. You have one Phillips screw over here, holding down the main board once that screw is removed, we can lift and remove the main board. Here's a better look at your main board.
You have a rubber gasket around the connectors over here. Your cameras are located here. If you want to disconnect your cameras, all you have to do is just pop the connectors off here's the other side. You have a sim card memory card reader located right here. Your proximity sensor is right here, as well as a secondary mic.
This piece right there- you have some graphite over here to help transfer heat peeling. That off reveals the Qualcomm processor over here, as well as the thermal pad sitting. On top of it, next we're going to disconnect the flex cable for your screen right here, and then we're going to remove the charger port board. There's some adhesive underneath it, so we're going to pry it off. So here's a better look at that charger port board.
You have your headphone jack right here. Here's your charger port! You have some rubber gaskets around these connectors. Here's the other side! You have a liquid damage indicator located here. This is a white sticker. You have a primary microphone locator right here now, you're left with the mid-frame, your battery right here, your vibrator motor here, your earpiece speaker, is located right here you have some more rubber gaskets around this area, as well as down here around the headphone jack area and the charger port.
This one does have a lot of rubber gaskets, which makes me think it might be water resistant to a certain point. However, there's no gasket around the sim tray, so I'm not sure about that. As far as replacing the screen goes, you'd have to heat the front of the phone where the screen is pry. The screen off the frame making sure you run your cable through the slid over here in the mid-frame, and then you get your new screen, run your cable back through and reassemble the phone. Now, it's time to remove the battery.
We're going to have to apply heat with a hair, dryer or heat gun from the front of the phone where the screen is, so we can loosen up the adhesive, that's underneath the battery, and then we're going to use a plastic pry tool to pry the battery off. Here's a better look at your battery. Here's the other side, also one more thing to mention: there's a copper tape in between the screen and the frame itself you can see through over here and some other parts of the assembly. So that's going to help transfer heat from the screen. Now I'm going to go ahead and put the foam back together.
Once all your screws are back in place, apply new adhesive and reapply your backplate flip your phone over power it on, and you're done. I hope you guys enjoyed this video and, if you guys want to see more videos like this make sure you subscribe and click on the notification bell, so you'll be notified the next time. I upload a video thanks again for watching guys, and I'll see you guys in the next video you.
Source : PBKreviews


