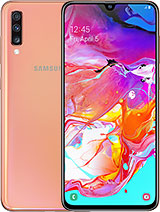
Samsung Galaxy A70 LCD Screen Replacement By Soft Solutions Repairs UK

Hey guys, how are you doing today welcome to solution repairs in a second here today we are going to replace screen on Samsung a 70. There isn't any visible crack on the screen, but LED underneath is broken. That's a reason. There is no image and if we plug in the charger it charges fine and makes noises, but obviously nothing shows up because of broken screen water to get into the phone we'll have to remove back cover. So let's begin the work and fix this film. First, we'll remove SIM tray.
Then heat up backside of the phone be careful while using heat gun, because back cover is plastic made, and you don't want to melt it down once back. Cover is warmed up enough, we'll use thin aluminum card and breathe adhesive. You can also use plain card instead and if you struggle at any point, you can reheat your required area, and it will be lot easier now, once back over is removed. Now we have access to the screws, so unscrew all of them pointed in red circle using 1.8 mm Phillips screwdriver now we'll go ahead and remove the second cover which is covering battery and other components, including main board charging, port, etc. , and once that is removed, will disconnect the battery first, then main flex, which connects total board to motherboard, then unscrew.
These two using same screwdriver and release the thumb, print scanner now disconnect other side of the main flex, LCD flex and antenna ribbon. And then you can remove the daughter board now disconnect antenna ribbon from topside, then unscrew this one, which is holding them at the board down, and then we'll go ahead and remove the motherboard. Now we'll remove our piece, vibrator and antenna cable, then we'll go ahead and remove the battery in order to remove the battery we'll have to heat up the other side on the screen. I give you a tip here. If your screen is okay, and you want to remove the battery, you don't want to keep your hot air temperature too high and burn the screen, then we'll use battery remover and pull the battery from one side and the battery is out here is the replacement part.
Now we are going to assemble it with all those components we have removed from 41. So let's go ahead and finish the rest of the work. First put the earpiece on its place, then vibrator then motherboard and tight. The screw to hold the motherboard down then place the daughter board and connect display flex to it then connect the antenna. Cable on both sides now place thumbprint scanner, plug it in and then screw it down.
Then use double-sided tape and stick the battery now connect both boards using man, flex cable. Once we make sure everything is plugged and connected properly we'll go ahead and clip the component cover and screw it down. This is the point you can test your phone and make sure everything is working as it should be. After tightening the screws, we'll stick the back cover and turn the phone on to make sure screen is working fine. This will take a little while, in the meantime, I would request those haven't subscribed to the channel.
Please hit the subscribe button and don't forget to click the icon, to turn the notifications on and ask any question in the comment section. Thanks for watching a video and goodbye for now you.
Source : Soft Solutions Repairs UK
Phones In This Article
Related Articles


Comments are disabled
Latest Articles


