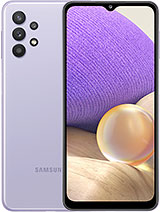
Samsung Galaxy A32 5G - How to Screenshot By KalipezTech
What's going on guys, Philips tech here coming back at you with another video in this video, I'm going to be doing a quick tutorial of how to take a screenshot with the Samsung Galaxy a32 5g taking a screenshot is a pretty basic function, but every phone has its own way to do it. So I'm going to show you exactly how to do it on this phone, in addition to some settings for screenshots that you can change so, let's get into it. So the way you take a screenshot on this phone is by pressing the power key in the volume down key. At the same time, now it's important to keep in mind. You don't hold these, you actually just lightly press them once real, quick like this, and when the screen flashes like that, this is going to show up, and that shows that you've taken a screenshot. Now you can click that toolbar to edit or share your screenshot, pretty straightforward.
Now, there's another aspect of screenshots I want to touch on, and that is the screen recorder. The screen recorder in case you didn't know basically it records. Whatever is going on your screen and to get to this feature you're going to open the quick menu, so swipe down once swipe down again here, we're in the quick menu in screen recorder is right. Here, go ahead and click on that and now, once you get past this permission thing, it's going to take you right to the screen recorder, you're going to have the choice of recording with no sound media sounds or sounds in mic and that's actually really cool. I know for a fact that iOS can't do this, so it's really cool to see it on a phone like this and then all you need to do is start recording.
Now it's going to do this countdown after that, it's going to be recording your screen the whole time and to stop just simply hit the stop button and your screen recording is going to be saved so now that we've gone over how to take a screenshot and how to use the screen recorder. Let's take a look at the different settings that you can change for these tools, so we're going to go to settings advanced features in screenshots in screen recorder, so the screenshot toolbar is that little toolbar that you saw after I took a screenshot in case. You missed it, I'm going to do it again right down here this little thing you can edit share whatever you want to do. This is really cool in my opinion, and I feel like a lot of people do like it, but it might be a little intrusive to your screen, and you might not want it to show up every time you take a screenshot. So all you need to do to get rid of.
It is just toggle this off, and then it's going to be off now. When you take a screenshot, nothing is going to show up. I know my library is going to be completely full of screenshots after this video, but whatever now. The other thing that you can do that, I think, is really cool is hide the status and navigation bars. I honestly didn't realize that that was already toggled on it's not by default.
So definitely be sure to do that. If you don't want this bar in this bar to show up in your screenshots. Let me give you a quick look at what that looks like. So, let's go to my gallery where there are probably a bunch of random screenshots from this video and right here you can see mine was already toggled on, and you can't see the status bar or the navigation bar. It's just the real part of the screen, and I honestly suggest keeping this feature on unless your screenshot is specifically to show either the status bar or the navigation bar, because screenshots with those two items in them do look a little clutter and if you're trying to take a screenshot of something and have it look a little nicer, then this feature is really cool.
The other thing you can do is delete shared screenshots. So when you toggle this on as soon as you share a screenshot, whether you send it to somebody or what, as soon as you hit the share button in the screenshot toolbar, it's going to delete the screenshot from your gallery, so you won't have a bunch of clutter in your photo gallery. You can also change the screenshot format. This is going to change from a JPG to a PNG and, depending on what you're doing with the screenshot, this might be necessary for the screen recorder. The main thing to be aware of here is what kind of sound is going into it.
So you can have no sound media sounds so if you're recording a video from YouTube or something like that. This is where you're going to select media sounds, and then media sounds and mic. This is basically, if you want to do some sort of commentary, while you're doing the screen recording that's also another option, and then you can also change the video quality, but that was a quick tutorial on how to take a screenshot and use the screen recorder with the Samsung Galaxy a32 5g. I hope you enjoyed the video and I hope you found this information useful as well. If you did don't forget to leave a thumbs up and subscribe to the channel, and as always, I will see you in the next video.
Source : KalipezTech


