Samsung Galaxy A21 Camera Tutorial By Tech Shark Reviews
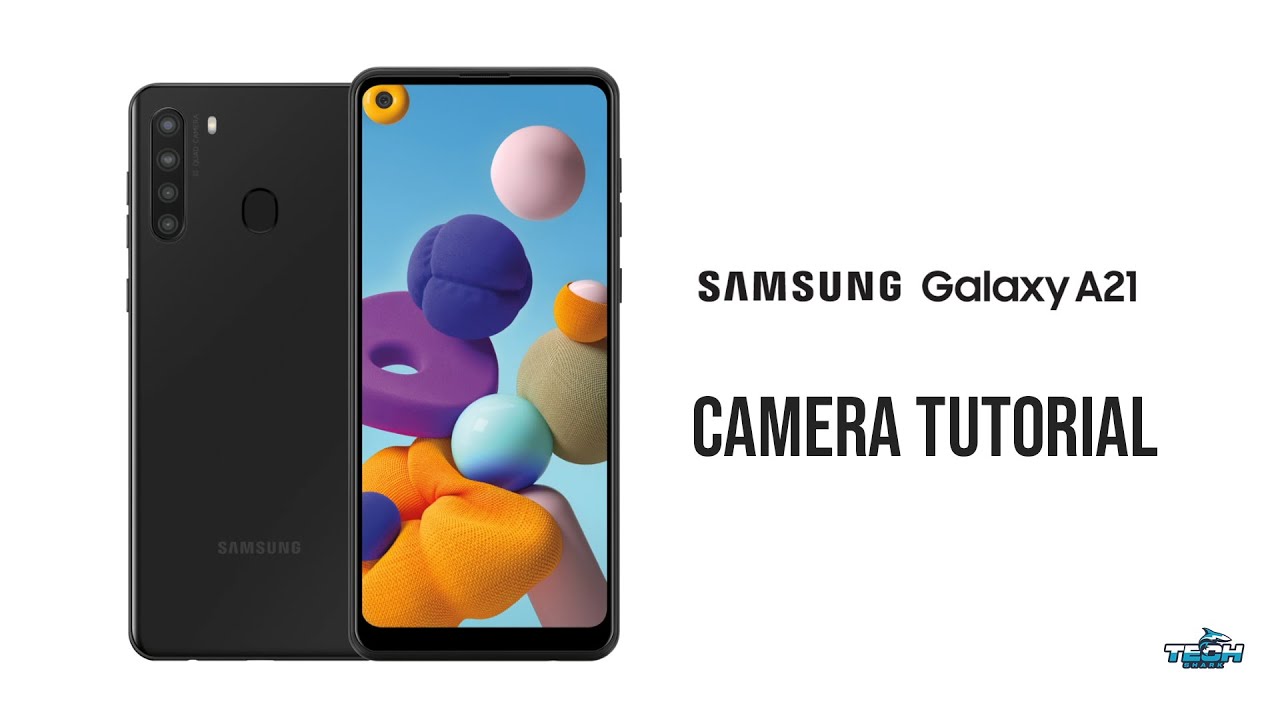
Hey guys this is Adam with tech shark reviews. This is a quick video of the camera on the Samsung, galaxy a21 and some of its features. So, let's get started first, let's go over which camera is which the four cameras on the back from top to bottom are the 8 megapixel depth, camera the 16, megapixel main camera, the ultra-wide 8 megapixel camera and the 2 megapixel macro camera. And of course we have our 13 megapixel front facing camera. When you tap on the camera, you get your basic camera layout on the top. We have our settings icon.
Then we have our flash control icon. Next, we have our timer feature followed by the aspect: ratio settings and the last icon on top is a magic wand which has your effects on the bottom. We have our camera modes along with the gallery or the most recent pictures on the left, our shutter button and the switching camera button on the photo mode. You will see two icons with little trees on it. The icon with two trees is your standard mode and the three trees is your wide angle: camera tapping it.
You will see the difference on how much the camera captures you can zoom in and out before, taking the photos as well. If you zoom out all the way, it will eventually switch to wide angle mode. When you switch to video mode, you will get the same settings on top except the timer feature. You also get both standard and wide angle. Video shots, just like you do with the photo mode.
One thing I also want to mention is the effects that you can add to your videos and photos by tapping the effects button on the top right you can zoom in and out when you pinch the screen, just like you can, with the photo mode, when you tap more, you will see four other options: panorama pro food and macro you'll also see a sticker option. The sticker option lets you play stamps or stickers on your photos or videos and filters on your face, like you would with Snapchat. This works with both front and rear cameras in standard mode. Only this will not work with ultra-wide or macro mode. Let's get back to the other camera modes panorama lets you take a really wide shot by panning the phone across the scene.
The camera app then stitches together. Several images that it took while in this mode and build a panoramic image, the trick is to be very steady and try to be on the same level. Whenever possible, you can only go in one direction, so make sure you start off at the furthest left or the furthest right as possible. Next, we have our pro mode. You will see options such as ISO, which adjusts the light sensitivity of an image sensor, the lower the setting the less sensitive it is to light, and, of course, the higher setting will make it more sensitive to light this controls how detailed or grainy an image will be at the end, so you can play around with that and see you want to keep it to the lower range as much as possible without rooting the image but, like I said you can play around with it and see what best suits you.
WB stands for white balance. This allows you to adjust the lighting in your situation. Here you can see what almost seems like presets and color temperatures like daylight and fluorescent, etc. play around with it and see for yourself, and this feature can also be toggled on manually or be set to automatic the last option we have on our pro mode. Is this plus and minus looking icon? This controls the exposure, which is a measurement of the amount of light per unit area on the photo, the higher the exposure the brighter it will be.
This icon is the metering. Setting metering is how your camera determines what the correct, shutter, speed and aperture should be, and that usually depends on the amount of light that goes into the camera and the ISO. Another thing I wanted to mention is that pro mode only works with photos and not videos. Then we have our food mode. There are a lot of people who love taking photos of their food.
I did it myself a while back. I don't have any food in front of me at the moment, so we can use this bush right here and pretend this is a salad. There are two settings on the top in this mode: the water drop icon gives you an option to toggle off and on a radial blur, it may or may not give your food picture a nice effect. It really just depends on how you like your food pictures if you tap on the screen, while this feature is on it will focus in the center of where you tapped, making everything else around it blurry. You can enlarge this box by dragging one of the corners, but again you don't have to use the radial blur on your food pictures.
The little wheel icon on the top right is the setting for temperature on your photo. This too really depends on how you like your food pictures you can zoom in and out of the picture by pinching the screen, and this mode only works with your standard rear camera. Lastly, we have our macro mode. This lets you take photos up really closely by standing. Only a few centimeters away from whatever you're taking a photo of my camera is literally centimeters away from the flower.
This mode only works in photo mode. You can use flash and filters in this mode. You cannot, however, zoom in or out in this mode. Now I will go over some settings you can play with. The first option we see is the scan qr code.
If you have this option on whenever you focus your camera on a qr code, it will display the URL website or the text etc. , and if you tap it, it will take you to the designated destination. The next option we see here is the whole shutter button too. This lets you select from taking a single picture, taking a burst, shot or creating a GIF. First, shots really come in handy if you want to capture multiple shots of something in motion, so keep that in mind.
Next we have the HDR settings. HDR stands for high dynamic range. It means that your camera will process photos slightly different from normal in order to capture greater detail from bright and dark areas of your photos. Next up we have our video sizes for the rear and the front cameras by default. They are set to 1920x1080, and then you can change the different sizes.
Accordingly, the picture as previewed option lets you save selfies as they appear in the preview or a mirrored version of it. Sometimes people take selfies, and then it's flipped, the other way. With this option, you can change that the grid line option gives you an overlaying lines on your camera, which may help you create aesthetically pleasing photos. They won't appear on the actual photo, but they give what we call the rule of the thirds. When you position your main object in the center of the photo, it becomes static and most of the time, that's where most of the tension goes.
So it basically is a reminder of keeping things centered and focused. Let's say you were trying to find some photos you took in your trip to la with this option on your photos will automatically be tagged by location, so you can find it more easily the shooting methods, options. Let you set the volume key to take photos or start and stop recording videos. This comes handy sometimes, but it really is based on your preference. The volume key can also be set to zoom and controlling the system volume, while your camera app is open.
The floating shutter button, however, allows you to place the shutter button anywhere on the screen. When you have the camera app open, this may come handy if you're holding the camera in a way where the shutter button is hard to access. The show palm option lets you take an automatic timed photo of your front facing camera. Just show your pump to the front facing camera and a quick timer will start, and then it will snap a photo of you. This only works with the front facing camera.
I tried several times with the rear camera, and it didn't work. This phone also has a watermark option. It lets you add a text watermark on the bottom left-hand side of the photo. This is also accompanied by the quad camera icon and the text Samsung quad camera, which I really find annoying. It would have been really cool if they allowed you to put your own logo on the bottom.
Instead, the last option on the setting is the shutter sound. It's the little camera click you hear when you take the photo, so here's where you can turn it on or off. I hope you guys like this video. Please give this video a thumbs up and subscribe to my channel if you have not already, if you have any questions or need any help using this phone drop, a comment below, and I'll get back to you as soon as I can. Until then, I'll see you guys later.
Source : Tech Shark Reviews
Phones In This Article
Related Articles


Comments are disabled
Latest Articles


