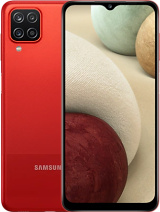
Samsung Galaxy A12 - Camera Tips & Tricks! By Kevin Breeze
Hey everybody- this is Andre here covering for Kevin on the Kevin breeze channel and in this video we're going to be going over some camera tips and tricks for the Samsung Galaxy a12 remember to get some more information on the pricing availability or just general information about the device itself be sure to check the link in the description. This link will take you right to the phone on Samsung's website, where a lot of the time they run some great trade-in deals that you might not be able to find anywhere else. That being said, let's get started now. Sometimes, when you're taking a photo, you might be in a situation where you have to be absolutely sure that you have the subject right in the center of the photo. Let me show you how to make this a lot easier, so in the camera you're going to want to go to the settings scroll down here and activate grid lines with the grid lines on you're going to be able to target the center of the photo a lot easier. This could be really useful in a situation where you have to make a specific part of what you're taking a photo of in the exact center of the frame.
For example, certain social media apps do have really specific ways. They show a picture on their sites. So if you're in one of those situations you might want to make sure whatever you're taking a picture of is in the correct frame, so it'll show up the way you want it to on the app with the grid lines activated. This is going to be a lot easier now, if you're taking portrait photos, you might be in a situation where you want the subject to really stand out from the background. Some of you might know, this is portrait mode, but with the Samsung Galaxy a12.
This is known as live focus mode. To demonstrate, I'm going to take a picture of this office chair in live focus mode. One really cool thing about the live focus mode of the Samsung Galaxy a12 is that you can control the blur of the background. This is really cool, because in some situations you might want the background to be more blurred out and in others you might want it to be more clear when it comes to taking photos. Having control over as many aspects of the picture as possible is always great.
As seen here, the live focus photo came out really well, the background was blurred, and it looks really professional a lot of more entry-level and mid-range phones sometimes have a live focus mode. Where the background really doesn't look very professional, and it looks more like the subject was just photoshopped onto a blurry picture, but this one blends really well and looks great now. Another feature that a lot of people don't know about is the palm selfie feature, I'm going to show you how to activate that and how to use it. So you're going to go to settings scroll down here, go to shooting methods and make sure that show palm is activated with this mode activated. All you need to do to take a photo is show your palm, as you saw there once you put the camera on your palm for a second it'll activate a timer that gives you a chance to put the camera in position.
It's a really cool feature to have when you're taking a selfie at a more awkward angle and don't want to risk dropping the phone or accidentally moving the camera out of position when pressing the shutter button manually. Have you ever been in a situation where you need to get your camera out as fast as possible to capture a moment? Well, I'm going to show you how you can do that by default, the Samsung Galaxy a12 is set up to open the camera app by double tapping the power button, as you can see, that's very fast and really efficient. But let me show you another thing: you can do with this button, so you're going to go to settings and look upside key now for a lot of you when you have to get your camera out as fast as possible to capture a moment, there's a good chance that it might not be the camera app you're, trying to open a lot of the times when it comes down to capturing a moment quickly. You might be using Snapchat to do so well with the Samsung Galaxy a12 you're actually able to set it to open Snapchat by double tapping the power button. Once you access the side menu from the settings, hit open, app and then hit this gear right here then you're able to select whichever app you want to open when you double tap that button.
Now, whenever you have a quick moment that you want to capture with Snapchat, you can double tap the side key, and it'll open right up now. That's really cool because I don't know about you guys, but if I have a quick moment that I need to capture it's usually with something like Snapchat and not the camera app itself, but no matter what the situation is. You can set that button to open any app that you want in order to take your picture now by default, the aspect ratio for a photo taken on this phone is three by four, but in some situations, especially if you're taking pictures for content creation or some other type of professional setting, you might need a different aspect ratio, for example, the aspect ratio for a picture on Twitter is typically 9x16 and the aspect ratio for an Instagram picture is usually optimized for square pictures. Let me show you how to change the aspect ratio, so you don't have to crop it later, using editing tools so right here we see the 3x4, and you're going to want to hit that, and here you can change the ratio to whichever one works best for you. This is a really nice feature, because a lot of the time, depending on what you're using the photo for you, might have to use an editing tool to crop it to fit the ratio of wherever you're putting the photo.
But with this you can take the original photo using the aspect ratio you want, so you don't have to worry about that later now, one really cool feature that I'm really glad this phone has is an ultra-wide camera, and I'm going to show you how to access it, so we're in the normal photo mode now and to get that wide angle. All you need to do is press this button right here. I really like the ultra-wide feature personally, a lot of the times. The more entry level in mid-range phones have a lot of distortion on their ultra-wide cameras, but this phone really doesn't. So if you have something like a group photo, or you're taking a picture of a larger object, and you need to see the whole thing whatever the case may be, the ultrawide camera is great for that, and it's even better when you can access it with just the click of a button.
Now there might be a situation where you're taking a picture at a different angle, and it's a little awkward for your finger to reach the shutter button right here. I'm going to show you how to move the positioning of the shutter button, so it's easier so go to settings, go down to shooting methods and activate the floating shutter button. This feature adds a second shutter button that you're able to put anywhere on the screen. For example, if you're taking a picture like this, you can have the shutter button right here. So it's just as easy to take the picture now by default, when you press a volume, key it'll usually take a photo, but I'm going to show you how to change this.
If you go into settings, hit shooting methods and hit the volume key option, you can actually make the volume key zoom. This is a really nice feature, because, personally, I really don't like having to pinch the screen to zoom, especially when it's a really specific detailed picture, or you're trying to keep your hand, really steady. I think it's a lot easier to press the volume buttons than it is to pinch the screen in those situations and, of course, if you find you like it, the way it is, you can always switch it back now. The final camera check I'm going to show in this video is how to change the default settings. Now you might find some specific settings on your camera that you really like, but don't want to go through the trouble of changing it back every time in your settings, menu there's a section that says settings to keep you're going to want to select this, and you're going to be able to change lots of different things from the filter to the camera mode and even the selfie angle.
I think this is really nice, because some of these settings do take a little of time and effort to adjust and being able to start off with them. If you know you're going to use them, most of the time is really convenient, but I hope you guys enjoyed this video on camera tips and tricks for the Samsung Galaxy a12 again, if you want to know more about pricing, availability or just some general info about the device itself be sure to check the link in the description. This link is going to take you right to the phone on Samsung's website, where a lot of the time they have some great trade-in deals that you might not be able to find anywhere else. But if you guys enjoyed the video be sure to leave a thumbs up and subscribe, and I will see you in the next one.
Source : Kevin Breeze


![Redmi Note 9 Pro 5G - Full walkthrough review [Xiaomify]](https://img.youtube.com/vi/SDT78h-Y57Q/maxresdefault.jpg )


