Samsung Galaxy A10e Fix & Replace Cracked Screen | How to fix Galaxy A10e screen | NexTutorial By NexTutorial
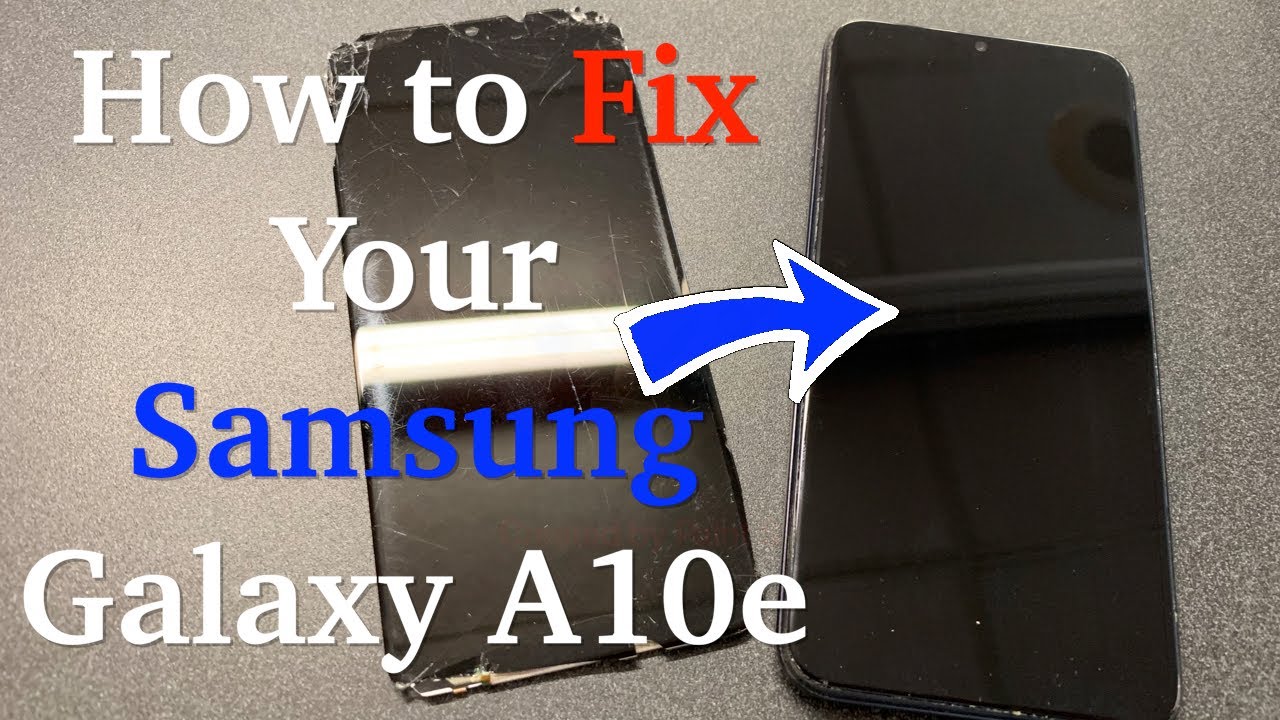
Hello guys welcome to my channel next tutorial. My name is Khalil, and today we are doing a replacement of a cracked screen on the Samsung Galaxy 810 II. This tutorial would work on similar models from any other carriers. The tools that you see lying around those are the ones we're going to be using to do the replacement on this phone of the screen. So, first, what you'll need to do? You want to take out the sin tray, so we can take out the back cover of this device. You can use your nails to take out the back cover, or you can just use a flat screwdriver to kind of peel it off, but you want to do it carefully, so you won't mess up anything of the frame or on the phone itself.
Next, what we're going to be doing we're going to have to take the top cover and total of four screws, so we can be able to disconnect the three ribbon cables and one of them is for the battery, because when you want to do the replacement on the screen, you want to make sure the battery is disconnected. So you won't mess up anything or fry the new LCD screen, those are the three ribbon cables were going to be disconnecting then I will show you next what we're going to be done. The next stop we're going to be using this blade to carefully lift the screen from the sides and can I remove the old adhesive that is glue or glue in the screen with the frame you can use, also a heat gun. If it's given you a hard time, you want to also keep it on low, so you won't mess up or melt anything as the plastic frame or fry anything on the motherboard. I'll get the phone overheated, and you want too carefully.
You want to keep it as far as possible from the screen, and that will help out also, so we can remove the old screen. If the screen that you're replacing is cracks, you don't want to give it much of a thought to kind of have to remove it perfectly. You can kind of if some like glass still sticking on the frame, that's okay, because that screen is going to be replaced anyway. So as long as you kind of clean the glass that stays on the frame, so you can put that new screen back in a place and glass chips won't mess up the new screen. So this is the ribbon.
Cable, we're gonna, removing, and it looks like is gonna- be a little harder to get off. So we have to take the bottom piece off in order to loosen up and remove that ribbon. Cable out now it's going to be an easier way to remove that ribbon. Cable. As you see, it came off much easier, then, when that cover was in place, so you see that small glass chips are glued on the frame.
We're going to have to clean that, so we can put the Inge CIV and put the new screen back in place. This is the N. He said we're going to be using be 7000, and this is a clear some people use the black which is gonna, be using the clear you don't want to put too much around the front camera because you don't want to cover that with in. He said, if you do it by accidentally, you're going to have to reopen the phone and kind of like do clean it and stuff, then do it all over but say you want to do it right in the first place, and you want to put a little not as much just to basically hold the screen back in place. Easier way is just to lay the screen and kind of slide that ribbon cable in.
But you want to be careful because you don't want some of that adhesive to get on the ribbon cables, so kind of put it in place. Push the screen in and just connect all the wiring, and you kind of want to press all around to make sure that it holds better. So just keep pressing all around, so we'll take a good grip and close the screen in place. Let's go ahead and put the bottom cover back in place and screw it back in. While the screen Anna and the glue, then he said, kinda holds better and Anna gets dry.
While we're doing this once we're putting everything back in place, we can go ahead and put the back cover snap it back on now the extra he said. If it has extra on the surrounding on the phone you can just come out once it dries kind of will come off easy to come off now. You can go ahead and peel this off and give them. He said anywhere from 10 to 15 minutes until it dries out, then we're going to be checking making sure the phone comes on cool, perfect. The phones came on.
Everything is done. We are finally at the end of our video for today. If you found this video helpful to you, please make to hit the like subscribe to my channel for more. Thank you guys for watching. Also don't forget to share this video with friends and family in case if they need this repair done on their equipment.
Thank you guys. I will see you next time.
Source : NexTutorial
Phones In This Article

Related Articles


Comments are disabled
Latest Articles


