Samsung A20 Caught on FIRE! Can I Restore It? By Hugh Jeffreys
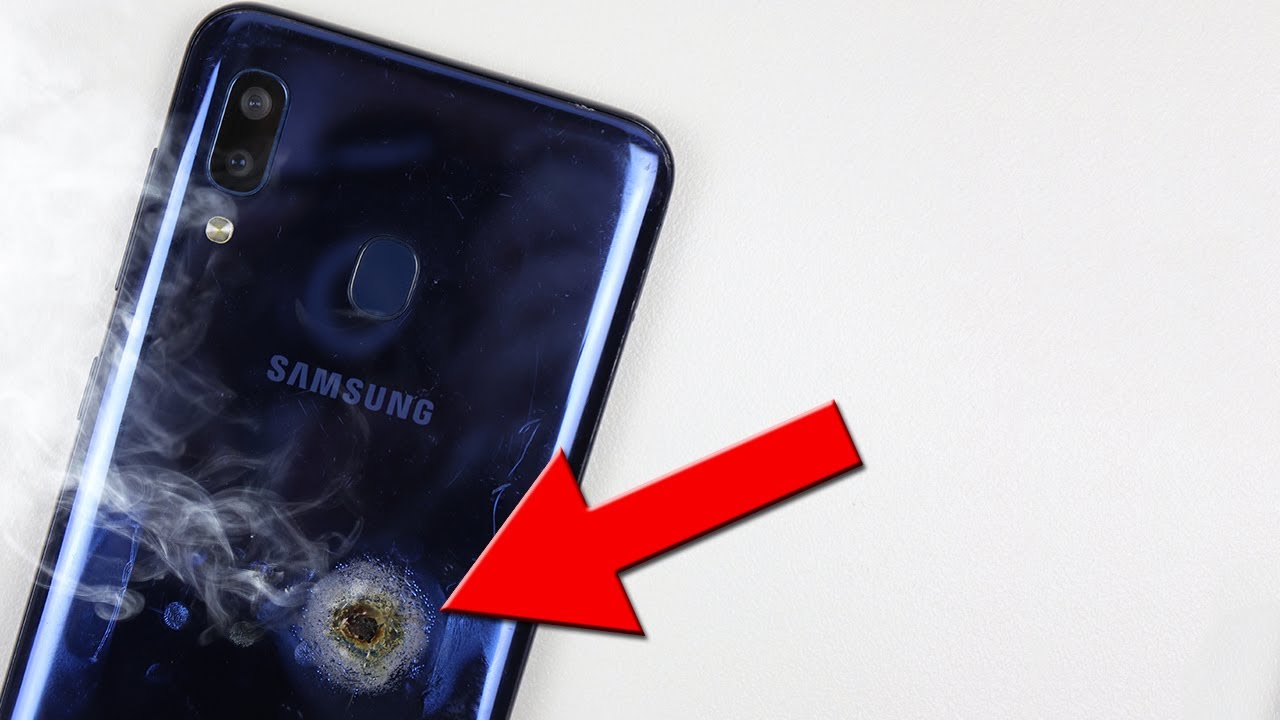
Hi guys welcome back to the huge Jefferies video in this video. I'm going to be attempting to restore this Samsung Galaxy a20 that is called fire in its current state. The screen is smashed, the phone is bent, and the back is melted warped and has a hole in it which tells us the battery has caught fire. Could this phone be the note 7 all over again? Well, let's find out, I received this a20 in a phone lot of 16 phones that I paid 129 dollars for so this phone only ended up costing me around eight dollars, given its current condition. I haven't even tested this phone to see if it works. So to begin it's time to see if we can get this phone to show any kinds of life I'll need to remove the back panel, and that was quite simple and didn't require any heat as half of it had already been lifted.
When the phone had caught fire, I could remove the fingerprint sensor and start undoing all the screws holding this plastic mid-frame into place with the screws removed I can ensure. I have removed the sim card tray and then simply unclip this frame with the frame removed. We can take a closer look at the innards of this galaxy a20. It's clear at this point. The battery has suffered some kind of damage I'll need to test the phone with a new battery to see if the electronics are damaged.
As the power button is located on the mid-frame, I'll see what pins on that flex cable correspond to the power button, using a multimeter in diode mode. After locating the correct pins. This will allow us to power on the phone. Without the button installed, connecting up a battery and connecting the power button pins using something metal, I was able to power on the phone and feel a vibration. The phone is also charging, however.
The display installed is dead, so we'll need to replace that not only to test the phone further, but to be able to restore it into a functional condition. I'll start by removing the interconnect cables, and you can see one of those has been melted due to the battery combusting. I have a strong belief that this phone has suffered a huge impact which has not only smashed the display and bent the phone, but also punctured the battery, causing it to go up in flames being a low tier Samsung. The back is made of plastic, which may have allowed something to more easily puncture the battery. However, while I don't know exactly what happened to the phone, I would say this was not the fault of a dodgy battery from Samsung, but rather the result of physical damage.
Moving on it's time to replace the display starting off I'll need to remove the motherboard and various other small components such as the vibration, motor and earpiece. Getting a look at that earpiece, you can see, there's not a lot of dust in here, which leads me to believe that this phone hasn't had a lot of use, moving down to the lower half of the phone I'll need to remove one antenna and the charging board assembly both of these are glued into place. So you need to be careful when removing them not to bend them too much, as you could damage the board itself with the major components of the phone removed we can bring across our new display panel. As you can see, the LCD is already attached to the frame. However, it is missing a couple of the grommets and other little pieces that will need to be transferred across from our old frame assembly.
These are quite small, and you will need a pair of tweezers to transfer these across and get them lined up into their correct positions. With everything ready to go, I can reinstall the charging port assembly and the antenna and correctly route all the little antenna wires throughout the frame reinstalling the earpiece. I can then put the vibration motor back into position before removing the protective films. Taking a closer look at the motherboard. You can see it looks, complete and hasn't been damaged by the battery, so positioning it back into place.
I can reinstall the one screw before connecting up the antenna cables and the front-facing camera it's now time to get that new battery installed. So I'm going to apply some fresh strips of adhesive to secure it in place, a replacement battery claims to be a Samsung original one, although I can't confirm that and Samsung themselves wouldn't sell me a battery, so I have no choice but to use this one installing some new interconnect cables. I can then connect up the new battery and short out the two pins for the power button, which should turn on the phone. After feeling the vibration, I flipped the phone over to see the Samsung boot screen and a short time later I was greeted with the lock screen and could enter the phone, and luckily it had no password opening up the settings application in the about section. We can confirm this is a 32 gigabyte, Samsung a20, on a closer inspection, this phone looks as though it's never really been used.
There are no accounts. The phone prompts in a notification that it hasn't finished setup, and it's only ever made four phone calls based on the date creation of system files. This phone was set up on the 14th of Feb at 1747 and was last used at around 18 30. The same day, so this phone was destroyed within an hour of being set up very strange, but now that it's working we can clip back on the mid-frame and reinstall all the screws securing it into place. I can reinstall the fingerprint reader and get our new back panel, which I can remove the protective film and install some adhesive for the fingerprint sensor, as that wasn't included on the back panel.
I'll also need to transfer across the lenses for the camera and the flash installing the lenses back into our new panel. It's time to get it reinstalled on the phone pressing it down into place. We can then remove the protective films on both the back and front of the phone, and we're done so. This is it. We have taken a melted, smashed and bent Samsung Galaxy a20 and restored it back into working condition.
The total repairs costing 120 Australian dollars. While this is only an entry-level Samsung, it's awesome to see such a damaged phone back in a working state. As for the battery, I was curious whether the puncture had gone all the way through, so I removed it from the old frame to see. I found that the impact had not made it's way through to the other side, and on that note this has been a huge Jeffries video if you like what you saw hit that subscribe button and consider checking out the phone restoration playlist for more videos. Just like this one and if you're looking for some helpful tips or what tools I used to repair devices be sure to check out my website, link for which is down in the description.
That's all for this video, and I'll catch. You guys next time.
Source : Hugh Jeffreys
Phones In This Article


Related Articles


Comments are disabled
Latest Articles


