Pixel 3a XL Display Replacement! By iFixit
There's no reason to live with a broken pixel, 3a XL screen the process to replace your own screen may be daunting to you if you've never repaired a phone but trust us, it's pretty easy and will only take you about 15 to 30 minutes for this repair, you'll need an eye-opener, a suction cup, a set of fixity opening, picks tweezers, a spider, a t3 torn screwdriver, and your replacement screen to begin this repair. We first need to remove the display by cutting through the adhesive holding it in place for reference. You can see the thin strips of adhesive lining the sides of the display and thicker strips along the top and bottom edges in the next steps, we'll be inserting an opening pick underneath the display to begin separating it from the body of the phone. The pixel 3axl has two seams one for the display and one for the mid-frame, make sure you're. Inserting your pick into the display scene place the suction cup along the right hand, side of the screen just underneath the volume button, while pulling up on the suction cup, strongly to create a small gap, insert the edge of an opening pick at a slight downward angle between the screen and the plastic body of the phone watch. Your angles, inserting the pick horizontally can separate the glass from the OLED panel.
Our screen was already cracked, but follow these instructions closely or yours will end up like this too. If you feel your pick hitting anything, don't go any further, you may be hitting the OLED display, and we don't want to damage that once you've inserted your pick slide it up and down the side of the phone to cut the adhesive, keep in mind during this whole process. We don't want to insert the opening pick between the display and the glass to be safe. Don't insert your opening pick more than a few millimeters into the phone on any edge if you encounter any strong resistance heat up your eye-opener following its directions and place it on the phone for a few minutes to heat up and soften the adhesive, hang on to that eye, opener if you've started using it, the adhesive along the top and bottom edges is thicker and stronger than on the sides. Heat up the eye-opener now and place it along the top edge of the phone once the top edge is nice and hot gently slide.
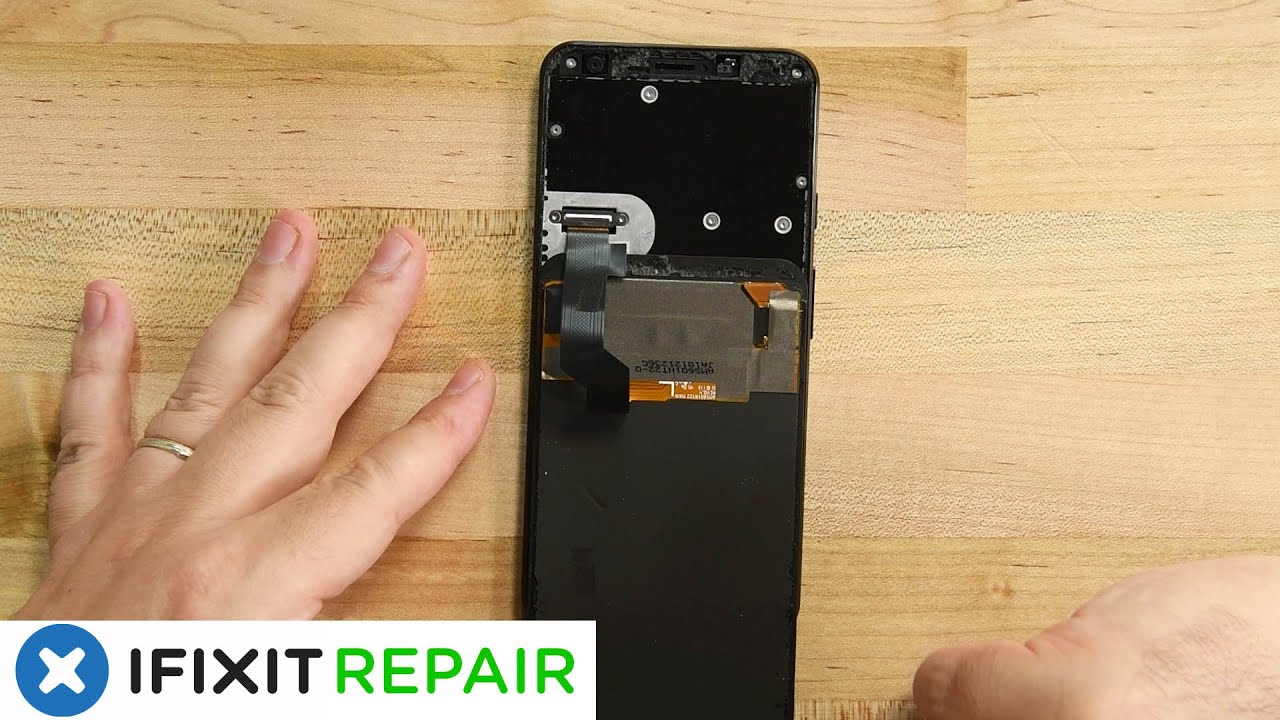
The pick along the top edge take extra precautions while sliding the pick here. Both the camera and proximity sensor are housed in this region, and we don't want to damage them when you safely made it to the opposite corner slide the pic carefully down the left-hand side of the phone. The bottom adhesive is just as tough as the top, so reheat that eye-opener and start warming up the bottom strip of adhesive carefully slide the pick around the lower left edge and across the bottom, remembering to not insert the pick more than a few millimeters deep once you've made it all the way around the phone. With your pick, the screen should be fully separated, but don't try and remove it just yet. There's a cable attached to the back of the display, which is connected to the motherboard, and we need to disconnect that first lift the screen by its top edge and flip it 180 degrees.
So the front of the display is laying on the open phone, remove the tape covering the display connector bracket and then remove the two t3 torn screws holding the bracket on remove the bracket and then use your spider to disconnect the cable. Your display is free use, some tweezers or your spider to remove the large chunks of adhesive from the back of the panel and the mid-frame then use some isopropyl alcohol to spotless where the old adhesive was once it's clean reapply. Your new adhesive lay the display face down on the phone so that its cable connector is pointed towards the bottom of the phone, then lift that cable up and press it into its socket to reconnect it replace the cable bracket and then secure it with the two screws we removed earlier before you re-adhere your display make sure everything is working as it should nothing ruin your repair like finding out something doesn't work after you've glued it shut, remove any adhesive backing and then flip the display over and press it into place after you're satisfied with the seal put the phone under a couple of heavy books for 30 minutes or so to help the adhesive bond. You.
Source : iFixit
Phones In This Article
Related Articles


Comments are disabled
Latest Articles


