Note 20 Ultra - 25 Advanced Camera Features you MUST learn By Tech Guy Charlie
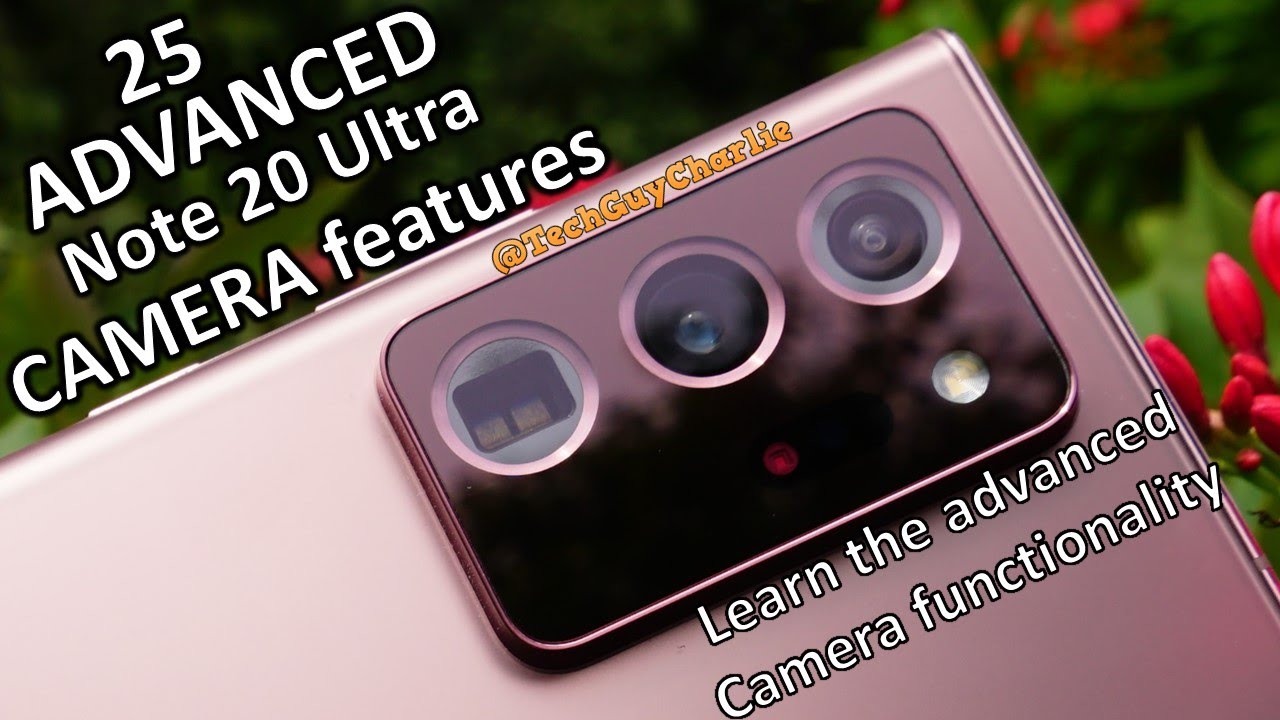
Hey, what's going on YouTube, welcome back in this video, I'm going to walk you through 25, advanced camera features of the Galaxy Note 20 ultra, and this is a part of a two-part series video. So if you haven't checked out my first video, please do so by clicking over here in that video. I have covered the basics of the note 20 ultra camerae, and it goes without saying if you are new here and if you enjoy watching my content, do make sure to subscribe to me on YouTube and then follow me on my social media accounts. I'll, put all the links in the video description. Also in the video description, you will find the time code for this video, alright, so without wasting any time. Let us get started all right so because this is an advanced feature, video we are going to start off with the pro video mode.
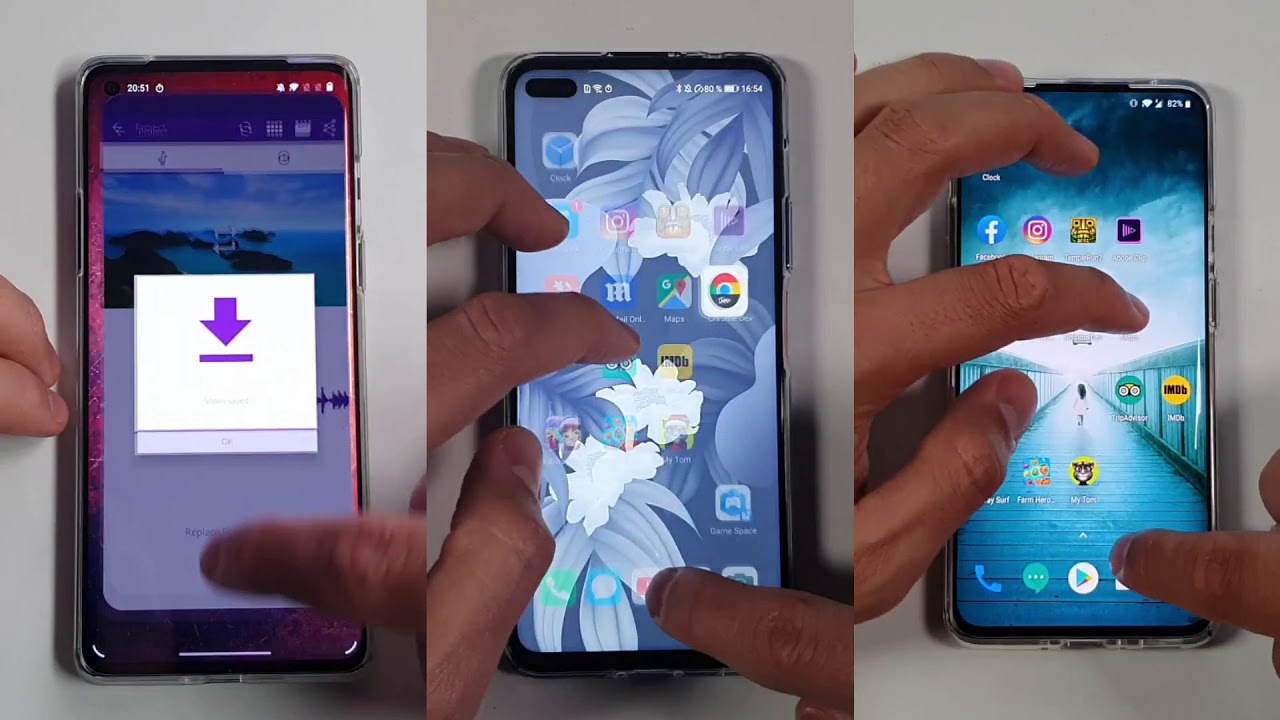
So pro video is where you have full control over the camera. So, while you are actually recording the video, you can change the ISO shutter speed, and you can also change the phone's autofocus manually, and I think videographers are going to love this feature. Another major upgrade I have seen on the note 20 ultras camera is the ability to use external microphones so inside the pro video mode. There is a little microphone icon over here tap on this. So right now I have connected my Bluetooth headphone.
If I tap on the Bluetooth icon, I can actually use the microphone which is on my Bluetooth, headset, and this feature does actually work. If I tap on the mic, you'll see, the audio meter will change and if I select the internal mic and do it now, so this feature will come in very handy. If someone is recording me from a distance, I don't have to scream in order for the phone to capture the sound, I can just wear my Bluetooth headset and speak normally, and you can also use a high quality USB microphone. Let me show you how so check this out. I've connected my blue snowball, condenser microphone to the phone using an USB type c to USB type, an adapter, and now I can actually select the USB option.
So now the phone will record audio that is coming from the snowball, condenser microphone and holy holy. What a massive difference this makes. So this is the sound that is coming in from the internal microphone of the phone, and now I'm going to stop and let's go back to mic. Gonna, select, USB and start recording, and this is the audio that is coming in from the blue snowball condenser microphone. You can probably tell it's a much, much higher quality audio recording.
So this is awesome. I can now use an external microphone with my Galaxy Note: 20 ultra in addition to using external microphones in the pro video mode itself, you can change the way the phone captures sound while you are recording a video and this is possible through the internal microphones. So right now I'm recording a video in the pro video mode and if I tap on the microphone icon again, you get three options: omnidirectional front and rear, and by default the omnidirectional mic is selected capture sound equally from all directions. You can also select front best for capturing sounds coming towards the front of the phone, and you can also select rear best for capturing sounds coming towards the back of the phone. So I'm guessing when you select the rear option.
This little microphone that is inside over here will be used. So that's how you can change the way the phone captures sound in the pro video mode, and you can also change the external microphone's sensitivity by using this slider pretty awesome stuff. The pro video mode also lets you shoot in the cinematic 21 into 9 aspect ratios. So what we are going to do here is press on this and select 21 is to 9, and you can see. We have that ultra-wide aspect- ratio- plus you can also record videos at 24 fps.
For that true cinematic experience. The pro video mode also has a dedicated resolution section in the setting. So let's go to setting and go to pro video size now over here you will be able to select the 120 fps option, which is not available in the regular camera setting. So no 120 fps recording option available it's only available in the pro video mode when you are recording a video in the normal video mode. The way you focus on objects is through touch focus.
So if I want this object to be in focus, I will just touch and that object will now be in focus, and you can see a little AF, lock icon. Even if I move the surrounding camera can see, the focus is not readjusting. So that's a useful feature in case the autofocus is getting confused. Now, what happens if I long press, so I'm going to long press over here, you can see a slightly different icon over here. It says: AF, slash eye, so that is the autofocus and the auto exposure lock.
And if I move the camera down over here, you can see the camera is not readjusting its exposure. Not it is readjusting the autofocus, so the autofocus and the auto exposure are locked, and the camera is tuned to that dark background and to remove the focus lock. You press on this icon and now everything is back to normal. Now in the pro video mode, you have a slightly more advanced autofocus and the auto exposure locks. So first thing you have to do is make sure the ISO and the shutter speed is set to auto and the autofocus is set to auto.
So now we are going to start recording and now, if I long press on the screen, you guys will see we get two circles and I can just take these out. So this is the auto exposure lock, and this is the autofocus lock. I can have the focus locked over here, and I can have the auto exposure over here on a dark background. So you can see the exposure on the video has gone up. So now I'm going to bring this auto exposure to a bright surface and you guys can see the exposure does readjust, and I can drag and drop the focus over here and the phone will now focus on this object.
Meanwhile, our exposure is locked onto the bright surface and I can bring that to a darker background for a brighter image and to disengage. You press the AF eye icon here, and everything will go back to normal, so that was focus lock. But what, if you want to keep a moving object in focus? Well, for that we can go to settings and turn on tracking autofocus by the way guys if tracking autofocus is disabled, most likely. You have selected the 8k video option, or you have selected the 60 fps option here. So when you select the 60 fps option or the 8k video recording, then the tracking autofocus gets disabled.
Tracking autofocus is turned on now, just tap on the object which you want the phone to keep in focus. So through tracking autofocus. You can keep moving objects in focus, and it works reasonably well, as you can see from this video and pretty much, the same concept applies when you are taking still photographs, you touch on an object to focus, we have tracking autofocus turned on and if you long press you get the auto exposure and the autofocus lock. So that's very useful in case your phone's autofocus system is getting confused while taking still photographs. Now, if we head over to the pro mode, we again have a separate autofocus and auto exposure, lock.
So first off I'll put everything on auto, including the ISO. So now, if I tap and hold, we get two different circles here is our auto exposure lock, and here is our autofocus lock, and the concept is the same, as I explained to you in the pro video mode now. One thing I really like about this is that if you put the camera in manual focus mode, you get these green outlines. You can probably see that that green outline when I try to focus, so this will kind of let you know which part of the photograph is in focus. You can see the green highlight and if I try and change the focus you guys will see the green highlight, so now the phone is telling me this part of the image is in focus.
So that's a really useful thing and in the pro mode you can change the ISO. The maximum ISO is 3200 and then the maximum shutter speed is 30 seconds. A lot of you guys want to know that. Then you have manual focus. Then you can change the white balance, and then you have some adjustments.
Tint contrast, saturation highlight and shadow, so that is the pro mode for photos. On the Galaxy Note, 20 ultra the note 20 ultra has a HDR, 10 plus display, and you can actually record videos in HDR, 10 plus, so that the colors and the contrast pop on the display. So for that, let's go to video mode first, and then we will go to settings, and then we will go to advanced, recording option and turn on HD, r10 plus video from here optimize, the contrast and color of each scene by recording rear camera videos in HDR, 10 plus. So now let me show you a comparison between HDR, 10 plus and a normal video. So this is a normal video.
You can probably tell the contrast and stuff- and this is a HD r10 plus video. I don't think you can properly make it out on camera, but the hdr10 plus video does have better contrast compared to this video that has been shot without HDR 10 plus. Now there is a catch if you do play back, HDR, 10, plus videos on a non-hdr10 plus capable display. This is how they will look like, as you can see, the colors are completely washed out and the video looks pale in comparison to a display that does support hdr10 plus- and this is the same video playing back on my HDR 10 plus capable lg TV and, as you can see, the colors and the contrast just pops. So in my opinion, if you turn on the HDR 10 plus option, the videos do look better, but you do need a HDR, 10 plus capable display to actually view these videos properly.
So please keep that in mind before you enable this feature. Now, if you want to share a HDR, 10 plus video, it's a little of a hassle because the receiving device or the app might not be capable of playing back the video in HDR 10 plus, for example, if I try and share this HDR 10 plus video on WhatsApp, you guys can see the colors are completely washed out, and even the contrast looks bad for that. We have a hdr10 plus converter in the gallery, so tap on these three dots go to settings scroll all the way down and make sure convert, hdr10 plus videos, while sharing is turned on so now, when you share a HDR, 10 plus video, the phone will convert the HDR 10 plus video into SDR, so that it's playable on other devices without the loss of colors and contrast. So now, when I share the converted, video on WhatsApp, the contrast and colors are no longer washed out. So that's why the converter option is important.
If you guys have recorded a lot of 4k videos, you might be aware that 4k videos do take up a lot of space on your phone to conserve some space. You can turn on high efficiency, video so for that go to camera settings then tap on advanced recording options and then turn on high efficiency, video record in HEC format. To save space. You may not be able to play HEC videos on other devices or share them online. I don't think that's a problem anymore.
You can upload HEC videos onto Instagram Facebook and some other websites and a fairly modern PC will be able to play. HEC video and the difference in video size is actually quite substantial. So I have recorded these two 4k videos. Both are one minute. This one has been shot without the high efficiency video option turned on, and the size is about 277 megabytes and the video that has been recorded with the high efficiency video option turned on this.
One is 160 megabytes, so the difference in size is actually quite substantial, and this adds up if you are recording a five or six minute, 4k video and, as you can see my five-year-old, lg smart TV is able to play back the HEC video file without any problem. It's loaded onto that hard drive so enabling high efficiency, video codec does cut down on the video size without actually degrading the video quality. Just like the high efficiency video, you also have a very similar option for still photographs. In case you want to save some space, but first, let's take a picture. Now, let's go to settings, and then we will go to save options and turn on HEIF pictures.
Save pictures as high efficiency images to save space. Some sharing sites might not support this format, but I was just checking WhatsApp, Facebook and Instagram do support HEIF pictures and, let's take another photo now that we have the HEIF option enabled, so this photo was taken with the DIF option on, and this is only 529 kilobytes in size. This picture has been taken without the DIF format and this one is 1.52 megabytes in size. So there is a substantial difference in size between these two photographs, but the quality is exactly the same. So no difference when it comes to photo quality to view photos that are short with the new high efficiency image format, you will need to download and install this DIF image extension from Microsoft's website.
I'll put this link in the video description, and after installing this, you will be able to view photos that are shot with the new high efficiency image format and same goes for videos. You will need to download this HEC video extensions from device manufacturer. After installing this, you will be able to play back videos short with the new high efficiency video and just like the hdr10 plus to SDR converter. The gallery also has HEIF image converter so in case a particular app or a website does not support HEIF images. You can convert them while sharing from the gallery, but I don't think there should be a problem, because this is a DIF image and I can easily share this over WhatsApp, Instagram and even Facebook.
Without converting the image. There is an awesome camera mode on the note 20 ultra, and it is called single take mode. So what single take mode does is that it will record a video- and you can change the video length from over here. So it will record a video, and then it will automatically take screenshots from the video. It will automatically apply a filter.
It will create boomerang video fast-forward video, and it will automatically crop the photos. So let me show you a single take shot, so this is a single take shot. This is a still photo. The five-second video is here: this is a normal speed, 5. Second, video and here's a picture with a filter applied fast-forward, one second, video and then finally, a boomerang video and the phone does this by itself.
You just have to press the camera shutter button, but you know what it works better if you have a face in the video so that the phone has something to focus on. So let's try this I'm really not into taking selfies but yeah. Let's try this. So, let's see what the phone thinks of this, so this is a still photo. This is a five-second video, normal speed.
This is a fast-forward, video again a photo with a filter applied different angle photo. This is a four-second boomerang video and the final photo has the background. Blurred and the phone has applied all of these effects by itself, and you can change the background blur effect. If you want. So that's how single take mode works.
Pretty awesome little feature to show you guys this next feature. I'm going to have to take the s pen out because I'm going to show you an r, doodle or argumented reality doodle. So when you are in the video mode press on this icon to turn on a feature called augmented reality doodle, so it says here move the camera around a bit to start. So let's do this now it is ready. So at the bottom here we have a couple of pen selection.
You can see quite a lot of them. Are there this is the highlighter. So what does AR doodle actually do? Well, as the name suggests, you can start recording a video and then maybe draw something on the screen, and this will be actually recorded in the video by the way the video length is limited to one minute. So do keep that in mind. I can highlight something over here and the highlight will actually stick over there instead of moving.
So even if my, even if I pan the camera here and if we go back, you can see the highlight actually sticks. I know some artists will absolutely love the AR doodle function. So if we play the video back, you can see the drawing that I was doing and yes, it also works for the front facing camera. I can draw cat ears, maybe now that looks like horns than cat ears, but yeah you get the concept of this. You can draw something while actually recording a video and all the live drawings that you're doing will be saved in the video itself.
Let's go to the AR zone and let me show you AR emoji stickers, so we'll go to more and AR zone now before you can use the AR emoji stickers make sure you have created your very own AR emoji in the AR emoji studio. So first do that, and now we will go to AR emoji stickers, and that is not my AR emoji. I think my friend created something, but anyway I'll explain what this stuff so her emoji stickers is a lot like Bitmoji. These are some animated gives that you can share on a messaging application, so just press on the share button and from over here I can share this with whomever. I want let's tap on WhatsApp, and I'm gonna share this with myself on my other phone and as you can see, I have received that animated GIF over here, so you can actually create an AR emoji.
That looks exactly like you, so this will allow you to send your animated self to your friend and if you happen to use the Samsung keyboard, it's even easier to share AR emoji stickers, so press on this icon, and then you can share your AR emoji stickers right from over. Here. You don't even need to open up the AR emoji app, and you have quite a bit of AR emoji stickers here for different occasions, and you can also create your very own custom sticker pack tap on that and from over here you can choose a background. You can pick one from the gallery, so this will allow you to change, face expressions yeah, you get the idea, you can also add text and then, when you are done, you can save it and share it with your friend and bam. We have received the same AR emoji on the other phone.
Now the other phone does not have to be a Samsung, it can be any phone, even an iPhone will be able to receive the AR emojis and AR emoji studio is where you can create your very own, your emoji. So that's me and I can give myself a makeover. I can change my clothes. I can change my face. Expressions and even change my face so AR emoji studio is awesome.
This opens up a lot of possibilities. You can design your very own clothes. I'm not gonna show how to do that, because then this video will be too long. So this is actually quite similar to Bitmoji. I like it and once you are done press on save and that will save your new AR emoji in on the phone.
You might have noticed when you are recording a video in the video mode when you try and zoom in the phone kind of shows a microphone icon, and you can see a yellow highlight. So this is the zoom in microphone. The concept behind zoom in microphone is that the phone kind of tries to amplify the sound that is coming from a distance. So that you will be able to hear the sounds that are coming from the distance a little more clearly so to demonstrate the zoom in mic effect. I've got my Bluetooth speaker sitting over there, and I'm going to play a YouTube video at low volume.
I'm going to play a video from Dave's Eve block channel and then what I'm going to do is start recording on the phone, and then we will zoom in on the phone to check out the zoom in microphone effect. You can probably hear I've kept the volume low so to simulate as if the sound was coming from far, and I'm not going to change the volume, let's start recording basically anyway. It's obviously designed for, like kind of general use, I believe, like I'd, be surprised if uh the inputs are, like you know, zero multiple inputs like zero to one volt and things like that, because you can of course uh select channel up here, and it's got the know. I don't know what the data thing is, but uh and yeah. Actually it must have there.
It is memory, you're ready, full. It's obviously got some memory, and you can print it out, so it looks like it may not print in real time. Furthermore, it may that's why. Hence, maybe why it's called a hybrid recorder like, so I hope that gives you an idea of how the zoom in mic works. The sound that is coming in from a distance does get amplified so that pretty much brings us to the end of this video.
I hope you guys have enjoyed this video as much as I enjoyed recording it. So thank you for watching. Do stay tuned for more videos. On the Galaxy Note 20 ultra, and I will see you guys in the next video.
Source : Tech Guy Charlie
Phones In This Article

Related Articles


Comments are disabled
Latest Articles


