Lenovo Z6 Pro Teardown Disassembly Repair Guide. Better than I thought. By PBKreviews
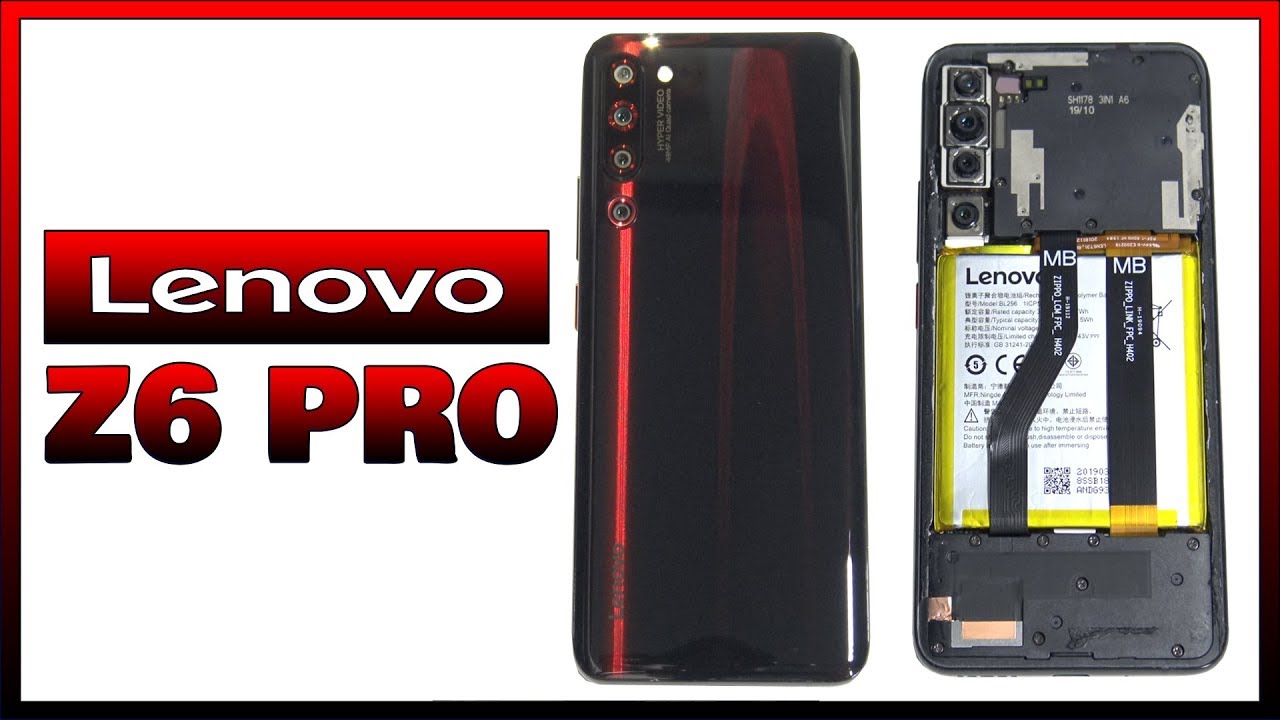
Alright, let's go ahead and pop out the SIM tray; okay, so take the back off. You have a lot of strong adhesive, so you're just going to have to heat up the back and use your plastic pry tool to work. Your way around the back of the phone. We're now ready to take the back off on the top portion of the phone. There are seven Phillips screws we need to remove now, once those screws are removed, we're gonna, lift and remove the plastic cover. We're gonna first disconnect the battery cable by popping it up.
Now, let's go ahead and disconnect the rest of the cables. You have one cable over here for the bottom camera. Let's move these cables out of the way. We also have two wire cables over here in the corner: go ahead and disconnect those let's go ahead and remove this camera on the bottom. Now, let's peel off this tape, now we have two more cables to disconnect for the sensors, as well as one for the front-facing camera.
There's a single Phillips screw left holding on the main board. Let's go ahead and remove that now we can go ahead and remove the main board. You have two thermal pads over here underneath the board. Removing the thermal pads reveals a vapor chamber over here sitting on top of a heat pipe underneath you also have a circular mil dot area over here. The center is hollow nickel straight through, so I'm, assuming the thermal power transfer, some heat to where the aluminum is over here and transfers it throughout the frame.
Now, once you remove the shield on the front part of the board, here's the chips underneath it and there are two chips that are covered with a thermal pad I'll go ahead and remove that right. Now, here's a look at them with the thermal pads removed. Now the top layer cameras are connected from the backside of the board, just go ahead and disconnect them. The bottom camera has the image stabilization. Now here's the backside of the main board- and here it is with the shield's removed on the bottom.
There are eight more Phillips screws. We need to remove, focusing us remove the cover over the speaker assembly. Alright, let's go ahead and disconnect this cable and get it out of the way. You also have this cube over here connected right here. Just connect that you, so this cable over here is your screen.
Cable. It connects to the other cable, which redirects all the way up to the main board and over here you have your in display fingerprint reader just go ahead and disconnect that now, in order to remove the fingerprint reader you're going to have to pry it off it's sitting in a circular spot right above the vibrator motor now I don't want to pry it off to the risk damaging it, but it is user replaceable. You have two more wire cables over here: go ahead and disconnect those we also have a single Phillips screw holding on the charger port board, we're going to ahead and remove that most that's the result. Let's go ahead and remove the charger port board. So here's the charger port board right here.
One good thing about this is the sim reader is right on the back of this, so both are replaceable, so I think ice. You ever damage your SIM slot or the pins inside or break as well as your charger port right here. It's going to be easy part to replace okay. So with all the latest models of Motorola and Lenovo phones, the battery is extremely difficult to replace almost to miss something Lenovo has implemented in the Motorola phones. We basically have two strong adhesive tapes underneath and prying it off as difficult you're.
Gonna need to apply some heat and use a plastic card, or something then to be able to work your way underneath it. It took me about 30 35 minutes to gently pry. The battery off silent damages here, the specs on the battery, also the power button and the volume button cables over here, and it's round through beneath where the mid-frame is in the screen. So if you want to replace that you're going to have to pry the screen off to be able to get access to removing the cable and same thing for the heat pipe that runs underneath over here. It goes in between the screen on the mid-frame, so I have to pry the screen off to be able to get access to that heat pipe if you're looking to replace the screen.
Here's a screen cable over here this slides through the mid-frame, and you're gonna, have to heat up the front of the display, and then I'm going to use your plastic pry tool to pry this screen off from the frame. Okay, now the fun part, let's go ahead and reassemble. The phone now go ahead and play some new adhesive and then go ahead and put your backplate back over flip it around power on the phone, and you're done hope you guys enjoyed the video and if you guys, want to see more videos like this go ahead and subscribe and click on the Bell notification icon, so you'll be notified when I upload, a new video I'll, see you guys in the next video.
Source : PBKreviews
Phones In This Article

Related Articles


![Mi Band 6 - Full Review - vs. Mi band 4 & 5 [Xiaomify]](https://img.youtube.com/vi/hNOqgFZgjJo/maxresdefault.jpg )
Comments are disabled
Latest Articles


