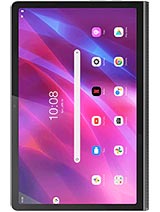
Lenovo Yoga Tab 3 10.1" Replacing Battery By Boogie Woogie
This is Lenovo yoga, Tab 3 10.1 inch and who will replace its battery. I will tell you the process, I already replace the battery, so I'm just telling you the process how it will be done. So first thing you have to open the screws from the back side. There are three screws here. First one will be here and the second and third will be these. There will be some sticker here.
You have to remove the sticker, and you will find two holes there. We have to remove both of the screws. Okay, removing these three screws. We have to open it from side. You can use any card or this type of thing or anything like that.
So these three things any of them. The best one I have used, is the card, the hardback card, just like the top card. So you have to open this like that disappear like that, slowly, gently and do not use the screwed screwdrivers or scissors or hard any hard thing. Just use any plastic thing like this, and you have to do on this side as well. This one is already open, so I'm, just telling you how you will do that and with the car from all sides when you, when you finish this one open it slowly.
So this will be this side. There's nothing on this side is just backlit, so everything is on this side, so you have to change the battery. You have to leave everything as it is only this side and this side of the battery both side. You have to put a screw. There are three screws on this side when he's here, second is here and third one will be under the cable, so you can find under the cable is another screw, so these two screws just holding the cable socket and that's that one screw that's holding the cable from the back that cable, which is coming from battery.
So there are three screws here, and similarly we'll find three screws. I will open here to show you how one two and three, so there are three screws open it. You will see that this small circuit you have to do and then the normally I already take it out. So this thing will be here. You have to look on it so, and you open it.
You have to remove this one and the next step. The most important thing is: most people don't know how to do this. We have to unlock this. Sometimes you have to do closing yeah, that's the can see. That is when it comes here.
It means it's unlocked. Now you can remove. You can remove the battery like that yeah I haven't opened it this side, so I'm just for the demonstration I've opened from one side you can, we can put it again make sure you put it on same since yeah Donna. No, you will put this thing here. Yeah, come here.
Similarly, you will look back on three screws here. Those three were already there. I haven't removed those so another thing other than this one, this one after you putting this. This is done completed for the battery I have another one, so I'm, just just just to demonstrate. I have a battery, and this thing sometimes you will get the battery only battery or the battery at the cover.
So when you remove this thing like that, you will find there are a small plastic lid on it, and you have to open a screw here and this black lid will be opened and that will be this side of the battery, so the other side will be cable just like in the picture. This is the cable side, and this is the side where you have just opened the lock, so there will be screw small screw here. You have to open that screw. You have to open that lid and then the battery will come out from the cover, so you can replace this battery where I will put the battery model and voltage and everything in the description. I will also put the model number of the tablet in the description.
Thank you very much.
Source : Boogie Woogie


