Lenovo Yoga 3 Pro Screen Replacement From Start to Finish. By Fix It Planet
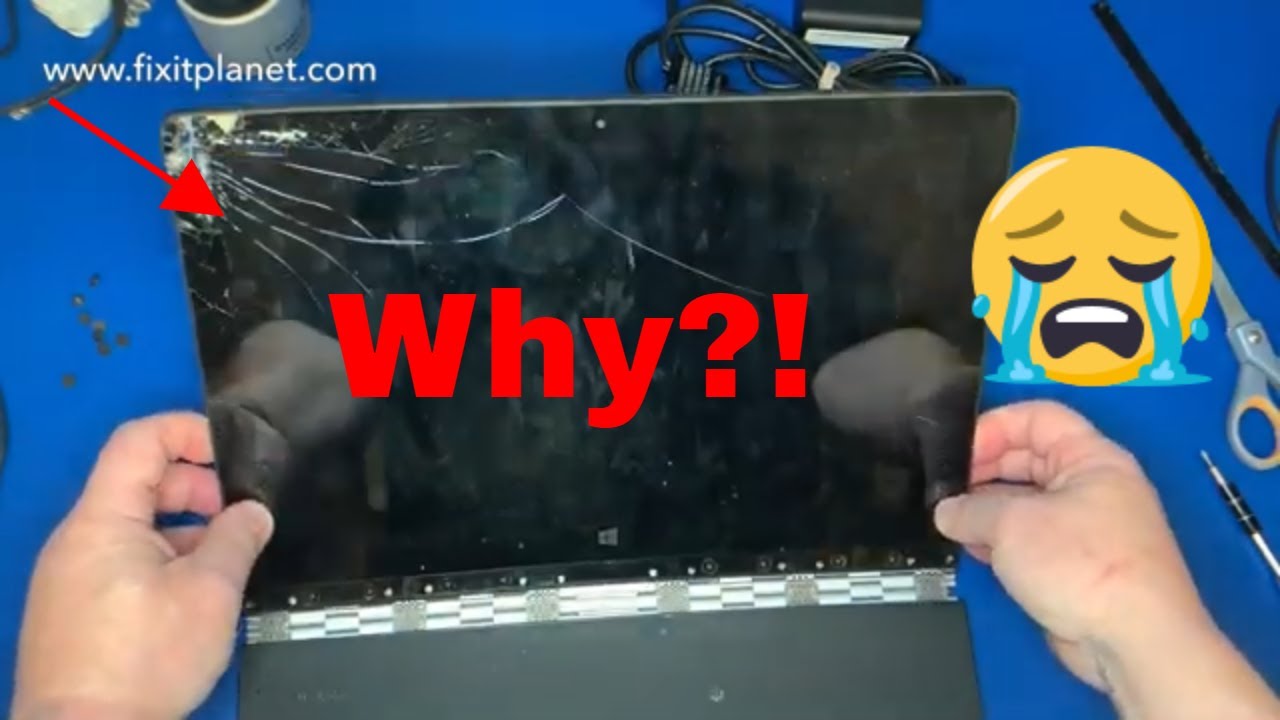
Hi this is John with fix-it planet. Today we're going to take a look at this Lenovo yoga, 3 Pro 1370. This is the 80h II, and it has a bad screen. It's been broken, but we're just going to go over replacing the screen is super easy. It's got like eight screws right along here, so you're going to pull this plastic cover off, and it's just stuck on with some adhesive and expose the screws. Now this kind of have a very thin, and I've got a wide flat head on them, but there are a Phillips, and I'll show you the screw.
Here you can see what I mean they're kind of flat big wide head on them. So there's four on the right side, four on the left side and then the display itself actually will slide up a little and then will come off, and we'll lay it down on the keyboard, so here's where it got damaged. So this is kind of messed up here, but you slide it forward a little, and then it will come loose from the back cover, and we'll be able to lower it down onto the keyboard. Now one thing you want to watch out for, though, and be careful, so we're not going to put it all the way on the keyboard, we're going to put something in between the keyboard and the display here. So this cable right here it does not have a lot of slack in it.
So what you don't want to do, is you don't want to rip that cable? So you don't want to pull on it too much and the connector is stuck down a little of tape here, sort of tape, it's plastic, but it's got a really strong adhesive on it. So you're going to have to pull that loose. Then you can disconnect it from that connector there and then there's a digitizer control board over here on the right. We need to disconnect all that and there's a cable here on the left. That's going to run around the corner and up the side and over to the top.
That's got your camera on it and there's also gonna, be another board right here now be careful with this one, because there's actually a little diode on the opposite side, they're stuck against the plastic. So you don't want to knock that diode off. It's like a little LED. So this piece here you just have to kind of be careful that you don't knock off any components on the opposite side, but the camera it's a little of heat on the backside will help soften it up because it does have adhesive holding it in place. You don't need a lot of heat, just kind of warm it up a little, and we're just going to pry it off with these tweezers.
Now that diode is here just on the right side of that board on the underside. So I don't know if I ever showed it up close, so I wanted to try and bring it up. So you don't knock it off and that will come off along with the camera, and then you can pull this display completely free, we'll bring in our new one here in just a little now on the bottom of the old screen. You'll also have a microphone, and you'll want to take that off as well. Now it doesn't have anything on the backside, so you can kind of just run your tool along the back side and as long as you don't break the board because, it's really pretty thin, and then you can transfer it to the new display and that's all we need off of that and put our microphone or both mic.
Those are two microphones actually I'm on board, put those in, and then we'll go ahead and lay it down and get it ready. So it's kind of lined up, and then we want to again just be cautious of this cable because you could tear it. There's not a lot of slack here right here where I'm putting that spider there. That that's a stress point, so you want to try and keep that screen up just a little. So you can get this connector back in, and then you can shove your tape back down.
You can put an extra piece of Tapton tape or something over that if you want to add a little extra but that tapes pretty strong that adhesive. That's there, it's pretty strong hold, but you can add more if you want we're, going to reconnect the digitizer Control board's, and then we're going to reroute, our cable for the camera and the sensors. We want to make sure we put them right back where they came from so pay attention to where they were. It was routed to begin with and be sure and put it back exactly the same way. Stick our sensor board back down and our webcam make sure the cables properly routed, and you're good to go so now.
What we're going to do is just basically reverse the process. So, instead of pushing the display up, we're actually going to lay it down flat and pull it down towards the keyboard towards the hinges and that locks it into place. We put our 8 screws back and cover them back up with that plastic cover just snug them down. They don't need to don't over-tighten them and that's all there is to it very simple, very easy to do just check all the way around the edges and make sure that it is all the way around there's no gaps test. It makes sure everything works, hope you enjoyed it like share and subscribe.
We'll see you next time, bye, bye now.
Source : Fix It Planet
Phones In This Article
Related Articles


![Xiaomi Redmi 10X 5G [My Experience Coming From a Samsung Flagship To A Xiaomi Mid-Range Phone]](https://img.youtube.com/vi/tsAgSSHR6ME/maxresdefault.jpg )
Comments are disabled
Latest Articles


