iPhone 7 Plus Battery Replacement-How To By iFixit
Hi I'm Gwendolyn with iFixit and today I'm going to show you how to replace the battery in your iphone 7 plus. For this repair you're going to need a spudger, a small suction cup, iFixit opening pics, a p2 pentalobe screwdriver, an iOpener, a Tripoint Y000 screwdriver, a phillips double-0 screwdriver and tweezers. When you do your repair be sure to follow the step-by-step guide on iFixit. com not only does walk you through the complete repair but you can also see comments and notes from other users who have followed it which is really cool and very helpful. As always make sure your phone is off before you begin this repair. Like previous iPhones the first things we remove are the two pentalobe screws on the bottom edge of the iPhone.
Next we heat up an iOpener to soften the adhesive that secures the display to the phone. We outline how to heat up your iOpener and steps 2 through 4 on our guide. lay the warm I opener over the lower edge of the phone to soften the adhesive holding the display in place. Now attach the suction cup to the lower half of the display assembly just above the home button. Pull up on the suction cup to create a small gap between the display assembly in the rear case.
Grab a spudger and insert the flat end into the gap. Slide the spudger to the left along the lower edge of the iPhone. Give the spudger a twist to widen the gap between the display and the rear case. slide the spudger up the left side of the iPhone starting at the lower edge and moving towards the loud/silent switch. Be sure not to pry the top edge of the display away from the rear case it's held in place by plastic clips that can break.
Now that the left side is done move over to the bottom right corner and do the same thing on the right side. Pull the suction cup to a 10-degree angle. the display cables run along the right edge so you don't want to tear them. You can remove the suction cup and slide an opening pic underneath the display along the top edge of the phone to loosen the last of the adhesive. Pull the display assembly away from the top edge of the phone to disengage the clips holding it to the rear case.
Open the iPhone like a book, with the display as the cover and the hinge on the right side. finally we get to use a screwdriver. We have four tripoint screws that are new but luckily we have a bit for them. Remove the bracket and use the flat end of your spudger to lift the battery connector out of its socket on the logic board. Next use the flat end of your spudger to disconnect the two lower display connectors from their respective sockets on the logic board.
Move to the top of the phone and remove the three tripoint screws securing the bracket over the front panel sensor assembly connector. Go ahead and remove the bracket as well. Use the spudger to disconnect the front panel sensor assembly connector from its socket on the logic board, and just like that you can remove the display. Let's remove the two Phillips screws securing the barometric been to the rear case and then just lift it out. Moving on we need to use the flat end of our spudger to disconnect the taptic engine connector from its socket.
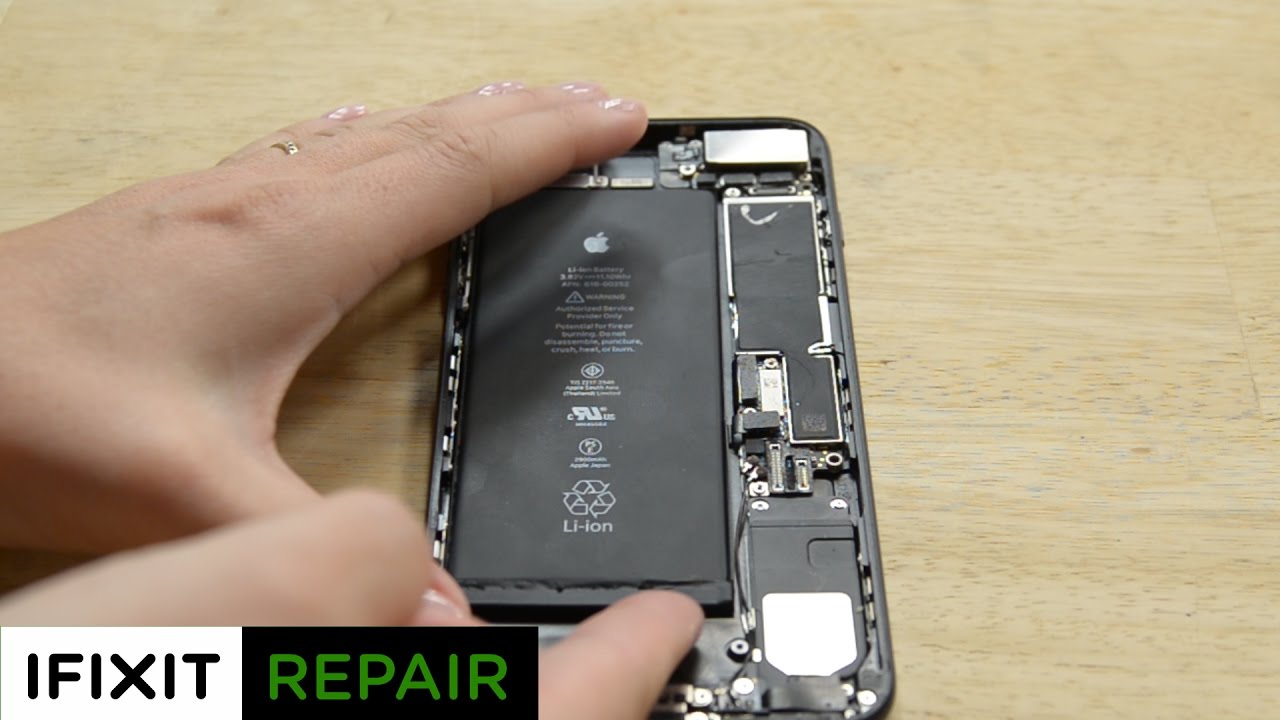
Grab your Phillips driver and remove the three screws securing the taptic engine, and once those are out you can remove the taptic engine. Grab your tweezers and peel back the adhesive strips on the battery once they are peeled, it's time to remove the adhesive strips. Remember to keep the adhesive flat and unwrinkled while you remove the strips. Slowly pull one battery adhesive tab away from the battery towards the bottom of the iPhone It will seem like it never ends but it will. Now repeat this for the last two strips while keeping your finger on the battery so it doesn't fly out of your phone with your last strip.
If by any chance your strips rip we have a heat prime method on our guide in step 29. You can easily remove the battery now. That's it for this repair! You can find all the parts and tools you need for this and many more repairs at ifixit. com Don't forget to subscribe to our YouTube channel to stay up-to-date on all our latest teardowns and repair videos. You can follow us on twitter at iFixit and give us a like on facebook facebook.
com/ifixit.
Source : iFixit
Phones In This Article

Related Articles


Comments are disabled
Latest Articles


