Ipad 7TH Generation 10.2 in - Digitizer Screen Replacement - How To Fix By Jose Morales
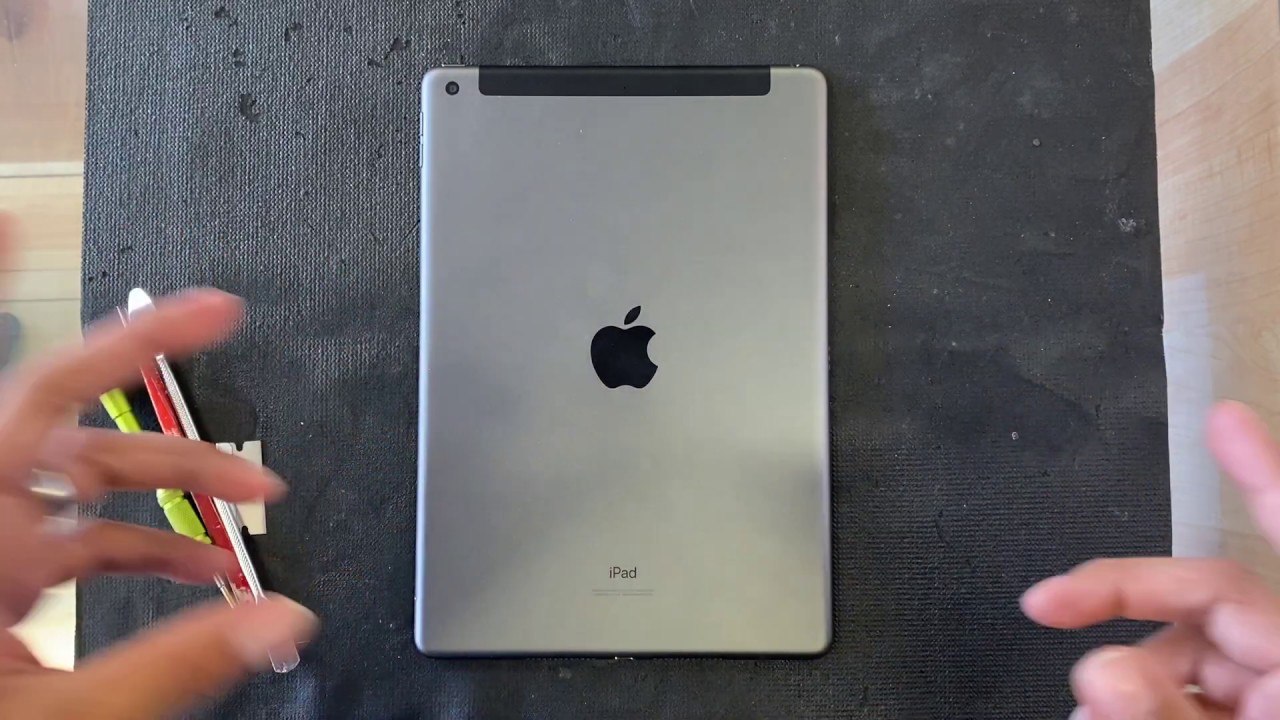
Hey guys welcome to a new video on today's video. We have an iPad 7th generation. It's a 10.2 Retina display LCD, as you guys can see, is really broken on this one. We can just replace the digitizer, which is just the glass, is before used to be very expensive this one. But now it came down price. Probably you can get it for like 30 40 bucks, even less than that.
So let's begin the repair. I'm gonna use a couple of tools, so you guys can see right here, razor blade, Phillip, a screwdriver and tweezers just to unplug some cables. All right. We have some playing cards right here and also to glue down the new digitizer. We're going to use some be 9000.
So let's do it. Alright, we're gonna start by heating. All around these t, Tier is only glue on the outside, as you guys can see, not in the middle, so you're gonna heat around don't hit the middle because. Also, you can burn the LCD and that LCD is really expensive by the way. If you don't have a heat gun, maybe you can use a hairdryer.
It will work just the same. You know it might take a little longer to heat the glass, but it will do the job. So you know you have to be constantly moving it around on just sleep home, one single spot cos. You know there's when the travel comes, that it is perfect. If you can use some gloves, you know so that way, you don't you don't pierce yourself with glass or burned with a pizza.
It just fit this up. Okay, we applied a good amount of heat. You know if, when you touch it, and you can't keep your hand in there, is that good enough we're gonna start on the top. You know the connection. It's going to be on the bottom right side.
Okay, so we can start safely on the top, so we're going to squish our razor blade in between the frame and the glass in there. You see it's very easy, with the razor blade, and then you know you can start with the playing cards. So just like. So you know you can do this very slow, you don't you don't have to rush anything just take your time. So that way, you know we already have some support.
Keep pulling that glass from the frame all right tried to keep the iPad off, because sometimes you know we press it when we're working on it. So if that happened, just push power bottom again and just shut it off, so you guys can see it right now we can just remove this razor blade, and we can play just with a car, and you know you can't you have to keep this warm because another way they glue the one split, even my workstation in the window, this design don't go too deep. With the playing card cause. You know we don't want to touch the LCD all right. So, as you guys can see, I can put my fingers.
The whole top is already kind of loose I'm gonna just leave the playing car are right there, just kind of like it doesn't go on a stick back, you know, and so we can start over, but anyways Thursday one of the hardest part. Now I'm going to show you very quick how to remove the whole thing, so we're going to keep a D sign early, we're gonna work on the side first, because we know the cables are on this. We want to open these like a book so that way, you're going to be easier, good heat all right, and I'm going to help myself with my hand. You know just like this and just keep like lifting and cutting that broken glass. If you think, with the razor blade easier yeah, you know you can just be pulling like this, because it's a stronger but like I said just be careful, so we're going to keep digging in there.
You guys can see. We already lived the whole glass all the way to the bottom, so we're going to flip it, and we're gonna, keep all doing it on this side, like I, said like we can do it differently, but I always try not to scratch the frame. So you know, when you do a repair you want to do the best. You don't want to leave an ugly device. You know always do the best.
If you like what you do. I bet I love. What I do so, that's what I do it so keep digging there. You see right now we have a home, the home button right there. So here is we have to, be really, really careful.
You see, I already lived, you don't want to mess with this side right there. You see the home button, it's a cable. That goes all the way from here to here. You don't wanna mess with that. You mess with that and then the fingerprint is not gonna work, and you know customer is not going to be happy either, but anyways.
This guy's can see. That's how you open it. We're already opening like, like I, told you like a book. You know from here. You can just twist it a little, but now we have the iPad open.
What we're going to do is remove four screws. They are on each corner. So let's just remove those four screws. Now we're going to get access to the connections right there all right now we can lift our LCD from the top and be careful because. They are this new feature.
They add some glue on the corners I, don't know what they did, that, but I guess just to have the LCD secure. You can see right there on the corners. We have some kind of glue, so you might as well use some of these strong tools and just pull it like that. Now we can lift the LCD. It's going to reveal this little plate with another three screws, so just going to remove those three screws and the last one and lift the little plate and unplug the LCD.
That's it now. We can just put the LCD on this side all right now that we have the LCD out of the way we can unplug the battery okay. We have this little antenna right here, we're just going to unplug that, and we're going to remove one screw, which is just pushing down the connection for the battery I'm going to put I'm going to try to lift the moldboard a little, so you know, so we lose some connection for the battery. Furthermore, we don't want the battery. You know to be making contact.
Okay, we're going to squish anything in there. Maybe a piece of a piece of plastic- anything just make sure it's lifting, so it doesn't have like any power around the motherboard, because you can short something up when you plug in all the new parts. So we have that out of the way, and we're just going to unplug the digitizer and be careful right here, I told you don't pull anything I remove also the home button, which is the fingerprint sensor in this case ?, so I'm going to remove this little sticker and pull that cable. So you have to be really careful on this one. Like I told you.
This is also the fingerprint if you damage the cable this finger, this iPod is not gonna, have a fingerprint feature anymore so and that's how you remove the whole digitizer. So now we basically halfway. We just have to clean all the remaining glass and installed a new one. All right now we're going to use the toothbrush just to make sure every single piece of glass is out of the way we don't want. Like I always said on my videos, we don't want any piece of glass in between our new glass, because that means it's gonna break, really easy, so just give it a good brush just brush it out.
You know just like that and go around checking. You know you can always with your finger. Really careful just check make sure all the glass is out of the way. We're going to put these on the side. Gonna just put it right there, and we're going to grab our new big Tier right there, and we're going to fall.
We're going to remove this adhesive cover just like that. You have to bend these cables in all right next thing: we're gonna, do we're going to grab our home button, which is really important. We're going to grab our home button, which is right here, peel it from the connector to the home button. So if you start this way on this way to the other side, most likely you're not gonna, have any problem. If you do it backwards, you might break the connection right there.
So you can hear you can heat this up a little. You know it's easier to peel, but you know just it's going to come out like this very easy use. Your nail use razor blade, just make sure, don't pull it if you feel like this is hard to pull, don't keep going, just stop right there. All right and here we're going to use my razor blade because. We have some kind of hard lure right here on this one.
You see very easy. You just going to cut that that's what holds the home bottom um place just later and then just push it in, and it's going to come out. Furthermore, you see! That's all you got to do to remove the home button, and it's going to come out nice in safe all right, just remove any piece of glass. If there is one and now before we close it before we install it on this. One I like to glue these with some be 9000 very easy.
I just applied a little of B 9000 on each side on each leg, and we're going to install it before you secure the home button, make sure is centered, and it clicks whenever you press it. So, let's, let's try, you see you hold it on both sides, and you push it fill is clicking. That's good. There is where you're going to leave it in you can do. What you can do right here is leave it even like ten minutes.
You want these to be really strong, because you know we push the home button every day, every single time we log in into an app or go to the menu. Whatever we push the home button to go back, so you're going to make sure this is strong. I'm going to put a little clamp right here just to hold it tight. You see just like that. You can leave it there for like 10 minutes.
If you want, and we'll be right back, okay guys, we let that dry pretty well, so we're just going to remove it, and you know test it again, because you don't want to just go ahead and install it. What about the moves or something just test it yeah? It's working awesome, and we're going to proceed to install this screen so because we cannot basically do it right now. I'm gonna just bend this a little sticker, so it's going to be easier to peel it off, and I'm gonna. Remove you see. Actually this one already have like adhesive I'm gonna, remove all these I'm going to expose all the adhesive.
You know that way when I install it I'm not gonna, be fighting with this. Sometimes people like after you plug in and everything you're like kind of peeling, this adhesive, you know it's an it's a headache, so that's it as out of the way, and I'm going to plug in these de faille, sir remember make sure the battery don't have contacting here because another way you know you can short something out there. We go it clicks really. Nice so aim also connect the home, but you might as well use the tweezer right here just to give it like the last push in their just stay there and close it. You know if you still have the tape just put it right there, so it won't move all right.
I'm going to bend this up. Remember right! Here. We have this little weird. Looking like a holder. Now we are going to install the LCD or the LCD.
We have right here. One connection, remember only one connection: ?, yes, connect it right there and don't forget this antenna because, you know later on. It's not gonna work! Fine, if you don't do that so, and we're going to put the three screws back on it. We have this little plate with the three screws and try to keep them on the same order, because many people confuse the screws, and sometimes they're not the same size, and when you come in a screw, a different one where they don't belong, you can damage the motherboard. You can pierce the moldboard, and it's not going to be good anymore.
It's going to be dead, so we put those three, and now we're gonna. Remove these and also connect the battery right there, and we're going to lay that LCD very softly back. Oh we're, basically almost done from here. We can turn on the iPad. This guys can see.
We have a lot of wool, I mean we didn't kill it all right, just making sure everything here is its nice and tight all right. So we have these. You can even test the digitizer right here, as you guys can see. I cannot. Like you see there, we go it's working, perfect yeah, so I'm gonna just push the power here.
Okay, before I close it down, I'm going to wipe these up a little. We don't want anything dirt right here, because after we close it. That's it. It's going to be closed for good. We're, not gonna, be able to clean anything.
They need. We leave on between. So we're almost done here. We're going to put the four screws that hold an LCD. We have all the screws in.
Furthermore, we have our iPad LCD clean. Furthermore, we're going to apply a little of being 9000 a little because you know don't put too much, because that is people who put a lot on the sides and when you push it in you know that thing just come out and spread all over the eye, but you don't want that. You know enough just put enough to make sure they. The glass is not going to fall. Last thing we're going to do before we close it, remove the plastic and just fold it the same way you remove it.
You are closing it. You see, that's what we are trying to achieve the same way. Furthermore, you open it the same way. Furthermore, you close it. Furthermore, you see, make sure all the corners are in then now we're just going to put a few clamps on it and let it dry you see guys that was how to repair the iPad 710.
Furthermore, you guys can see if I push the power button. Oh, what a cute ROG look. We have everything, we're gonna just powered off and you got. We can test the home button. ? you see there you go.
We have home button working, okay, so make sure you didn't damage anything, and we're going to end this video right here you can let this sit for like 20-30 minutes the longer, the better just want to make sure the glue is nice and dry before you start to use it. So thank you guys for watching. Don't forget to subscribe, make sure you hit bail notifications, so you get notification every time. I upload a new video and thank you guys, I'll see you guys in the next video bye.
Source : Jose Morales
Phones In This Article

Related Articles


Comments are disabled
Latest Articles


