How to Apply a dbrand Razer Phone Skin By dbrand
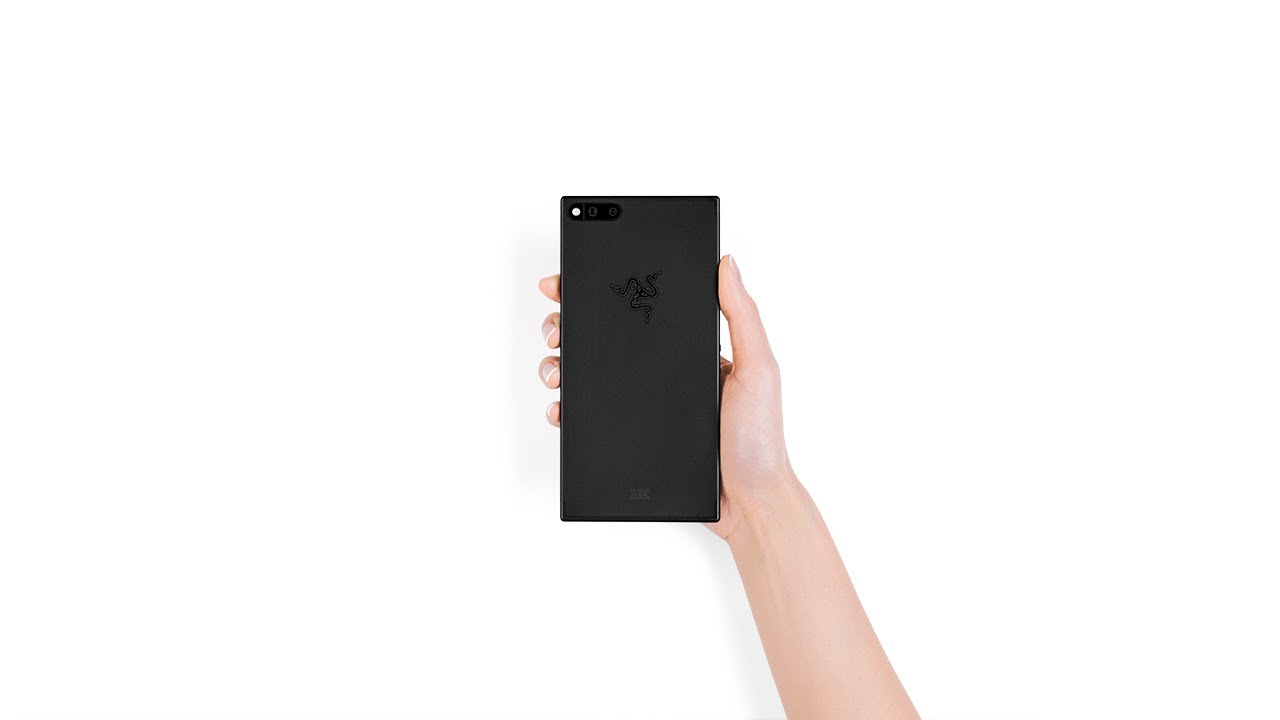
If you just got your D brand razor phone skin relaxed. This is going to be easy. First, wipe your device free of dust and fingerprints for optimal results, ensure you are under bright lighting. Note that your D brand skin comes with two elements back and camera. A microfiber cloth is also included to help smooth down the edges. You will require a hairdryer for this installation, so pause the video now and go grab one welcome back, install the camera skin using the original razor phone.
Next, let's install the back piece. Remove the skin from the 3?m paper and reattach is shown, align the skin around the USB port and microphone, ensuring that the microphone dot is perfectly centered within the cutout in order to get the rest of the skin installed correctly. The bottom needs to be perfect once lined up perfectly apply firm pressure to the bottom of the skin. It will likely have some troubles sticking down. Let's take a moment to fix that heat the bottom and apply firm pressure to just the back edge of the device, as shown next wrap the skin around the back of the device.
Applying pressure to the exposed portion rotate the 3?m paper reattach as shown and align the skin around the camera once lined up apply pressure to the exposed portion. You may now remove the 3?m paper entirely and smooth out the back surface of the device once moved out. Grab your hairdryer and heat the top flap until the material becomes soft, now apply pressure from one side to the other. You probably notice that both ends of the top are sticking out. Don't worry, we'll come back to that later.
Grab your hairdryer again and heat up the left side of the skin next wrap the skin around the frame of the device by first applying pressure to the edge moving towards the front of the device. Now take a look at the power and cutouts you'll. Note that they're, probably not fully stuck down to fix us simply heat up the material and press down firmly while you're at it do the same for the USB cutout on the bottom. Repeat: the application process for the right side of the skin. At this point, you're, probably feeling that all the edges on the skin are pretty sharp, especially the corners.
Let's take some time to fix that begin by heating. Any of the four corners then wrapping the skin downwards. In order to make the corner seamless next heat, the corner again then grab your microfiber cloth and rub it 10 to 15 times. This will smooth down the sharp point where the back and frame meet repeat this process for the other three corners, if you're feeling that any portion of the skin still feels sharp, simply heat it up some more and rub it with your microfiber cloth until it becomes smooth to smooth down the front edges of the skin, rub the border of your microfiber cloth 10 to 15 times the friction will soften down the sharp edges, making this skin feel like it's melting into the phone done? If you have any questions, you know how to reach us.
Source : dbrand
Phones In This Article
Related Articles


![Xiaomi Mi 10 PRO - Review with Photo + Video + Audio + 5G! [Xiaomify]](https://img.youtube.com/vi/dwe8oj_EvVU/maxresdefault.jpg )


Comments are disabled
Latest Articles


