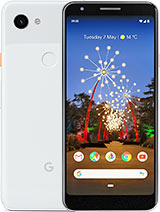
GOOGLE PIXEL 3A XL SCREEN REPLACEMENT By iSmart

You, hello friends, welcome to this new tutorial today. I have here this Google, pixel, 3a, XL and I will show you how to fix the screen or how to place the screen. Alright. So to do this job, we will need some tools. We need an icy semi. We will need tweezers.
Some plastic cards like this, make sure it sticks it in, and you will need something like this also, and we will need a heat gun. Then we're going to need to double sticky adhesive and the last thing we will need is a glove alright. So, let's start before you start make sure you look. You watch the video from the beginning to the end, so you will have an idea about all the steps that you need to follow, and also you will know if you are able to do it by yourself, or you need to give it to a specialist. Also, when you are doing this, do it at your complete own risk.
Okay, so, first we're going to use a heat gun, and we will heat up surface here, make sure you spread the heat all over the edges. Your copper nails are three minutes all right, so I think it's enough now. So what I'm going to do I will take this I see Sammy and make small gap here between the frame and the glass. Then I will slide it gently so once I have it open like this? You will use this card. Make sure when you put in you answer this card make sure it is and omit the LCD like this.
The screen is broken. You don't have to worry about, bought it make sure you save this mesh here because you're gonna transfer to the new screen. This one, you can add extra heat as needed. Let's once you have this, ladies all, right now what I'm going to do I will remove this plastic, which is covering the adhesive connection. I mean the cable connection.
Now we have here two screws we need to morning. So I forgot to mention that we will need a pantalone screwdriver to open these two screws. Hopefully this will work. Now, it's small! You may get the right screwdriver alright. So this is the screwdriver that I'm going to need.
So it's t3 by 15 millimeters. It's like it's a pantalone that it's little a little bigger than the one which are used for iPhones, so now I'm opening these two screws this first one. This is the second one. Then we can remove this bracket, which is next to the screws. Then we'm gonna use only my nail to disconnect this cable.
Let's say the screen is off now right. So what I'm going to do now? I will remove the pieces of glass that are left here. You all right so make sure that the frame completely clean, no pieces of glass or adhesive stays here, because if you leave something there the screen will be like lifted from the side where there is some stuff you know, so you need to be very, very careful with it and make sure don't leave anything there all right so now, since the frame is ready, what I'm going to make sure of I'm going to make sure that we have the right screen. So this is the screen, and we will go to the old screen, and then we will remove some stuff from here. Put them here so, as I told you in the beginning, we will need this mesh to be transferred to the new screen.
This mesh will be here all right, so it has a plastic cover in this part. Here don't touch the camera lens with your finger plants, so now I put this mesh may feel like there is a piece of glass here: make sure that this measure is very clean, nothing on it all right! So now it's perfect. So the second thing- I'm, not gonna, transfer this one. This is just a bracket around the camera, make sure it's aligned, and I repeat: don't touch it with your fingerprint to touch the lens all right, then we have this adhesive covering this component here. You couple this party here as well right.
So the last thing that I'm gonna transfer is this tape carefully, then I will remove this, and I will test. This screen first make sure it's working before we glue it down, make sure the cable is handy, present, matching widgets' connection, all right. So now what you're going to do we're going to turn on the phone. This one has patterned which I don't know: what is it so? What I'm going to do it looks like the screen is working good, all right. So since the phone is working good, we couldn't get the password for it.
So I'm just going to go ahead and continue guru in the screen down. So once you taste the screen turn the phone off power, then all right. So now what I'm going to do I will pull this screen a little like this, then I will use just my name to disconnect this cable from here all right. So let's put this aside so now what I'm going to do I will put the adhesive all around here. Let me see the adhesive, so this is the adhesive.
So what I'm going to do I will put 1 strip from the top like this to the form this corner to the corner, then I will put another one right here then another one here and here then I will cover I will remove the adhesive, which is covering the camera lens and the proximity sensor and the earpiece here so this one's. Do you need to be open? Make sure you open them as I told you, so we're going to put just one from the corner to the corner, so we will cut this adhesive evenly and make sure that he is not overlapping. These edges now I'm going to use this budget or just make sure that the adhesive sticks very well all right. So now what I'm going to do? I will cut the proximity sensor adhesive. So now we will uncover this and this pot here and this one all right.
So now the frame is ready, so I'm going to do a remove this plastic here then I will remove this plastic here then I will connect. This cable makes sure the cable is well-connected. Then I will put this bracket alright. So before I glue, the screen down I will test it one more time to make sure everything is working. Fine, all right! The phone has the talk back option active on it.
I will turn it off later on. I just want to end this video right now, so I'm, using my two finger to slide up and down anyway. This screen is working good, so what I'm going to do now I will glue it down, make sure it's aligned with the edge and let it sit flat. Alright, so the screens working good I just need to get rid of this talk back problem. It's not proud about option alright guys, so that was how to replace the screen on the pixel a 3xl.
Please, if you find this video helpful, please hit the thumbs up and if you have any questions, leave them in the comment area also subscribe. If you are not subscribed, see you in the next video and have a wonderful time, peace.
Source : iSmart
Phones In This Article
Related Articles


Comments are disabled
Latest Articles


