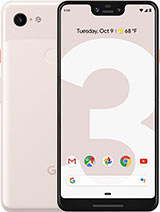
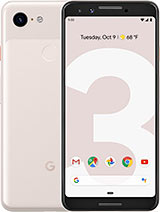
Google Pixel 3 – Battery replacement [including reassembly] By iDoc EN
In this video, we at IOC Europe, show you how to replace the battery of your Google Pixel 3. The repair is fairly difficult because the glass back cover is strongly glued. You should plan about 60 minutes for the repair. We recommend the following tools: tools and spare parts are available at www. idoc. edu.
All links can be found in the video description, and now we wish you a lot of fun switch off the device first to avoid short circuits during the repair press and hold the standby button. Until power off appears tap again to confirm and wait till the device has shut down to loosen the glued back cover use a heat gun or an ordinary hair. Dryer warm glue is easier to loosen the easiest way to loosen the back cover is to use a flat and flexible tool such as the eye, plastics or flex. You will also need a suction cup and several picks to loosen the back cover all around heat, the spot where you start and place a suction cup on the bottom of the back cover press, a flat tool between the back cover and the frame and pull on the suction cup. The flex is easier to insert than the eye plastics because it's made of thin stable metal, but it is also easier to scratch the frame of your device.
You can initially use the flex to get into the narrow gap and then switch to the eye plastics be extra. Careful. The back cover can break very easily if necessary, apply the heat several times and try again removing the back cover might take half an hour, take a little more time and work carefully to make sure you don't break anything once the tool is inserted. Stick a pick into the gap to keep it open then run the tool around the entire edge to gradually loosen the glue, be careful not to insert the tool to deep into the device to avoid damaging any internal parts. Then heat the next part and insert the picks one by one once the back cover is loosened, lift it very slightly the fingerprint sensor, underneath the camera is still connected with a cable fold.
The back cover over and place it on the device make sure that the flex cable is not bent too much. The fingerprint sensor, connector is secured with a black plastic cover, loosen the two Phillips screws on the cover. Remove the hooked cover by carefully pulling it out with the tweezers separate the contact carefully with a plastic spider, always lever from a side where there are no components on the motherboard to prevent any damage, be also careful not to damage the socket on the board or the plug itself. Finally, you can put the back cover aside. The battery contact is located under a plastic frame.
The charging coil for wireless charging is also attached to this frame. Loosen the screws, with different lengths of the middle frame. Note the position of the screws so that you do not mix them up when reinserting them. The IOC magnetic pad is particularly suitable for storing screws and other small metal parts safely. During repairs, when all screws are loosened, you can remove the frame together with the coil.
Now the battery connector is visible, and you can disconnect it be certain to use a plastic tool to prevent short circuits to remove the battery first disconnect the connector of the control buttons from the main board. The flex cable of the keys runs over the battery and could otherwise be damaged when levering first loosen the dark gray foil that is glued to the battery in the main board. The foil tears very easily, but that's no problem. The battery in the pixel 3 is not glued as strongly as in other smartphones. There are tabs on the left side to remove the adhesive strips under the battery, loosen the tabs and pull out the adhesive strips.
We did not loosen the battery by pulling out the adhesive strips because we changed the display of our pixel 3 and wanted to continue using the original battery with its adhesive. If an adhesive tape breaks use a wide plastic tool on the bottom and left side of the battery to lever, it up, be careful not to bend the battery or damage the wrapper. You can heat the glue to make it easier to remove, however, never heat the battery directly but from the side of the display. If the battery can be lifted, use a tool to slide it under the battery to remove any adhesive, then remove the battery from the device and put it aside, prepare your new battery by removing all protective foils over the adhesive surfaces. If your replacement battery has no glue or adhesive tapes attached, you can use thin double-sided.
Tape to hold the battery in place. Do not apply adhesive to the flex cable insert the battery into the enclosure leave some space at all edges of the battery to other components in the frame, so that the battery is not pinched in press the battery firmly into the housing so that the adhesive can bond better. Finally, reconnect the contact of the volume buttons connect, the battery to the main board press, the contact onto the connector of the motherboard until it clicks into place at last position, the middle frame and fasten it with the Phillips screws of different lengths before you attach the back cover take a closer look at the glue on the edges. If it wrinkles in some places and is thicker, the back cover may not lie flat. Remove the glue at such places.
You can also remove all adhesive and use a new adhesive frame. Usually there will be enough glue left on the back cover so that you can attach it to the frame. Put the back cover in place and reconnect. The fingerprint sensor then put the plastic cover back on. It must be placed under the flex cable of the mid-frame.
Then reattach, the two Phillips screws before you finally close the device you should test. If everything is working right here in the video, you can see the Google Pixel 2, but this step works the same for the pixel 3. Turn on the device and test the screen set, the brightness to minimum and maximum drag an app icon across the entire screen to make sure the touch works in all places. Put the back cover back in its original position. Press the back cover on all over, so the glue will stick.
In addition, you can heat the device with hot air and then press the device together or weigh it down with a few books so that the adhesive holds even better. Your phone is fixed now, and we hope it was fun for you. If you liked the video, why don't you leave a thumbs up and subscribe to our channel high quality tools, spare parts and accessories are available in our store, see you next time you.
Source : iDoc EN
![Google Pixel 3 – Battery replacement [including reassembly]](https://img.youtube.com/vi/KjKjKXFZY94/maxresdefault.jpg)


