Best Google Pixel 5 Camera Tips and Tricks By Jonathan Casey
Hey, what's up everybody, I hope you guys are good. Today we have a pretty cool video for you, we're going to be talking about the Google Pixel 5, I'm going to go over several camera tips and tricks that way when you get through with this video you'll be able to go out there with your pixel 5 and step your camera game up now. Some of these are not necessarily going to be new features, they're older features, but if you're new to the pixel they'll be new to you. This is the reason why I always cover old features and newer phones, because there's always newer users out there. So let's go ahead and kick it off with feature number one or tip number one, and that's how to quickly launch the camera. It's really simple: all you have to do double press the power button boom you're in the camera.
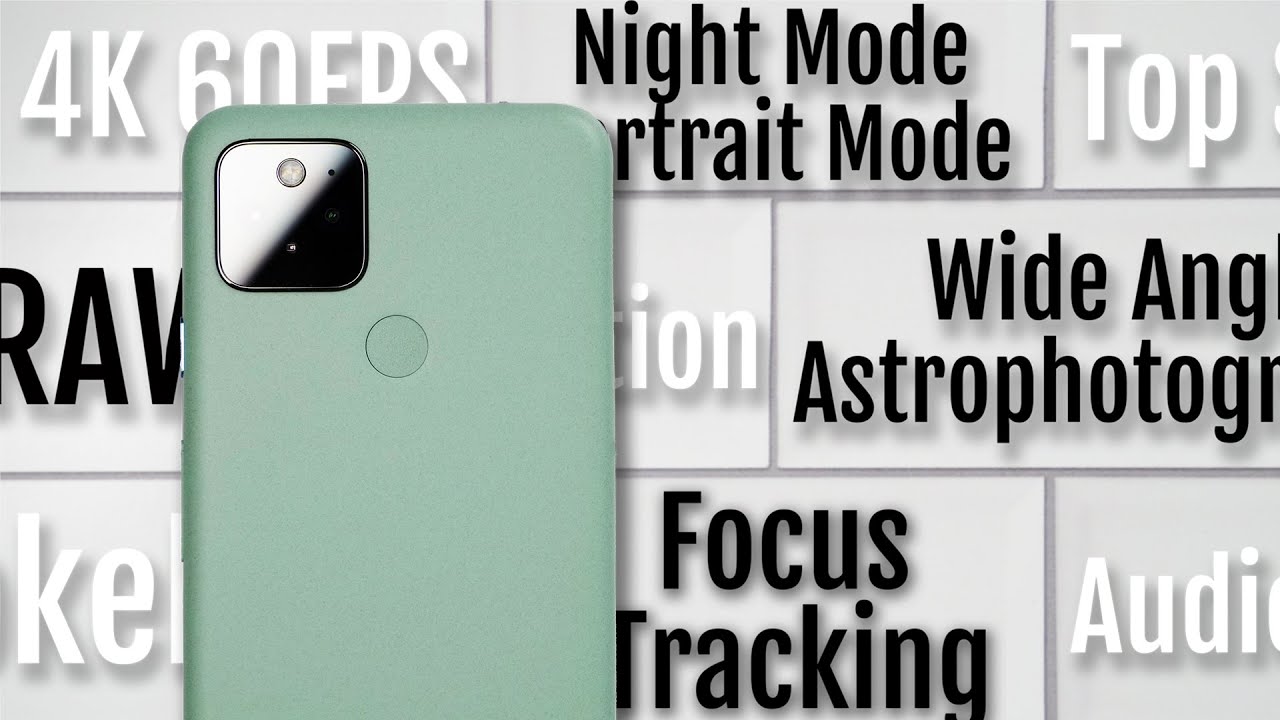
Now you can start snapping away, get the shot that you want, and you don't have to worry about fumbling your phone wasting time trying to get inside your phone. The second thing I want to talk about is 4k 60. Now, based off of my experience with pixel devices, this is the first time I've ever seen.4K 60 frames per second on a pixel device to enable it you're gonna, go into your camera. App and you're going to go under video and then tap the arrow at the top, and you'll see the option for 4k and then just tap 60 right below it, and now you're able to shoot.4K 60. And I got gotta say I'm really impressed with the video coming off of the pixel 5 when you're shooting 4k 60.
It looks really, really good and when you combine the 4k 60 on the pixel with some of these other tips and tricks that I'm going to show you throughout the video you'll, be able to capture, dare I say cinematic video next up, we have audio zoom. So if we go back into the camera, app go into the quick settings tap on the cog wheel in the bottom right scroll down until you see audio zoom and make sure that's toggled on audio zoom allows you to really focus your audio. So if you're recording video, and then you zoom in it's going to focus the audio on whatever it is you're zooming in on, while trying to eliminate some background noise, so it's basically audio isolation. This isn't new. It's been on the iPhone for a while Samsung Galaxy devices have had it and lg devices have it, but it's still nice to see it on the pixel 5.
Here's a quick example: I'm going to zoom in on the fountain and as I'm zooming in you should start to hear the sound of the fountain a little more. So there's 2x, alright! So now we'll zoom in even further, and now we will zoom out if you record a lot of video you're, really going to appreciate the four levels of stabilization the pixel 5 offers, but there's also a secret fifth level of stabilization. That I'll show you here in a minute once you're inside the camera app. If you go under the video tab, you have a little button with a hand and some squiggly lines around it. If you tap on that, it's going to pull up the four different levels of stabilization, we have standard for light movement.
We have locked for far away shots, and you're using the two times digital zoom. Then we have active for a lot of movement, and then we have cinematic pan. Personally, I think all four work really, really good, but there's a fifth kind of hidden option. So if we go into the gallery and then pull up some photos here, pull up a video and then tap on the edit button on the bottom. You can actually apply digital stabilization after you've taken the video so right next to export frame.
There's like a little box with like another box inside it. If you just tap on that, it's going to stabilize your footage. It does take a minute, especially if you're shooting 4k 60. Another thing that I want to show you is touch focus tracking. This is something that I have praised, google for ever since they brought it to pixel devices when it comes to touch focus, tracking, there's really nothing that you need to do or enable.
But one quick disclaimer is: it only works in full HD? It does not work in 4k, but all you have to do is just touch whatever it is. You want to track on the screen, and you'll see it will instantly start tracking and if I move it forward, it focuses and thanks to the dual pixel autofocus on the pixel 5 you're, going to get really, really good results with the autofocusing system. Another great thing is: it doesn't just work in video. It also works in photo. So if you touch your subject, it will start tracking it and then now you can do some burst shots and make sure you keep your subject in focus.
A cool feature that googles unveiled like a year or so ago is the ability to control your highlights and your shadows before taking a photo kind of like exposure compensation, but taken up a notch. Let me show you so if you touch on the screen under the regular camera mode, you have the option to control your highlights on the top and then your shadows on the bottom. So if I bring in a darker object and then touch on the subject, bring up the shadows, you can see the blacks kind of become more milky more faded. And then, if I drag down the highlights, you can see it's adjusting the wider portions or brighter portions of the image, and then you can lock it once you're done. So none of that will change.
It's also going to lock your autofocus, so you don't have to worry about anything changing on you, except maybe the white balance. Another cool camera feature on the pixel.5 is macrophotography mode. This was on previous pixels, so it's not new, but if you're unfamiliar with it, you need to get familiar with it, because it's awesome so right now, I'm in the regular camera mode- and you can see a moon in the center of my shutter button, because it's detecting that we're in a dark scene over here there's another moon with an next to it. If you tap it that just means auto night mode. So if there's no line through it like right now, there's a line through it.
That means it's off. No line means that it's on, but if I go over to night sight, it's basically going to do a long exposure, giving you even better night mode performance. I would say, however, if you have your phone stationary, it's not moving it's on a tripod, or it's propped up on something you'll see macrophotography pop on at the top of the viewfinder. This means that you're going to do a very long exposure, and it's going to process the image as if you're taking pictures of the stars, giving you some really awesome results and what's great about the pixel 5 is macrophotography mode works in the wide ultra-wide and telephoto. I honestly think that's pretty neat now granted the telephoto is digitally cropped, but still that's really cool that you're able to do that in macrophotography mode.
I'm pretty sure this is new to pixel devices. Was this on the 4xo correct me if I'm wrong down in the comments section, but I'm pretty sure this is a new feature to the pixel 5. Having that ultra-wide is definitely new and using that in macrophotography mode, you should be able to get some really killer results. I really wish google give us a pro mode inside the pixel camera app, but they don't. Luckily, there is a way to enable raw to do that.
Go inside the main settings by pulling down the quick settings and then tapping on the cog wheel go under advanced and then make sure that raw plus JPEG control is toggled on now. Every time you take a picture you're going to save a JPEG and a raw image. If you want to get something out, quick, like the social media, you have the JPEG. If you want to get the most out of your post editing, then you have a raw image. If you want to view all of your raw images just tap on view raw folder, and then it's going to open the folder, where all of your raw pictures are saved.
Just remember that raw pictures do take up more space because they're, bigger files so be mindful of the space that you have available on your phone. If you're a big selfie taker, then this next feature might interest you and that's safe selfies as previewed. In other words, how you see it on your screen is how the image is going to be saved versus flipping it. Let me show you, so we go into the settings right here. You see the option for save selfie as previewed make sure that's toggled on now.
If I switch over to the selfie camera put my hand up here, it's on the left hand, side and I take the shot. You can see my hand is, on the left hand, side. Now, if I go back into the settings and toggle it off, and then you can see my left my hand is, on the left hand, side take the shot. My hand is not flipped. So, like I said, if you're a selfie taker, this might be pretty important to you.
Frequent faces is another cool feature that I recommend enabling it's really cool, how it works. If you take a lot of motion, photos or top shots or burst shots, it's going to prioritize the faces that are seen frequently in your photos, making sure that they stay in focus and things like that. So let me show you how to enable it go into your settings and then right here where it says frequent faces just tap on it and make sure it's toggled on I'll. Read it for you real quick. It says when you take a motion photo or touch and hold for a top shot.
Frequent faces recommend shots that prioritize the people you photograph most frequent faces. Data is only saved on this device, and it can only be accessed by this camera app. So you don't have to worry about any of that data floating around in the cloud getting hacked and that stuff leaking you're good to go. Okay, so picture this you're on the beach you're with your friends, it's a beautiful scene. You go to take a selfie with your friends you're, like smile, guys, click that one jackass had to blink.
When you hit the shutter, Google can save that with top shot. So let me show you how top shot works, there are two things that you need to remember with top shot. If we go into the camera in order to use top shot, you have to have motion photo in auto and then, if you go into the settings and then go under advanced, you have to make sure that social media depth features is turned off. If this is turned on top shot and motion, photos will not work so make sure those two things are set up correctly. Now, if I go into a photo right here, this is just a goofy selfie that I just took and then swipe up one more time you can see you have shots in this photo, and you can find the one that google recommends, or you can just slide through and find the one that you want and once you find the photo that you actually want just tap save copy, and hopefully this is going to save some of your photos now top shot is not a new feature.
It's been around for a while. Now, let me know down in the comments if you've ever gotten any use out of top shot when it comes to the pixel and how their cameras function. I feel like they're the accidental cameras, because, even if you make an accident, you can go back and usually fix it, just like with top shot. However, there's another thing that you can do and that's add both or background blur to a photo as long as it has a face in it, even though you didn't take a portrait mode shot, let me show you I'm in my camera app, I have the front-facing camera turned on, I'm in the regular camera mode, not portrait mode. Now, I'm going to take a quick selfie.
Ah, I'm going to go into the photo, and now I'm going to tap the gallery icon right here in the top right and then tap on the photo and give it time to process right there boom blur background tap blur background, and now you can adjust the background blur as you see fit now. Here's the thing. If you go all the way over, it's just not going to look right. It's going to look very artificial: it's not going to look natural and there's going to be a lot of messed up areas in the photo, because it's not a true portrait mode photo, but if you add a subtle blur to the image, it looks perfect. Considering this is not a portrait mode shot once you're done just tap, save as copy and boom there you go to go along with this accidental camera theme I have in my head, there's also the times when you take a picture of a loved one.
Your child, a friend and their face just isn't well lit like the background's properly exposed, but they are just dark, like you can't really make out any detail on their face. Well, Google has implemented something called portrait lighting which fixes that issue again going back to the whole accidental camera theme. Let me show you how it works. So, let's go back and pick this photo. So we're going to tap the edit button then go under adjust portrait lighting and boom.
You can see it instantly lit my face up. I don't know it just looks really, really nice, and it adds a good pop and of course you can use the slider down here to adjust how strong you want that portrait lighting. Now before you say anything, this is a lot different from the portrait lighting feature found on the iPhone, because you don't have to have a portrait mode shot to use this. So if I want to move the light around, I can just touch and move it anywhere. I want if I want to place it directly on my face.
I could do so. Furthermore, I can add, like some shadows, as if the light was shooting beneath me and pointed up, or I can do it in the corner and then, if I completely mess it up, I can just tap auto again, and it's going to put the light where it saw fit in the beginning of the video I mentioned 4k60, and I'm really happy that it's on a pixel device. Finally, but 4k60 does take up quite a bit of space on your phone, I mean the file sizes are pretty big. Anything 4k is going to be bigger than 1080p. Obviously, but by a substantial amount in order to keep those file sizes down, you can enable the high efficiency, video codec file format to do that.
We're going to dive into the settings tap on the cog wheel, go under advanced and make sure store. Videos efficiently is turned on once that's turned on you'll get better compression and reduced file sizes in all video formats, no matter if you're shooting in full HD or 4k, while we're inside the advanced camera features. There's one more thing. I want to show you so right here we have social media depth features and if you turn that on what's going to happen is whenever you upload a portrait mode shot to like Facebook, it's going to use that depth information to create like a parallax photo. It's really neat, I'm sure you guys have seen it if you're scrolling to Facebook, sometimes you'll come across someone's photo and as you're scrolling.
It's like a 3d image. This is how you're able to do it on a pixel device with iPhones. I believe it just saves automatically, but with the pixel you can turn it off or turn it on. Just remember, though, if this is turned on, you won't be able to use top shot or motion photo when it comes to photography, including smartphone. Photography framing is very important.
In fact, I would go as far as saying framing is one of the top three most important things that you need to learn immediately if you're trying to get started with photography, I'm still learning it myself. So I can't really give you a ton of advice. However, Google can so if you go into the settings tap on the cog wheel and then scroll down, you can see, you have an option to enable framing hints, and what this is going to do is help make sure you're getting the best composition possible. If you don't know anything about framing on your own, so go ahead and toggle that on and now this is just a quick kind of stupid example. But if I hold the phone like this, so as you can see, it says, try raising camera for your selfie, so your pixel is actually going to give you some tips to make sure that your composition is on point and honestly.
I can really appreciate that to go along with the framing hints. You might have noticed that I have like a tic-tac-toe board on my image and this is actually a grid for framing. If you go into your settings, scroll down, you can see, you have grid type right here, you can tap on it, and then you can pick from 3x3, 4x4 or golden ratio. I typically only use 3x3. It just helps you remember the rule of thirds whenever you're taking a photo.
If you don't need any grid whatsoever, you can just tap off. But honestly, I think 3x3 is not intrusive whatsoever and, like I said it's going to help you get the best composition possible. So I'm not a huge fan of flash photography, at least when it comes to smartphones. I know there's professional flashes out there that look perfect, not talking about those specifically on a mobile phone. I am not a fan of flashes, however, if you are in a situation where you absolutely have to use a flash, and you want to take a selfie or do a quick video using the front facing camera, there's a selfie light so go into the quick settings here and then tap on selfie, illumination and turn that on, and you can see it brightens up the black areas of the screen.
Making your face. Look, you know a little brighter. It's actually not too much it's not too intrusive, and it does a pretty good job. So, to give you an example, I'm going to go ahead and turn off my studio light here, oh, and then you can see this is with the selfie light on I'm going to go ahead and take a picture. Now, I'm going to do one with the selfie light off and there you go.
You guys can see for yourselves. There is definitely a difference in skin color, maybe not so much brightness, but definitely in skin color. But in a more severe case I could see this coming in clutch. This also works for video. So if we go into the video setting and then go into the quick settings here, you can see you could do selfie illumination it's going to brighten that face letting you get more light on your face when you're recording a video.
So again, this is just a really neat feature. I know we've been going in and out of the photo editor throughout the video, but I feel like that's a feature on its own and something that I really think that you should dive in and experiment with the photo editor on the Google Pixel 5 is hands down one of if not the best photo editors on any mobile phone. It has a lot that you can do so. If we go into the photo editor here, you can see you have different suggestions, which of course, is going to be AI based in order to make sure that it's applying the correct settings to your picture um. So we have enhanced.
So if I just tap enhance, of course, it's going to automatically enhance the photo, but it doesn't overdo it, which is something a lot of other photo editors. Do when you tap the auto button, so we'll hit, cancel um, we'll go to black and white portraits. We could do color pop um. We have tons of settings to adjust like skin tone pop vignette, um, the white balance. Black point shadows highlights, I mean, there's a ton in here.
We have built-in filters and of course we have markup, but definitely dive into the photo editor on your new pixel. Take a look at it because it is really powerful. Another neat thing you can do is export a frame and a video as a still image. So if I pull up a video right here and then tap on the edit button, which is in between the share button in the trash, can and find a frame that I want to export and then just tap export frame boom. That's it so, there's my still image.
Now I can edit this image. I can upload this image. I can do whatever I want. It's basically just taking a frame out of a video clip and if you're going to be doing this a lot, I highly suggest that you shoot in 4k 60. So that way, the majority of the frames stay in focus and stay sharp, and you're going to get higher resolution frame grabs.
The last thing I want to tell you about: is the ability to take a portrait mode shot, but with night mode and the best thing is you don't have to do anything it automatically will kick in. Let me show you so if I go to portrait mode, you can see right here, there's a little circle with the moon and the that means that if it feels the scene is dark enough, it's automatically going to kick night mode in, even though you're in portrait mode. So you can see right now, it's in night mode, inside of portrait mode. That's why the moon is inside the shutter. So if I were to switch over to the front facing camera, it goes away.
It's really nice. So here's a quick example of a portrait mode shot just regular, no night mode enabled and then this is an example of a portrait mode shot with night mode enabled I'm pretty impressed. Let me know what you guys think, so that was a lot of camera information on the pixel 5. I get it, but luckily this video was time stamped and chartered, so you're able to skip around how you see fit. If this video helped you out, and you enjoyed it, consider giving it a thumbs up, make sure to follow me on Twitter and on Instagram.
If you feel like talking to me on a more direct level, if you have any questions or anything like that, and of course I will see you beautiful people in the next video you.
Source : Jonathan Casey
Phones In This Article
Related Articles


Comments are disabled
Latest Articles


