Apple Watch Series 2 Battery Replacement—How To By iFixit
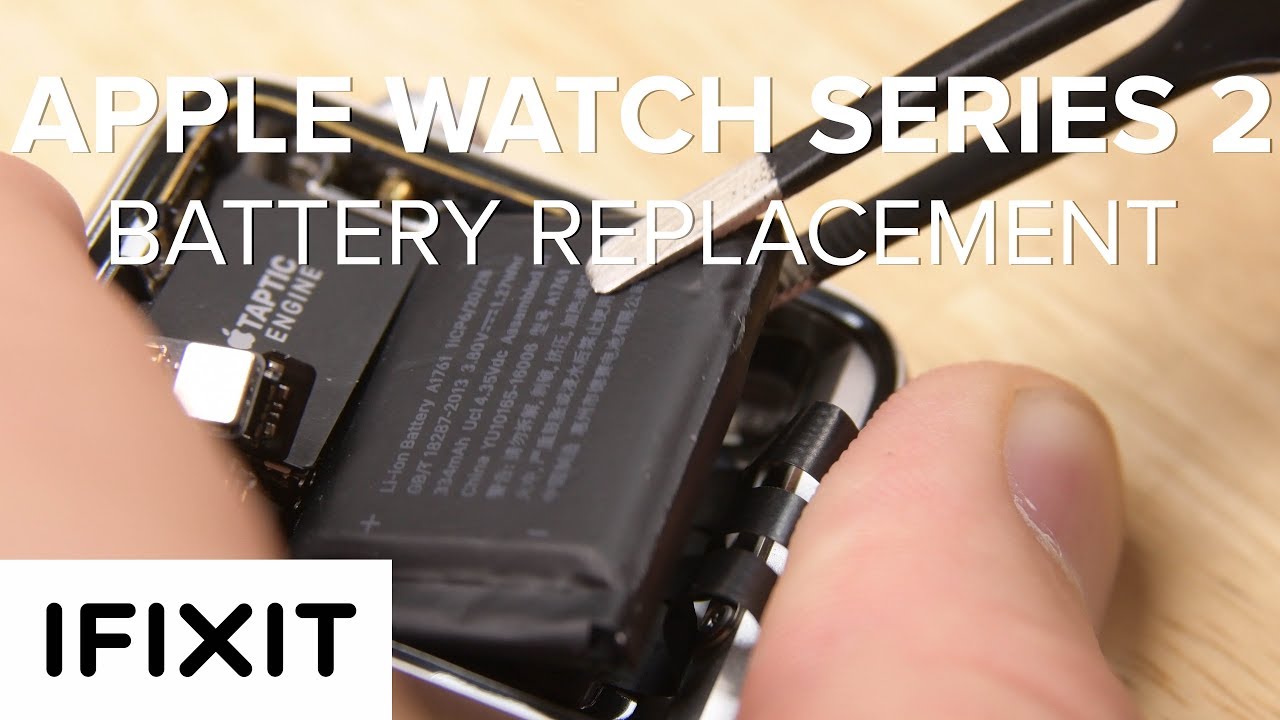
H ey I'm Alex from Fixit, and today I'm gonna show you how to replace a battery on your Apple watch series 2. For this repair you'll need an iOpener, a curved razor blade, tweezers, a Y000 screwdriver, some opening picks and an opening tool. I also recommend getting a force touch gasket. It's inexpensive and it's real easy to break. So it's good to have it on hand, and remember when it's time to do your repair make sure to follow the step by step guide on ifixit. com.
We're gonna start this repair by removing these two bands, so we have better access to the watch itself. To release the band press the band release button and slide it out of its groove. Now that we have the band's off we get our first real job, which is to loosen the adhesive so we can take the display off. This adhesive is really tenacious to help with the waterproofing, so it usually takes quite a bit of heat but we don't want to burn the LCD. So we're using our iOpener to get it to about a hundred and sixty degrees Fahrenheit and then we're gonna try to open it with our curved razor blade, so that we don't damage the metal very much.
When I'm opening the Apple watch I always want to make sure I'm coming in at the safest possible side. For the Series 2 that's gonna be the side across from the digital crown. That's because the display cables come in from the bottom of the display, and the crown also holds a little bit of the antenna. So I'm gonna stay as far away from those components as I can and open from the other side. You'll notice that I use a metal tool which some people prefer not to use so that's to not scratch the watch but as this a watch has never been opened it's a little bit harder for me to get in.
Now that we have this watch open we're gonna switch away from the sharp blade and then we're gonna switch to the pic so that we minimize our chance of cutting the gasket. We really don't be lifting any of the black gasket or cutting through and exposing any of the copper. I'm gonna be moving my pic all the way around the display being sure to cut all the adhesive without disconnecting the cables. Alright, so now that we have the display completely off of the adhesive, we need to disconnect the display. The first step to doing that is removing this black adhesive that's covering all of our connections.
With the adhesive out of the way we now see our three ZIF connectors that we're going to open and then remove the display. So now that we have the display off the thing we want to make sure is that we didn't damage our gasket the things to look out for as seen here are exposed copper or cut all the way through exposing the casing underneath. So in this watch we're probably gonna have to replace our gasket. The first thing we're gonna have to do is take this bracket off which is held in with this tiny little tri wing - so we're gonna get our driver in there and remove this screw. With the screw gone, we can get these tweezers in there and remove this bracket exposing our first set of connections.
so our first connector that we're removing is this battery connection, and due to tight tolerances and because these pointed tweezers are ESD safe I'm going to go ahead and use these instead of a plastic pick. With that connection out of the way, we can lift this board that's connected to the battery, and now we can see further connections deeper down including the force touch gasket. Now that the gasket is disconnected we have to get it off of our casing. So I'm going to use this pick and slide it under our connections and wiggle it down making sure to get underneath the adhesive. Once I have it started, since it stays as one unit, I'm just going to use these blunt tweezers to lift it off of the casing.
Before putting your new gasket on it really pays off to clean this surface as much as possible. So I'm going to use this q-tip and a little bit of alcohol to make sure that all that adhesive is off of the case. Now that your case is ready for reapplication, we're gonna take our new gasket and just remove the rear adhesive cover. We're going to reapply this really carefully making sure you're getting into all the edges and seating it as best as we can. This is really important to make sure that our 3d touch and just our touch work once the screens back on.
To get the battery out we're gonna get our opening tool around the battery. We're also gonna make sure that we're not on any of the display cables because they rip really easily. The adhesive behind the battery keeps it in place, but it's not very strong and it's more gooey than adhesive. All that's left now is to reassemble your Apple watch! I recommend reconnecting your new display and making sure that display and touch work before actually removing the top adhesive and sealing it down. Well, that's it for this repair make sure you subscribe to our channel to keep up to date with all the latest iFixit teardowns and repair videos and I'll see you next time.
Source : iFixit
Phones In This Article


Related Articles


Comments are disabled
Latest Articles


