Xiaomi Mi Pad Complete Disassembly & Assembly /Screen / Battery/ Replacement By ClickInfoHub
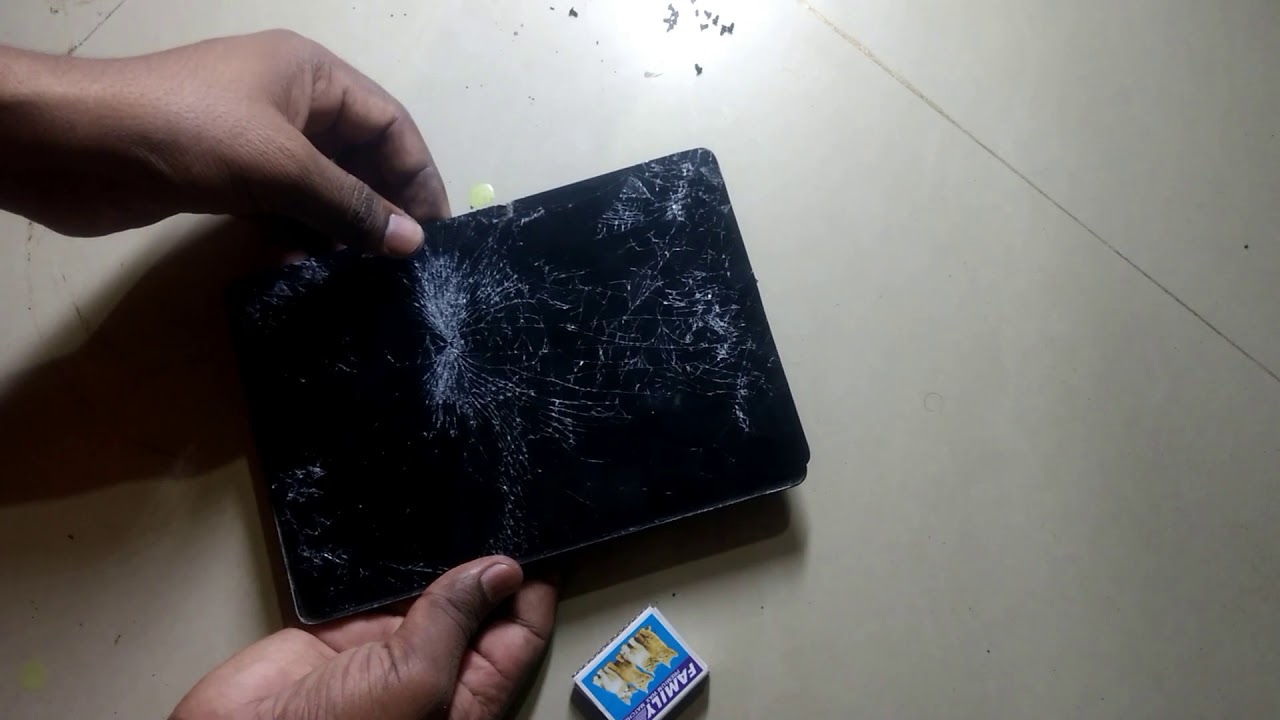
This is Baileys, and in this video we will be assembled a yeah. My bad 7.9 inch iPod. So in this video I will be simple, the mi and will replace the new glass for this. So it is very easy to do that, so, let's get started and start doing it that so like we have pulled back out for the tap same like this, we can remove the back panel, just with light hand you do it. My display has been broken. That's why I'm doing it like that, so you do like that.
You will get a more back cover like our old mobile style have, and previously we were having this like that. You can do much. So this is the back panel and there is it's true back to the for the back panel below the camera. Remove that well screw, and you will get the remove of back panel, which is on the rear camera. So this is the panel you can make it away.
I have removed at all screw. You can see it here so after that you remove the electric pin of the Power Man ?, sorry power, so that power for the battery, it is the connector also the LCD. Is there and I think yeah three cables are there: you can see it. This is for the maybe display one more for the power and one more for the LCD or something like that. Three input, cable.
You have to disconnect from the motherboard. You have to remove this top motherboard. There are two screw attached to here right here and one more here near the camera, so remove that to scroll and try to unplug this electric circuit. Here is the one side you have to unplug it like I did here, and this is for the front, camera and unplug it. So you can easily remove that motherboard from the panel I miss you one more plugin, easier up and down button for the volume rocker, and here you can see for the camera.
Is there one more plug-in that you have to keep in mind? We have more circuit connected to the motherboard at the bottom of the pad. You can see there are three screw remove that screw and try to remove this panel -. These are the speakers actually I saw it feels like something else, but they have dual speaker at the bottom. You can see that these are the speakers. If it've found a mother, put lots of effort.
I have removed battery sorry, not battery this LED display from the plastic pad. So now we will remove this limit non-removable, removable batteries to that I have heated the pad and removed this sticky panel from there, and then I got separated from the motherboard. Sorry from that plastic pad, that's all I got the separated. Now we will fix. We will install new LED display on this glass back before that we will remove the battery to that battery.
I haven't removed. I have this non-used idiom with the help of this idiom, I just flipped from right to bottom and same for the left, ? up, then I got to remove this battle. It's very stocky down. You cannot remove very easily after 25 minute I have removed on that plastic board. Okay, I have removed battery from this plastic ball.
I mean that broken display I have installed new display, make sure that the LCD cable is coming out from that, so you can plug it there on the motherboard. That's all now new display has been installed. You can see if it's time to install the battery install the battery, as it was originally hosted on the all panel, make sure that everything is fixed and everything is at right, place it here and this lightly from the top to bottom I think there is a gap mother for our plastic. Before that we will install these speakers on the bottom of the panel. Take it one by one post it at right place and just screw it out there port on the back.
Where previously it was posted, make sure if you don't forget any camera outside the box place the front camera as well as the main camera and plug it out that tapes, one by one, don't miss any play any clip. It is not stuck to the motherboard. If, if you do so, you will not get device started, plug-in second tip to the motherboard second cage also plugged. Now it is power tape, black eyed, also slowly, you do that some time to fix it and to host on the right foot. Now this is volume rocker flips make it that also connected to the motherboard.
Otherwise, your Roll maracas will not work now host the front camera at right, place and plug it out to the motherboard. Some nice will come like tea, you get it there. Yeah, did you add up all that and make sure this is the right place and also one more cable I, don't know what it does, but first it at right, place and rightness just make sure it's working or not. We haven't done on the power D ISM, PMI impact ME and also relates to the discipline everything was as expected. You can see that device is started, it's booting right now there you can see, and also we can verify fetch is working or not.
Source : ClickInfoHub
Phones In This Article
Related Articles


Comments are disabled
Latest Articles


