Super Easy iPad Pro 9.7 Screen Repair From Start To Finish. By Fix It Planet
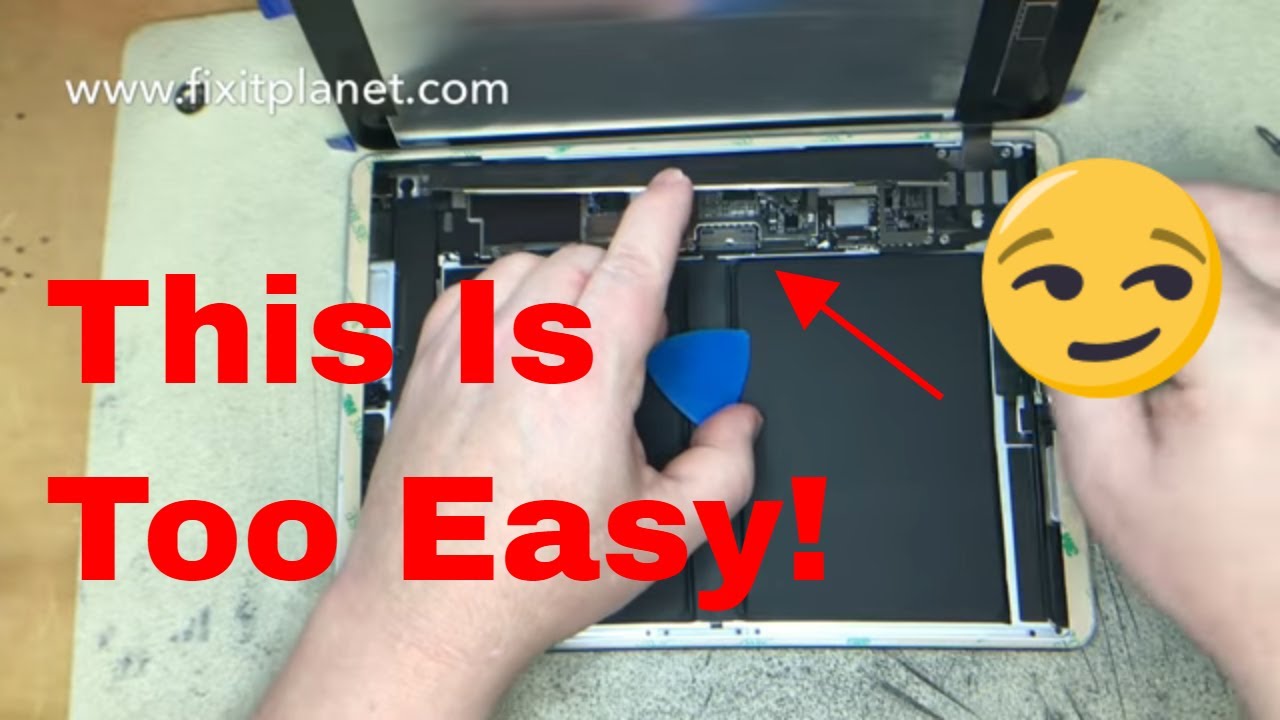
Hi this is John with fix-it planet. Today we've got an iPad Pro nine point, seven inches, and it has a cracked screen. Everything else on this tablets working perfectly fine, and it's not banged up too bad one little corners got a little of damage to it, but it's not real awful, we'll use just a little of grinding on that corner to smooth out that a little other than that it was pretty much in perfect condition. So this is going to be a really easy repair, so we'll put it on a hotplate, get nice and warm to get started. So we can separate the display from the frame and for the most part, if it's chipped up, if it's cracked awful, then that will slow you down a little, but on the edges that don't have any breaks, it's pretty quick to just slide your tool through and cut through the adhesive. Once you get near the home button, that's where you have to be extremely careful.
The home button cable is very near the edge of the glass and there 's's not a lot of room to get your tool in there and then, of course, if the glass is broken anywhere near it, you got to be even extra more careful because you don't want a piece of broken glass to cut through the cable. You don't want your tool to cut through the cable, so that's that you're really the most important part. That's the part that you just have to be absolutely extremely careful around. So as we're getting nearer and nearer the home button, we want to make sure our tool does not go far into the glass, so we sort of concentrate on all the areas until we're ready to go near the home button. Warm it up a little here, because this sides, the side, that's broken, awful, and it cools down really quick.
So all the cables for the display are, on the bottom right hand, side, and it's a good idea not to cut through those while the battery's still connected. So you do want to kind of be careful around that as well. Now we're going to warm this up near the side that we need to get to for the home button so that that sides cooled down a little. I want to make sure it's its nice and warm, and we're just going to barely put our tool in near this home button just going to just barely put it in their till we get past the home button, and then we're going to make sure it's not snagging on any of the adhesive or get caught on anything. So we'll just kind of want to set this watch.
What we're doing. While we separate that, and then we're coming near the corner that has the cables in it. So we're going to stop short there, and we'll be able to go ahead and pry it up from here. Open it just like a book which is actually can I'm s, sort of small piece of broken glass near the home button came off on this one. Luckily, it didn't cut into our cable.
That's the metal bracket goes over our three pop connectors for the display, and we'll also need to take these other screws out as well. In order to get access to the battery connector, this shield is actually stuck down not just with the screws, but it also has some adhesive underneath, so we're going to warm it up just a little. You can start from here, but it's easier to start on this side. I think, and you can kind of start prying it up, and you'll want to be careful that you don't bend it up too much. You don't want to bend it too much out of shape, and you don't need to take it all.
The way off. I just want to lift it up enough to get access to the battery connector, take one screw out, and then we'll be able to put a pic in between the battery connector. So it's not making contact during the repair. Now we can safely disconnect our pop connectors for the display cut through the last of the adhesive here, and we'll be able to take this off, and we'll set the tablet to the side. While we get the parts off of the old display that we need to transfer to the new one, so there is a camera bezel and that's what it looks like we're, actually going to put it on the camera.
And then, when we put our adhesive down, it will hold it into place. So it will be right where it needs to be, but we do have to put the home button assembly from here to the new one and again this is absolutely critical. You cannot make a mistake here. You make a mistake on this. There's no no way to solve the problem.
Customer will lose security feature and will not be happy. So the little connector has a clamp. We just let the clamp and pull the cable out gently and carefully, and we've warmed it up a little to help assist us in getting it lifted. It does have adhesive holding it down in place, and it will help us to get the metal bracket off as well. There's that then we can just pry the button up a little around the edge there and then use our spider plastic spider to take the button out.
So we don't scratch it up, make sure the cables are in good shape and folded, properly and kind of inspect it make sure everything's, okay and that's all there is. We need off of that we'll take our new display now and get the home button back in place. So we're going to start by putting the connector in the cable slide into the connector, make sure it's seated all the way, and then we can put the clamp down and smooth the cable out a little press it down, use the adhesive that came with it. Hold it into place now, we'll just kind of Center. The home button make sure it's in the right position make sure the cabling is folded properly and seated correctly, just like it was on the old screen.
Then we can put the metal bracket we're going to slide that metal bracket underneath the cable on the right side and then stick it down, and we'll just check it make sure that it's seated flush, it's not crooked. It's not stuck muon's working, everything's good, make sure everything is nice and flat. Nice and neat put our tape back on the little connector. So once everything is put back into place, this is going to look go right there around that whole little camera window there, and that looks all good. Now we're just going to take off the old adhesive, whatever is left of it, and then we're going to clean up the edges really, really well get any excess leftover adhesive off the frame clean it up all the way around okay, and then we'll be able to put our camera bezel in around the over the camera.
So it sits exactly where it's supposed to be, and then, when we put our adhesive back down, it will hold it into place. Then we'll be able to put our pop connectors for the display in and give it a quick test make sure everything is working properly and looks like it should, but before we can do that, we're going to take this pick out of the battery connector and screw it down. I think this is a really easy repair changing out. The screen on this particular iPad I think is easier than most of the repairs for the previous iPads, and everything is testing out. Well, looks good, so now we'll be able to put our brackets back on over the pop connectors for the display cables put our screws in all the way down that side, making sure that the shielding is laying nice and flat kind of reminds me of the iPad Mini a little with that, all those screws that you have to put in there, but it's not nearly as bad overall.
So we're going to we're just going to stand it up on its side now, and we're going to be able to get access to this last bit of masking on the strip up on this side, and we're going to make sure that the cable is lined up properly. So when we go to put it back when we go to put the screen down, it should just go straight back into the frame making sure that it's not pinched anywhere I'm just going to warm the edges up a little, and then we're going to give it a good rubdown with cleaning cloth. We'll do another quick test so anyway. That's it guys, thanks for watching I appreciate if you like, and subscribe bye bye now,.
Source : Fix It Planet
Phones In This Article

Related Articles


Comments are disabled
Latest Articles


