Samsung Galaxy S20 Ultra 5G Battery Replacement! By iFixit
If, the battery in your galaxy s20 ultra has gone bad, but you're not ready to part with the phone, yet you're in the right place. This video will show you how to replace the battery in your s20 ultra for this repair, you will need an eye-opener, a suction handle, a set of fixity opening, picks a spider tweezers, a Phillips double zero screwdriver, and some high concentration isopropyl alcohol. We recommend over ninety percent and for parts you will need a replacement battery and, if not already applied some adhesive to hold the new battery down, you will also need adhesive for the back cover when closing up the phone. We also recommend using our magnetic mat so that you can keep track of screws and write down notes during your repair and following the guide on ifixit. com on the guide, you can read tips and tricks that will help you throughout the repair before you begin make sure that your battery is drained to below 25. This reduces the risk of fire if the battery is damaged during the repair warning.
If your battery is swollen, take appropriate precautions and do not heat your phone, we'll leave a link with swollen battery instructions in the description below start by heating up an eye-opener and place it on the bottom edge of the phone's back cover. Leave it there for about two minutes, then apply a suction handle on the spot. You just heated up and pull it with a strong, steady force. This will create a gap between the cover and the frame for the next step. Warning do not apply excessive force with the pick while cutting the adhesive during the next few steps, or you might crack the back cover glass.
When you see the gap grab an opening pick and insert the point into the gap so that the adhesive doesn't re-adhere. This may take more than one attempt due to tight tolerances. If so apply more heat. Once you have your pick inserted slide the pick back and forth along the bottom edge, making sure you slice through all the adhesive then leave a pick in the seam so that the adhesive doesn't reseal. Next, grab your eye-opener again and heat the left edge of the back cover this time and insert a pick into the middle of the phone and slide it toward the bottom.
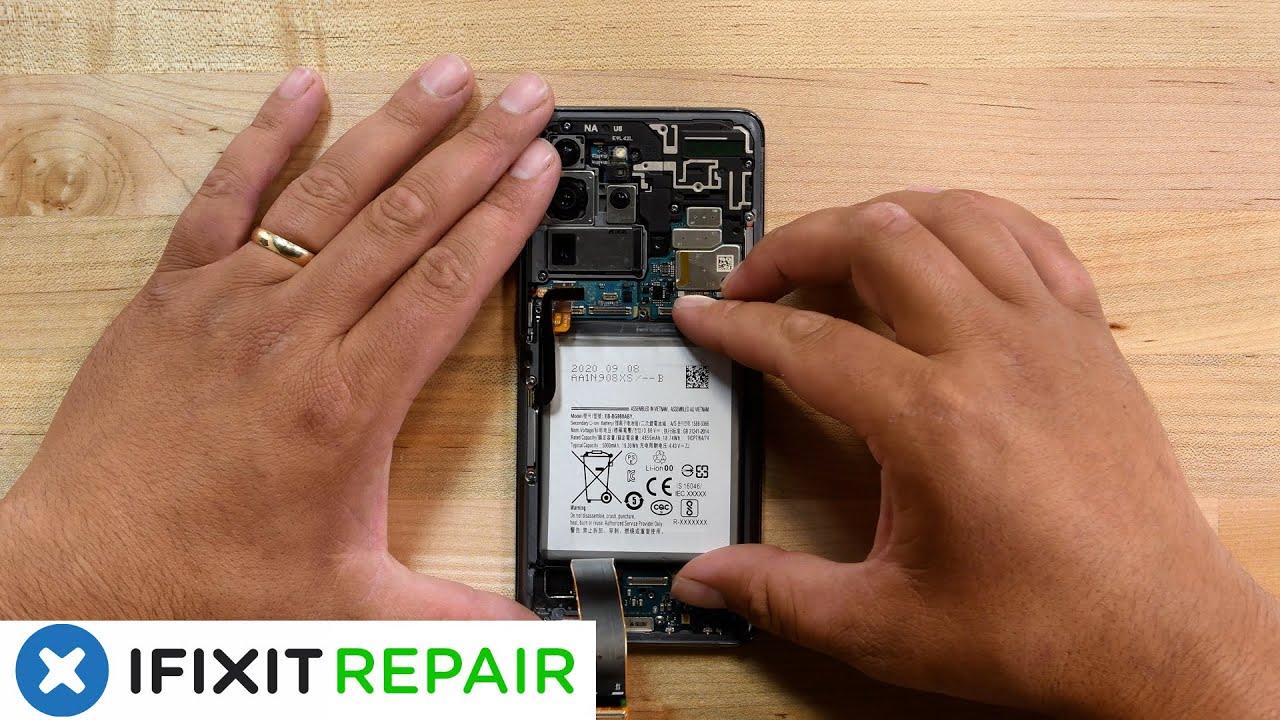
When you're done cutting all the adhesive, there leave the pick at the bottom edge and grab another pick and slide it to the top edge, now repeat the same process on the right edge once that is done, use your eye-opener to heat the top edge and use your pick to slice through the adhesive there when slicing around the corners at the top, be careful because the curved edge is very susceptible to cracking, be very gentle. Once you have released all the adhesive, you can remove. The back cover now goes ahead and use your spider to disconnect the wireless charging. Coil connector use a pair of tweezers to gently peel. The wireless charging coil up and away from the phone next grab your driver and remove the five Phillips screws securing the motherboard bracket, then, with your tweezers unclip, and remove the bracket with your spider, disconnect the battery connector and then use your driver to remove five more Phillips screws.
Securing the loudspeaker and the lower mid-frame insert your tweezers into the notch in the top left corner of the lower mid-frame and pry up to release the clips holding it in place, it should come right out next disconnect the main and auxiliary cables from the daughter board, then repeat the process for the two cables on the motherboard. Now you can safely peel those away pry up and disconnect the 5g antenna, cable from the left side of the motherboard and finally disconnect the main display flex, cable, gently, peel up and move the display, cable and 5g antenna cables away from the motherboard and battery. Now on to the battery grab your isopropyl alcohol and apply it to the gaps between the battery and the frame on all four sides make sure you tilt the phone in different directions so that the alcohol spreads out underneath the battery as much as possible. This will take about two to three minutes for the alcohol to start softening the adhesive apply a suction handle to the center of the battery and hold on to the top and bottom of the phone. Now firmly pull up on the suction handle.
If the battery doesn't move, add more isopropyl alcohol and try again when the battery does begin to lift, keep lifting until it is separated from the phone. Before you install a new battery, you will need to remove the old adhesive in the well using some isopropyl alcohol and the flat edge of a spider. If you need it to install your new battery place, some adhesive in the well and then lay the battery on top and press it into place. If your battery came with pre-applied adhesive, you can just remove the liner and place it in the well flip. The display, cable and 5g antenna cable.
Over and reconnect both to the motherboard, then reconnect the main and auxiliary cables on both the motherboard and daughter board, making sure they are oriented the correct way: go ahead and connect the battery cable, but before moving on make sure that the phone powers on and everything is working properly. If it is power off your phone and disconnect the battery again now go ahead and reinstall the loudspeaker and screw it back into place. You can now safely reconnect the battery next lay the motherboard bracket back into place and reinstall the screws securing it to the phone grab, your wireless charging coil and connect it first, so that it is properly aligned, and then you can press it down into place before you close up your phone be sure to apply new adhesive to your back cover. We have a video that walks you through this process, linked in the description below lay the back cover onto your phone and press. It firmly in place then be sure to set some weight like a book or a tool kit flat on the top of the phone for at least 30 minutes, so that the adhesive seals tight once your phone is sealed, be sure to calibrate your new battery using our guide over on ifixit.
com, linked in the description below happy fixing.
Source : iFixit
Phones In This Article


Related Articles


Comments are disabled
Latest Articles


