Restoring a Bent iPad Pro that was RUN OVER BY A CAR! By Hugh Jeffreys
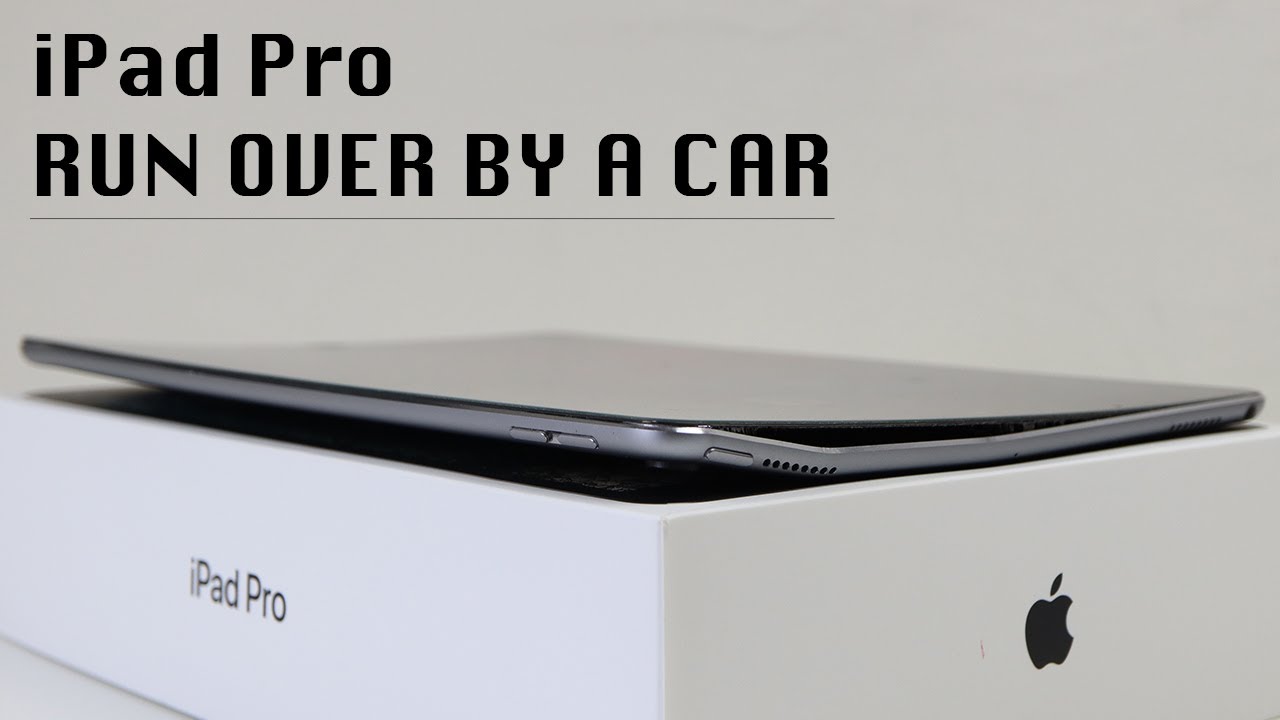
Hi guys welcome back to another huge Jefferies video in this video we're going to be restoring this iPad Pro 256 gigs. This particular one has been run over by a car causing a major bend down the whole right hand, side of the device with the LCD also being badly smashed. I purchased this iPad from eBay for a total of 170 Australian dollars or around 120 us. If you're wondering how someone manages to run over their thousand dollar iPad. Well, I asked the previous owner. They said their son dropped it while he got into the car, and they drove over it with the iPad.
Getting squashed between the tire and the gutter looks like we have a challenge on our hands. With my purchase, I received the broken iPad original box and the receipt stating that the iPad costs the last owner 1088. While I got all the original packaging, there was no charger or lightning cable included. The iPad screen is a little temperamental. Sometimes it lights up other times.
It just shows this. When the iPad display decides to work, you can see how badly smashed it is. However, the touch is still working. This tablet is a 256 gig iPad Pro with a 27 centimeter display, while repairing this we'll also discover whether Apple is pairing. The true tone function like they do on their phones on the back.
The iPad has countless stress marks in the areas that the device has been bent on the bottom you'll see, the frame has also bent outwards, creating another gap. So it's time we fixed this poor iPad using a heat gun. I will soften the adhesive around the display to assist in removing the screen. The removal of the display was quite easy, given the large gaps produced by the bends, which allowed me to slide a plastic pick right under the glass. I find it amazing that the LCD and screen protector are cracked, but the actual display cover glass isn't.
After we have separated all the adhesive around the display. We can lift it upwards to be able to access the battery connection after undoing one Phillips screw I'll, also unscrew the LCD bracket with a further two Phillips screws. This proved challenging as the display cables are so short and with the frame being bent, I wasn't able to lift the display up as much. However, before we unplug any of the four connectors, I must first disconnect the battery. The iPad doesn't have a battery plug, but rather a clamp style connector, so I'll break the flow of electricity.
By inserting a plastic pick with those four connections disconnected, we can remove our LCD panel. Getting a closer look at our frame. You can see just how bent it is. Luckily, this model of iPad has its logic board located in the center, so it has been unaffected by the bend to the frame. This housing is in good condition other than the bend, and while I could purchase a new housing for around 120 dollars, I'm just going to try and fix this one, putting my muscles to work, I'm going to start by just trying to press the iPad flat.
While this helped a little. The iPad was still far from flat as metal tends to spring back. So I'm going to use two old iPad housings to lift one part of the iPad. This way I can bend it more than I need with the metal, hopefully springing back into the shape I want. While I aim to get it close to perfect metal is a very hard material to get straight.
After being deformed, I tried various other methods like bending it against the table and even involved a hammer for the lower portion where the frame had bowed outwards to prevent any damage to the tablet. I wrapped the hammer in two layers of microfiber cloth. Once I was happy with the outcome of the frame, it was time to prep our new display, we'll need to transfer the touch I'd home button and camera bracket to our new screen. This is the most daunting process of the entire repair as apple pairs. Each home button to the iPad.
Replacing this button will remove the touch ID function entirely, with Apple being the only ones to repair it after the removal of our camera bracket. I'll need to apply some fresh adhesive so that it sticks to our new screen correctly positioning that in place. I can then install our home button into our new LCD panel for the home button bracket. Furthermore, I'll also apply two new pieces of adhesive. This should help prevent the home button from becoming loose inside the iPad reinstalling that bracket being careful to not damage the touch, ID, cable and routing it correctly.
I can plug back in our touch ID sensor and move back across to our iPad frame, where I'm going to remove all the remaining adhesive before applying some new stuff. As this adhesive was just cut off, the roll I'll need to cut it down to size for use in our iPad. I found the adhesive provided with replacement. Displays, is simply not up to standard and can cause the display to lift resulting in dust entering the device. I had to use two different sizes.
However, the two millimeter adhesive was still slightly too big for the sides of the device, but it should still work fine. Speaking of our display, this one cost me 190 Aussie dollars and already came pre-installed with the adhesive. The adhesive used is really weak, so I removed it. So we can just use the one I've applied to the iPad with the display ready for installation it's time to painstakingly reconnect the four screen cables. Given the design of this iPad, the cables are very hard to access and reconnect with those in place.
I can reinstall the bracket and the two Phillips screws on top reconnecting our battery. It's time to test out the iPad with our device on. I could do some tests of the touch cameras, sound and other aspects of the device. With everything working. I could place a small object under the display to keep it hovering above the frame so that I was able to remove all the protective film from the adhesive.
Removing our small object. It's now time to seal the two halves together, simply line them both up and press the screen into place, giving the iPad a quick clean on the back with some alcohol and a microfiber cloth. All that's left to do is remove the plastic, protective film and install a tempered glass screen protector, and we're done so. This is it. We took a once destroyed iPad Pro that had been run over and made it almost perfect externally.
The device has been restored into an almost perfect state, with only a few noticeable flaws. I'm amazed at how well this housing turned out granted. There are a few small flaws, such as parts, not being a hundred percent straight, but from a distance. You can't tell that somebody ran this iPad over I'm happy. I chose this method over buying a new housing.
Not only did I save 120 and labor, I also saved the housing from ending up as waste. This whole device cost me 360, Australian or 260 us dollars. These devices are still selling one bay for around 550 to 700 Aussie dollars. Everything on this iPad is working as it should, including the 120 hertz display, which provides the feeling of an ultra-fast tablet. As for the display, while the 120 hertz refresh rate is working, I was amazed to see that true tone hasn't been disabled, like it would have been on an iPhone if someone hadn't reprogrammed the old screen serial number into the new display, and on that note this has been a huge Jefferies video.
If you like what you saw hit that subscribe button and consider checking out the tablet playlist for more videos. Just like this one and if you're looking for any tips or what tools I used to repair devices be sure to check out my website, link for which is down in the description. That's all for this video, and I'll catch. You guys next time.
Source : Hugh Jeffreys
Phones In This Article

Related Articles


Comments are disabled
Latest Articles


