OnePlus Nord N100 - Camera Tips & Tricks! By Kevin Breeze
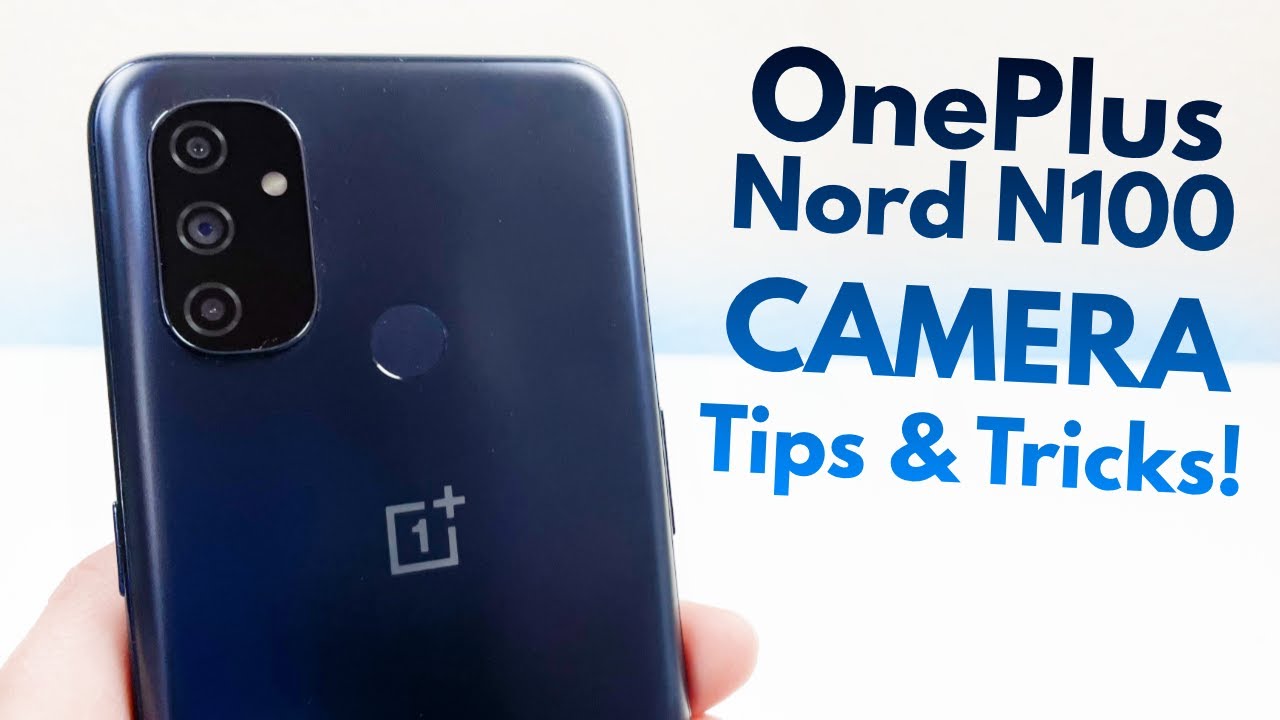
Hey everybody- this is Andre here with the Kevin breeze channel, and this is camera tips and tricks for the OnePlus word n100. This phone is pretty new, being dropped in november 2020, and today I'm going to be going over some tips and tricks for the camera that you might not know about. Let's get started so the first thing I'm going to go over is a couple different ways to open the camera. Now, of course, the way everybody knows is pressing the camera button and the app will open, but a quicker way to do. This is just by double tapping the power button now usually in other phones. It doesn't default to this, but with the word n100, it does actually default to opening the camera.
So all you need to do to open the camera is double tap, and it'll open right up now, the first time you do if it's going to ask which app you want to open- and this is your chance to have it open, a different app if you want to so. If you have another app like Snapchat that you want to use instead of the regular camera app, when you double tap the power button, then you can do so and that might actually be really useful for Snapchat, for example, because a lot of the time the nature of how Snapchat typically works is you want to actually capture a moment faster so having such a fast shortcut to open that app does make a lot of sense. The next way to open the camera is probably just as fast but a little more involved to set up, so you're going to go to settings, go to the search bar and type gestures once this comes up, go to quick gestures. Now right here, there are several letters: you're going to be able to draw on the screen of the phone while the phone is locked in order to open the camera. For example, we're going to go to draw to keep in mind that these are pretty much the same.
Only real difference is the motion you're making on the screen. Now you can have it default to open the camera, and not only that, but you can have it either open the front or the rear camera, and you can even have it open another app if you want it to so. For this we're going to have it open the front camera again, you can make it open whatever you want and of course you can make different letters open, different things as well. So now that we have that set we're going to turn the screen off and now say I want to open the camera. Well, the screen is locked and there we go.
So that's a really easy way as well to open the camera when the phone is locked without actually having to unlock the phone and select the camera app itself. So the next thing I want to go over is how to change the frame of the photo now by default. This is set to 4x3, but you might need a different aspect ratio depending on the situation. For example, a social media platform like Twitter typically has a definition of 9 by 16 that the platform is optimized, for whereas a platform like Instagram has one by one, or maybe you're, trying to take a picture for a website that has a completely different aspect ratio. Well, I'm going to show you how you can change this, so you're going to hit the three bars right here and right here.
You're going to hit the frame, and it's going to change to one by one, and you can cycle through these until it hits the aspect ratio you want. This is a really useful feature when you're trying to get a different aspect ratio. Of course, you can change this on editing apps, but this is going to save you some time as well. The next thing I'm going to show you is a few different things you can do with the volume button now by default. When you press the volume button in the camera app it's going to take the picture, but I'm going to show you some other things.
It can do so once again, press the three bars right up here, hit settings and hit the volume button, so you can have the volume button either control the shutter control, the volume or zoom I'm going to select zoom for this example. Now, when it's set to zoom, you can actually control the zooming instead of pinching the screen just by using the volume button. I think this is a really useful feature, especially if you have to hold your hand more steady when you're taking a photo, and you don't want to move your hand to zoom in and out now you might notice that every time you take a picture, it makes a shutter sound. Now, that's pretty normal, but it can get old. If you take pictures a lot and are tired of hearing it, I'm going to show you how to get rid of that.
This is really easy. All you need to do is hit. The three bars go to settings and then toggle this off. Now, whenever you take a picture, it's going to be completely silent, so there's no shutter sound. Now, I'm going to go over an alternate way to take a picture, so you're going to want to hit the three bars again go to settings and toggle on long press to take photo with this feature activated.
All you need to do to take a photo, is press and hold a finger on the fingerprint scanner. This is a really useful feature again, if you're holding the phone at a different angle to take the picture- and you can't move your hand as much as it definitely helps to make things not only more convenient, but in some situations even safer as well. Now this isn't the only alternate way to take a photo. Either we're going to go to settings again scroll down a little and turn on touch to take photo with this activated. The only thing you have to do to take a photo is tap the screen.
This can definitely be useful too. It's really just another way to take a photo that you might feel more comfortable using now, sometimes when you're taking a photo, you might want to be absolutely sure that whatever you're trying to take a picture of is centered properly, I'm going to show you a way to make that even easier. So we're going to hit the bars here, go to settings scroll down and turn on the grid with the grid on it's going to be a lot easier to tell where the center of the frame is and if you're trying to get something perfectly centered. This is going to be a really useful tool. Now another thing in the settings menu that is enabled by default is called AI screen recognition.
This is a really cool feature that not all phones have. What this does are basically recognizes the setting of the photo and that helps the camera adjust its sensors in order to take the best possible photo again. This is enabled by default. So you really don't have to do anything. It's just kind of cool to know that it's actually there I'm going to show you what it looks like in action.
So right now you see it said indoor right there and, for example, let's say we put this plant right here once it focuses, it does say, green plants, so it really recognizes what the picture actually is of, and it helps it adjust the sensors to take the best picture in some comparison videos. With this phone I've done on the channel. I have noticed that the phone does take noticeably better pictures than some phones. I was comparing it to especially photos of this specific plant, and I do believe that this feature is part of the reason why being able to adjust the sensors based on the actual setting of the picture, really does help. Take the best photo possible now.
The last thing I'm going to go over is a little basic, but this is going to be how to take a screenshot, and this is definitely going to be useful if you're, either new to this phone or new to android in general, because each device does have its own unique ways to handle screenshots. So the first way to take a screenshot, that's the most basic and most well-known- is to press the power button and the volume down button. At the same time, that's all well and good, but there's also a way you can take a screenshot simply by placing three fingers on the screen and swiping. I'm going to show you how to activate this feature, because it's not activated by default, so you're going to go to settings, hit the search bar and once again type gestures once again, we're going to go to quick gestures and make sure the top one three fingers. Screenshot is enabled, with this enabled you're going to be able to take a screenshot so much easier instead of pressing two external buttons.
Once all you need to do is swipe on the screen, and it's so much easier. It really makes it that much better of an experience, the other really weird less known about way to take a screenshot that I'm really not sure why anyone would go out of their way to do is by pressing and holding the power button. The menu is going to come up, and you hit the screenshot right there. Now the only way you're going to be able to do this is, if you go to gestures like we did before, hit buttons and gestures, but instead of going to quick gestures, you're going to want to hit press and hold the power button now by default, voice assistant is enabled instead, but you're just going to want to hit power menu and that way, when you press and hold the power button, power menu is going to come up instead and that's how you get that option. But again, I don't really know why anyone else would use it when you can just swipe your fingers on the screen, and it just goes like that.
I think that's probably the most efficient way to take a screenshot now pressing the power button and the volume down button is not bad either. So really I don't know why you would ever need to do it from the power menu, but it is good to know that that option does exist, but this is camera tips and tricks for the OnePlus word n100. I hope you guys enjoyed the video and learned something new as well. If you did definitely leave a thumbs up and subscribe and as always I'll see you guys in the next video.
Source : Kevin Breeze
Phones In This Article

Related Articles


Comments are disabled
Latest Articles


