iPhone SE Battery Replacement Guide - RepairsUniverse By Repairs Universe
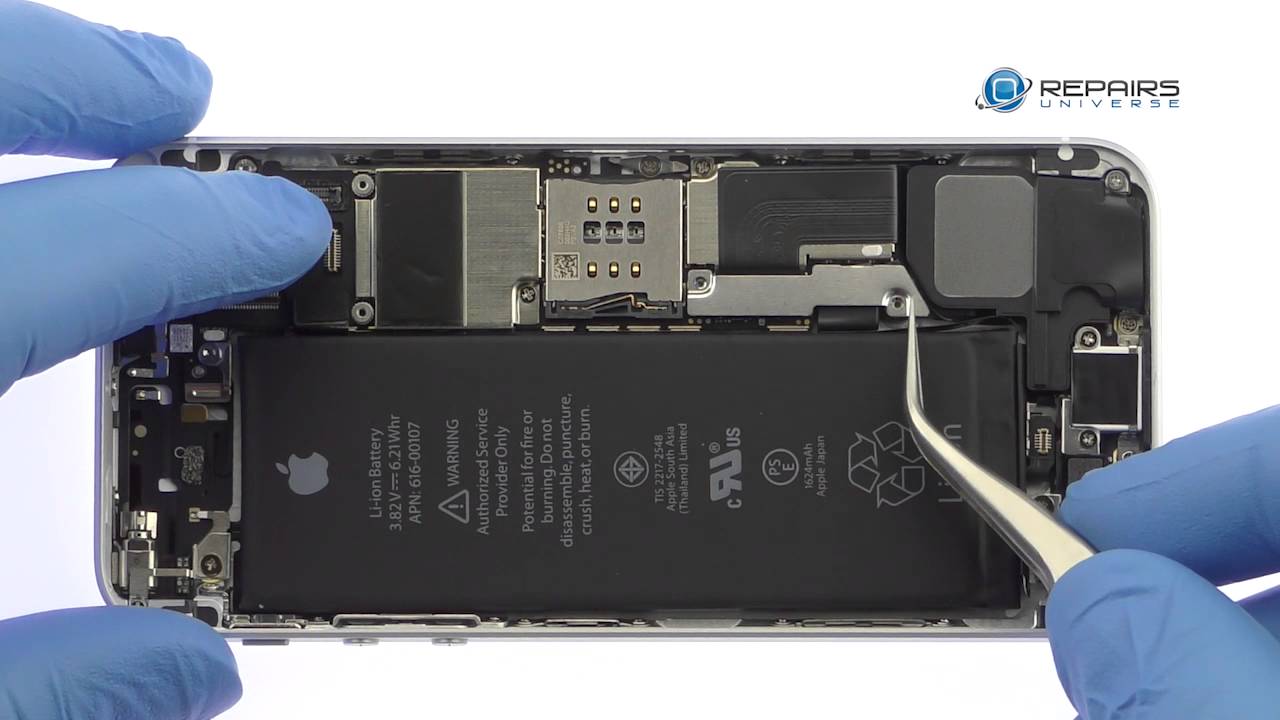
iPhone SE battery replacement, guide warning. You are performing this repair at your own risk. We claim no responsibility for any damages that might occur to perform this DIY repair. You will need a plastic triangle, opening tool, suction cup nylon, spider SIM card ejection tool, fine tip curved tweezers precision, knife said premium: two millimeter red adhesive, roll professional, Phillips, screwdriver professional, iPhone, pantalone screwdriver power down your Apple iPhone SE smartphone eject the NATO SIM card tray, remove the two bottom three point: four millimeter pantalone screws located next to the Lightning connector place a suction cup near the home button, while applying firm, constant force, use the plastic triangle, opening tool to work around the display assembly and separate from the iPhone SE rear case. Just like the iPhone 5s lurking beneath the iPhone SE display is the touch ID cable. Do not pull the display up too far without first removing the bracket and disconnecting the cable.
The display assembly is still connected to the iPhone by several cables. So don't try to remove it entirely. Just yet remove the following: 4 Phillips screws securing the metal bracket to the motherboard. These screws are different sizes, so be sure to remember where they go, use the fine tip curved tweezers to remove the metal bracket and disconnect the LCD digitizer and front camera, and proximity sensor, cables. Remove the following: 2 Phillips screws and bend the metal bracket with the spider detach the iPhone SE 3.8 full battery from the logic board, use the fine tip curved tweezers to peel up the adhesive tabs at the bottom of the battery, grab the tabs and try to keep the adhesive flat and wide slowly pull the adhesive away from the iPhone SE. The adhesive will stretch too many times the length of the battery keep pulling until they come out from between the battery and the iPhones rear case.
You remove the iPhone SE battery. You make sure to take a look at our other DIY smartphone and tablet repair. Tutorials, don't forget to subscribe to our YouTube channel like us on Facebook and follow us on Twitter.
Source : Repairs Universe
Phones In This Article

Related Articles


Comments are disabled
Latest Articles


