How to Use the iPhone 12 Pro Camera! By iTwe4kz
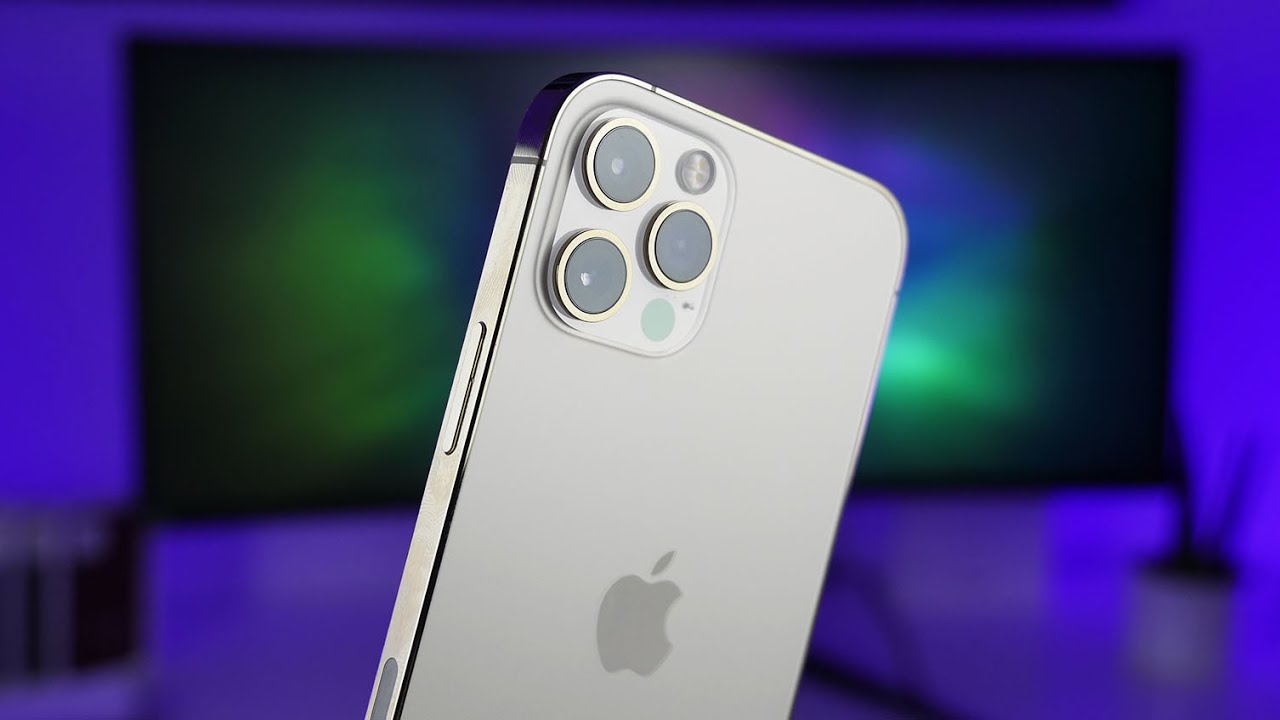
What's up guys code here today in this video, we'll be talking about the brand new iPhone 12 Pro camera. So there's a ton of videos out there right now talking about the comparison between the iPhone 12 Pro camera versus another camera. So, rather than making a video coming to the exact same conclusions, saying the exact same things to you in a different format with a prettier face, I figured why not take advantage of this time and do an actual video on how to take advantage of the camera app. How about that? Now? I'm just going to go out on a limb here, and I'm going to assume that probably 80 85 of the people that use an iPhone camera probably pick up your phone. You tap to focus maybe zoom in a little, and then you take a picture and that's the beauty of the iPhone camera is that you can do that, and you can still get amazing photos, but for those of you that want to take your photography to the next level or just make the app just a little more efficient and easier to use with not much effort at all than stick around and check this out. So before you jump straight into the camera.
App, let's go into the settings, so you go into the settings app, and then you scroll down here to the camera settings. So when we open that up, there's going to be a few things that we want to talk about here, one of those being the format, so there are two options for your format: there's high efficiency and most compatible. So I'm going to recommend that you have high efficiency and the reason for that it is going to reduce the file size, and it's also going to allow you to use things like 4k at 60 frames per second 1080p at 240 frames per second, so the slo-mo and HDR. If you have most compatible on there, which is just going to change the format for the videos and the photos to JPEG and h.264 you're not going to be able to use all of these options, and I like to use these options. So if you're not going to use those, you can leave most compatible, but I would recommend using high efficiency.
So now, let's go down here to record video, so record video is going to be the default. Quick. Take video that you're going to set right here. So I keep it as 4k at 60 frames per second just because I want the highest quality with the highest refresh rate. If you don't know what quick take is I'll show you that here in just a second once we get into the camera app so scrolling down here we also want to toggle on HDR video, auto fps, so auto fps is going to automatically reduce the frame rate to improve low light situations.
So that's gonna basically mean if you're, using like 60 frames per second, and you're, recording a video, and it notices that you're in low light it's actually going to automatically go down to 24 frames per second. In order to make that video look better. So the way that I keep it, I do auto 30 and auto 60 so when it finds those uh fast moving subjects. So if you're recording somebody like a soccer game or something any action sports or something where there's a lot of movement, then it's going to notice that, and it's going to bump up that recording to 60 frames per second. If you don't want it to automatically do that, you can just turn it off, and then you can set it up directly in the camera.
App and I'll show you how to do that. Here in just a minute so scrolling down here, we also have lock camera. So this is an option. That's a little finicky. For me, it doesn't seem to always work and sometimes if I mean I've closed out the camera app.
I have closed out of the settings app after making the toggle on or toggle off, and sometimes it just doesn't take effect for whatever reason. But what this does are it locks the camera. So let's just say that you're on that one time, standard lens, so you're not on the two times you're, not on the ultra-wide or anything like that, you're on the one times standard lens, and you start to zoom in while you're recording so normally when it gets to that two times. Zoom, it's actually going to jump to that other lens, so you're going to get kind of a jump in the video. So if you do the lock camera, and you toggle that on you're not going to get that, but the downside of doing this is its only going to be able to zoom in to three times if you're, using the one times, cam camera or the standard camera.
So I'll just show you right here. If we go and start recording- and we start to zoom in you can see that it didn't change lenses now this moved over, but that's just because it went up to two times zoom, but it didn't actually change the lens and the reason I know that is because one it didn't shift the lens, because the two lenses are in different physical positions on the phone. So you can actually see the jump when it changes. Also. The other way is by noticing that it's only three times.
So, if you use the other lens, it actually allows you to go up to six times. So we're going to close out of this- and you can see it just switched to this lens. So that's why it shifted in position of the subject. So if we just tap on this, it's going to go to the two times lens and if we start to record you can see we're going to be able to go into up to six times. So that's what that lock camera does when you toggle that on it just means that it's not going to change lenses when you start recording, and it's going to avoid all those jumps.
So as we go back, you also want to turn on slo-mo. In my opinion, I would definitely use the 240 frames per second, because it's available, I mean why not the only downside is, and the same thing goes for the 4k at 60 frames per second. Is it takes up more space? So just keep that in mind now, coming back down here, record stereo sound, of course, preserve settings. This is an option to where you can toggle on a couple of different things that allow you to keep specific settings inside your camera app. So, for instance, you can preserve the last mode, such as video, rather than it automatically going back to photo.
So, every time you open up the camera, it's going to be on whatever you close that camera at. So if we toggle that on, and we go into the camera, and we're in video, let's close it out, we open it back up, and we're still in video. So if you have that toggled off every time you close out of it, it's going to go back to the photo. I like to keep that off. I don't really want it on same thing for these two right here.
Furthermore, I really don't like to have these on just because, usually when I'm taking a video or a photo, it's in a different setting with different lighting almost every single time, so I usually adjust on the fly if I'm there, and I need to. But having said that, you do have the ability to save your last use filter your aspect, ratio, light or depth setting rather than having it automatically reset same thing, goes for your exposure, which I'll show you here in just a minute. You also have the live photo. I do keep this one on, so it preserves the live photo setting rather than automatically resetting it. So if we jump back out here, we also have use volume up for burst.
I like to use that, so I have that toggled on also show that here in a minute scan qr codes, you might as well have it on there the grid. I highly recommend having the grid on your camera, just because it allows you to use that rule of thirds and be able to frame your shot a lot better and just make sure that you have the subject right in the middle. Furthermore, I would highly recommend that one, you also have mirrored front camera and view outside frame, so for me or the front camera. This is just basically, you can see right here. If I go in here, and I go to the front-facing camera and I take a photo you're going to notice that it doesn't mirror it, it's exactly what we were just looking at, but if you toggle this off, and then we go, do it again, let's take a picture, and you can see that it's mirrored just like that, so you can either set this up inside the settings.
If you always want it to not mirror, or you always want it to mirror. You can do that right here, or you can do it really easily. If you take one, you can just go into editing and then flip it, so it is mirrored, but this is going to save you time if you always want it one way so right down here. Actually all these last four options, I just recommend having all four of those on. I don't really see it upside of having it toggled off if you're having some weird issue.
Maybe then you can toggle these off, but in general I would just keep all four of those toggled on. So let's jump out of this and go into the camera. So the first thing that I want to talk about is this green light right up here, so that green light means that your camera is on. It could be your front facing camera. It could be your back facing camera, but that just means that something is accessing your camera.
So this is going to be really helpful if an application is actually using the camera that you don't know about. So that's just something to keep in mind if you're, not using FaceTime or your camera app or streaming or whatever you're doing, if you're, not using something that you know is using the camera, and it has that green light. Then you need to take some action because something is not right now. The next thing I want to talk about are these little quick actions that you have up here at the top. So it's really nice to have these up top and really quick, because sometimes you need to pop out your phone and just take a quick picture before the opportunity is gone.
So you have your live photo right up here, and this is always good to have on, because you have the opportunity to change the photo, and I'll show you that here in just a second, but it's also really easy to turn off. You don't want to use it. You just tap on it, and it's gone now over here for the flash. It's the same thing you just tap on it, and then it'll go into auto, and if we cover up the frame, you can see that we have night mode that will pop up too, so that just automatically detects it. You can tap on it and if it's yellow, that means that it's turned on now, there's a lot more options that you can go through too and there are two ways to access those one of those is just by tapping this little arrow right up here at the top, and it gives you all the options down here.
The other way is to swipe up and that's going to give you all the options as well. I usually just swipe up or swipe to the left, just depending on what orientation I have. The phone in so down here you have a lot of options now again that night mode is not going to show up unless it uh senses that it needs night mode, and then, in that night mode section you can actually change the time frame that it'll take to uh expose and grab more light. So you can do that right there within that little section. If it is available now same thing goes for the uh live photo.
You can turn that on off or auto live, so it's going to detect when it needs to use that. So I usually like to keep it on just because, like I said it's going to allow you to change the photo if you need to so, for instance, if I have live photo on- and I drop these- let's just do it now, and now I can go into that photo tap edit, and then you can see what the photo is, but I can actually change the key frame and the way to do that. Are you tap on the live photo right here, and then you can change the key frame so which one is the best one? So that's going to allow you to give it just gives you kind of safety if you do think that possibly your photo's not going to come out great, or it's a moving target, and you just want to have the ability to switch it. So that's just an option for live photos. Now, let's jump back out and go back to our settings down here.
So next is the aspect ratio so right here. If we tap on this, we normally shoot in 4x3, but you can also change this to square, which is a one by one ratio or a sixteen by nine. Now keep in mind. If you take a picture in square or sixteen by nine, you still have all the data in a four by three pictures. So what I mean by that is you'll notice.
If I change this to a square that it's just going to literally shrink into a square, so it's going to crop it just like that so same thing for 16 by nine. So what I mean by that it is not going to actually show you more photo up here and down below, just because it's 16x9. What it does is it zooms in, and it crops the outside to basically crop it into a 16x9 photo now one thing to keep in mind: when it does this: it still is taking this photo. It's just cropping it for you. So if you go ahead and go, let's just say we're going to take a square photo, we take the picture we tap over here we tap on edit.
We can actually still access the 4x3 photo, so you can see we're going to change our crop to free form, and then we can actually access all that photo just like that. So, while you can't see that part of the photo it's still there, if you use one of these 1x1 or 16x9 aspect ratios, which can be pretty helpful when editing photos, so let's go back to the camera here, and the next thing I want to talk about is exposure. So right here you can set an exposure, so you can brighten it up swipe it over here or make it darker by swiping all the way over here now. Another way that you can do this without having to go into your settings is tapping and then just swiping up that's going to allow you to quickly access the exposure. You can also swipe it down now when you have something set down here.
Let's just say it's not on point: zero you'll get a little icon right up there, showing you what that exposure is at. So if I tap off this, it's gonna actually give you the 0.7 plus and if we go back to zero, that little icon is going to go away after I get out of the exposure. The next thing is the timer, so you have a timer right here. You have three seconds and 10 seconds, and it's going to show you that you have a timer right there. Also, if you're, taking the picture it's going to flash every second before it takes a picture just to indicate when that photo is coming and the last one is the filters.
So you can go through these if you'd like you can set them and then save them by using those camera preserve buttons in the camera settings. So, let's go back to the 4x3 now. The next thing I want to show you that you already know is that you can tap to focus on something you might not know is you can focus lock if you tap and hold that way, it's not going to change if you have several subjects or several things in the frame. So that means that no matter what it's not going to move, it's going to stay right there, but if you don't have it locked, and you just tap to focus, you can lose that focus because it's just going to try to autofocus. So you can see that square is gone, so you have to tap and hold in order to keep that focus lock.
So we'll go ahead and swipe those down and then swipe across to go to video. So for video you can swipe up, and you're only going to get two options right here. One of those is the flash. So it's just going to keep the flash on like basically a flashlight. While you record video, and then you have the exposure, so it's going to work exactly the same way.
You got your little icon right up there. If you do change something just to let you know now, the other thing to keep in mind is you can change what frames per second, as well as the quality of the video that you're shooting right up here, just by tapping on it? So if I tap on the 4k, it's going to go to HD, and we're at 60 frames per second. If I tap that it'll drop to 30 frames per second now, I noticed if you use the 4k 60 frames per second for the quick take video, then it doesn't actually give you the ability to access the 720p at 30 frames per second. So keep that in mind honestly, nobody should be shooting at 720p with these types of phones anyways in my opinion, but you know you do what you do. Speaking of the quick take.
I guess I should talk about that. Really quick so in photos you can tap and hold, and it's going to start recording a video now, if you want to continue to take a video and take your finger off, you can swipe it over to this lock to record video. Then you also have your shutter button. If you want to take a picture, same thing goes for the burst mode. So if we tap and then drag it, that's going to start taking a bunch of burst photos and in our settings we set up this volume rocker up to take burst.
Photos too. So if we do that, that's going to take burst photos too. If you use the volume down button, then that's going to record and then once you let go, it's going to stop recording so for slo-mo. You got the same options right up here at the top. You have HD, and then you can switch that to 120 or 240.
Furthermore, you get the same options in slo-mo as you do in video same thing. For time-lapse. You just have exposure. So if we swipe over here to portrait, you have a two-time zoom, and you can't zoom here, and you also have a one-time zoom, which you can't zoom it'll just go to one or two, and then you have all your different types of portraits that you want to take. If you swipe up here, you do actually have a couple of different things, one of those being your f-stop.
So this is just going to basically say how much depth do you want in your photo? So if you swipe it all the way to the right to f16, there's not going to be much there, that's going to blur. But if you go all the way to the left, then it's going to blur a lot. More I'll put my red bulb back there, and you can see that it's really blurry and then, as I move it across, it clears up. So it doesn't give as much depth at f 16, that it does at f 1.4 so set that up, however you'd like, and you also have the exposure, the flash, the filters and the timer, and then you can just swipe through right here to change which one you want now as you swipe through some of these actually, almost all of them. I think, except for the natural light yeah all, but the natural light is going to give you this light option.
So how much light do you want to let in, so you can swipe that all the way to the right or all the way to the left and that's just going to give you or show you how much light you're going to get since it's really bright in here, it's kind of hard to see, but it is, I mean you can kind of see it up here where this uh faint purple is, if I swipe all the way to the right it's going to get brighter. If I swipe to the left, it does get a little darker now one thing to mention on zooming: you can do this in photo and video is you don't have to just tap right here, and you don't have to pinch to zoom. You can tap and hold on these buttons, and it's going to give you the option to very slowly and more precisely zoom in so just tap and hold, and then you're ready to go, and you can do that on photo and video just to show you. So the last thing that we have here is panorama and really the only thing. I wanted to tell you about panorama.
First, if you swipe up here, there's there are no options, there's nothing! You can do here other than change the zoom. So you have the wide angle, the standard and the two times. But the way to take a good panorama photo is by rotating, so rotate your phone rather than trying to pull it across or move it across as you're trying to take. You know a landscape, and so what I mean by that I'll try to stay in frame as I do this, but trying to move like this, in my opinion, is just harder to do, and it takes more effort- and I can only go this far because my mic's right there, but if you start like this, and you just rotate so hit the piano and just rotate the camera you're still getting all of that space just with a lot or a lot less movement, and just to show you the difference between moving like this and then moving all the way like this. The amount of time that it takes.
You can see not to mention that looks really jittery. As you can see, I mean that just doesn't look good and that you know that's partly because me, but you can see it's a lot easier to just rotate. You get clearer pictures. You have more control, and you're not going like this, so you cover less ground. Furthermore, you can even pull the phone in closer to your body and just rotate your body and that's even more stable and even easier.
So that's just my little tip on panoramas. I actually took a really nice panorama uh in Colorado. Like a month ago, I went on a hike and I got really high up there. I think it was around 12 000 elevation and I took this really nice shot, but that's all I have for the camera app. Hopefully you guys learned a thing or two or just hopefully made things a little easier to set things up in your camera settings app to make the camera app a little easier to use all right guys.
That's all I got for this video hope you guys enjoyed it and if you did make sure you hit that like button, if you guys want to be notified when I post a new video make sure you hit that subscribe button and turn on those bell notifications- and I will see you guys in the next video.
Source : iTwe4kz
Phones In This Article
Related Articles


Comments are disabled
Latest Articles


