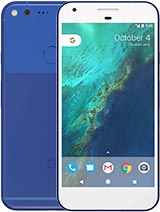
Google Pixel 1 LCD Screen and battery replacement By iSmart

You, hello friends, welcome to this new tutorial today. I have here this Google Pixel, and this is the pixel 1 and the problem on it is the battery. So today, I'm going to show you how to replace the battery I already ordered this one online I think it's like 11 12 dollars. You can order it on eBay or Amazon by the way to order the electronics for the electronics parts for the phones, it's better to order them from eBay, but always check. Also, on Amazon. You may find a good deal, but most of the time you don't find everything on Amazon.
You will find it on eBay. So this is just quick advice so today to replace the screen to replace the battery on this phone, we need to remove the screen from here to remove the screen. It's very risky. We may damage this one and that's what happened to me. I was like doing it in rush and I miss up this screen.
So today, I'm just going to give you some other advices how to lift the screen from here without breaking it, and hopefully you can get it done successfully. Alright. So to do this job, you will need a battery, and you will need a t4 or t5 or t6 screwdriver, because if you don't have special screws screwdrivers you may not get the right screw to open the screws inside I mean the right screwdriver to open the screws inside, so I have here the t4, and also I have here the t6 a tank. This is the t6 also we will need an IC, semi and tweezers, and we will need like some plastic cards like this, make sure you have plastic cards very thin, not thick, and also you may need a guitar pick. Something like this and I think.
That's all. You will need a glove more like because you're going to heat up scream should we need a glove like this. Then you will need a heat guard. I think that's all what you need all right. So, let's start the first.
First, we're going to heat up this screen carefully, and we will spread the heat all over the screen, just the edges and then maybe like two or three minutes, and we will make sure to not focus the heat like this in one spot, but we will need to like heat it up this way, all right, and once it's hard enough, we can start like peeling it off. Okay, so I'm, just going to show you how to heat it up just like this and so make sure bones, focus, delete and one spot like this, because if you focus then it in one spot, you may damage the LCD in the bar okay. So once the screen is hot enough. You're going to use this icy semi to make small gap like this here and make sure. Don't we go like this or like this or like this just slide it gently here and make a small gap just like this, and once you make a small gap there, you cannot use this play card or the plastic, and you can insert it here so once you insert this one here, you're just going to slide it gently until you release this part once you release this part, you're going to use another card, and you will slide it here, gently just on the edge here? Don't go deep inside until you release this part.
Okay. So once you release this part, you're going to lift this corner like this, and you will and set this one and go deep. But when you go deep inside here we have a cable. You make sure don't if you feel like this one stuck just gently if you feel like it's stuck somewhere, just pull it a little back and keep slightly like this, and here also there is a risk, because the cable is folded in this part here, and then you're going to slide. Just gently make sure this card doesn't reach this point here in the bottom, because the cable is folded exactly right here and if you slide this one deep inside you're going to cut the cable which is inside here and keep doing like this.
Until you release the screen from all the edges screaming by the way, sorry the open, so I'm just using it as an example, you know alright, so once you release this one you're going to be very careful once you open it like this, you're going to pull it this way, then you will find the thing here. So why? Why I'm telling you to not slide it here, because, as you see, I cut the cable from this corner here this cable? Is it cut with this tool? So that's why we already have a new screen here that I'm going to replace during this repair all right. So once you open the screen like this, what you're going to do you're going to open these two screws here? We're gonna use this screwdriver to remove this bracket. This is the first one. This is the second one, this bracket, which is next to the screws.
Then I'm going to use this icy semi, and they will pry up or peel off play up this gently very carefully because we have some components there. I don't want to damage the components there. You can use your man. If you have a long line, you can use it and that's it. So we remove the screen.
So here is the damage will happen. So when I was like sliding this one here, I go here, and they cut this cable. This card stocks here, and they cut the cable I cut the cable. From this side you see- and this is the K which is cut a car from here, and then I need new screen. So that's why I already got a new screen here.
Alright, so now after I opened, the opened the remove the screen. I need to open this screws to reach to the battery. So we have here: 1, 2, 3, 4, 5, 6, 7, 8, 9, 9, 9, screws, and I'm going to use the same screwdriver make sure you are using the right screwdriver cause. If you don't use the right screwdriver, you may damage the screw, and you will never be able to open this one. All the screws are the same, so don't worry about mixing them up all right, so I still have some screws stuck in here this one.
They have two more stuck in here, so it's not a problem so as I'm going to do it we'll use this I see semi, and they will assert it here between the frame and this middle frame break up. Make sure you remove the SIM card tray from here, so I remove the SIM card. I feel like something is holding here. I think there is a screw and I need this spot here. Let me check: no, it's not screw.
They just can't go ahead, all right, so a release. This part make sure don't go deep inside because you may touch the motherboard all right. So once you release this one, we have small cable here, make sure don't cut that cable, okay, release it all right. This is the middle frame. So now we have the battery right here.
So what we're going to do we're gonna, disconnect the battery maybe's connect the battery, make sure you have the right battery open this one. Sometimes, even if you order the right model number, they may ship you the wrong one and always make sure you compare what you get with what you have all right. You see this path. We should be like this all right, so this is the right battery. So what I'm going to do now I will remove this cable from here, because it's on my way so that I'm going to I will disconnect this cable birthday is already disconnected so now.
I need to remove this ability from here. I will try to do like this. Make sure that walk the battery all right. So this is the new way to do it. So I'm going to do I will connect it first.
Okay, it's connected, then I will place it in its place by the way we already have the adhesive here that we going to hold the battery, so you don't have to add more adhesive right. So it's connected very well. So now I will reconnect this one back all right. So I connect the battery, so what I'm going to do now I will put. Let me remove this glove, so what I'm going to do now I will put this like a.
We connect, this cable here, okay, it's connected, then I will, and we clip it, and we'll connect it from the top first. We will connect this cable again because it got disconnected all right, so I clip it now make sure it's connected very well all right. So what we're going to do now we're going to test this screen so to test it. We're gonna, just connect. This cable right here make sure these two connections are matching together, don't use any force.
Other songs are going to direct like this. Let's just connects it, then what you're going to do we're going to turn the phone on all right. As you see it turns on I'm just going to wait for it to turn on by the way. While we are waiting, we will need a double sticky adhesive. This is I forgot.
To mention this. We will need a double sticky adhesive, some people. They are using some kind of group, but anyway, so I'm using the top stick. Adhesive this is, you can buy it online from eBay or Amazon. It's not expensive.
You can buy something like this big one. If you are cell phone repair technician, you can buy this one, it's. It will like to help you to fix, like hundreds upon hundreds of phones, but if you are using it just in your phone, you can buy the smallest one. Something like this: do you have different why'd? You buy the double sticky adhesive. This is the 3?m double sticky at this.
If you find it online all right, so the screen is working normal now. So what I'm going to do? I will turn off this, and they will put the adhesive around this screen. So always the screen. When you try to open it, you open it. This way.
You need to fold this cable here then disconnect you can use your name, or you can use something sharp to reach down. Okay. So what I'm going to do now? I will put the screws back. Then I will put travel this part here with adhesive, and they will remove all the residual here from the old adhesive make sure there is nothing crooked here, and we will go from there all right, so the frame now it's very clean. What I'm going to do I will put adhesive I will put two strips of adhesive from the top to the bottom, like this and another strip from here to here.
As you see, I didn't cover the camera lens and the earpiece and the proximity sensor without hiss. If we cut a little piece from here to not answer up, the cable also I have a screw when I get that's going to go here all right. So now it's time for the NCD. So before I connect a CD here we remove the plastic, which is cover and adhesive all right. So what I'm going to do now I will connect this cable.
Then we put this bracket here all right so now that the cable is connected, which I'm going to do I will turn the phone on and test it before I glue it down. We put the sim card tray back. Okay, it looks like it's working good, so what I'm going to do now I will make sure it's matching with the frame perfectly then I'll, it is go down. No, there is something wrong here. I forgot to put there is a mesh that needs to be here on the NCAA this one.
You have to lift it up, one more time and I hate that need to make sure you don't forget anything. So this is the mesh that we need to which work I will find a way how to answer it inside here without damaging my screen all right. So let me lift the screen little, I'm afraid to break it again. That's it as you see they glue the screen before they make sure it's perfectly finished, and I forget the mesh, but I put it back safely, so the screen is working good, alright guys, so that was how to place the screen on the pixel and battery. So if you are doing this job for yourself, you may need to order a screen with your battery in case you damaged it, but you can give it a try before you order the screen.
If you don't need your phone, because once you break the screen, you will not be able to use the screen until you get the new one all right anyway, so that was how to replace the screen and the battery on the Google Pixel. One I think it's going to be like the same on the other Google pixels, and if you find that this video is helpful, please hit the thumbs up. Also share this video with friends. If you have someone who have the same phone on a stranger place screen, if you have any questions, leave them in the comment area, I will get back to you as soon as I. Can, thanks for watching and see you in the next video have a wonderful time.
Peace.
Source : iSmart
Phones In This Article
Related Articles


Comments are disabled
Latest Articles


