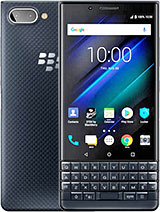
Blackberry Key2 Screen Replacement By AverageCanadianTech
All right so today we're doing a blackberry key to screen replacement, customer Brody's phone right up in the corner there, and now the touch on the side turned off right now, but the touchscreen at the bottom, where the class and buttons are keeps enabling Google Assistant without his hand there so needs the screen, replaced ASAP to get it working again. So that's what we're doing today! You can start on that right now. So the first thing you need to do is just get a pry tool of any sort. I usually use a knife or something you can use a metal pry tool. If you want as well, you just got to heat up the back a little and then peel it off basically wedge a tool in there. When you can,, it's going to be a little hot.
It's gotta find a good there. It goes hey just going to shimmy it out of its little thing. So that's there! Now you can just kind of slide your finger pry tool around the perimeter of the phone, and it should lift. If you heat it up, the glue should come away pretty easily. Nothing to really worry about too much.
There goes the pack, it's I'm too hard. There just put that to the side. Now we have to remove all the screws that go around here. Take your time with that I guess they're all Phillips head, so you's having a problem out there. That's just the best beside the point.
I guess so got all the screws out, I'm pretty sure. So now, I just got to moved about the plastic. The speaker unit down here is attached to all of it. Pry that out go also. One thing I forgot to do actually is disconnected these incentive ribbons just to let go down here after you remove the speaker just so you don't.
When you're taking off the black plastic because, they do run along the top. You don't want to break that or anything like that. You know just remove the speaker. Your neck comes out pretty easily once it's bright out now remove there's two just peel those back and now the other black clay should just come on out there. We go top layer, give us an issue, but that's alright and yeah.
Now for the screen disconnect the battery, obviously disconnect it right up here, disconnect that and as far as I can tell I, don't think you're going to have to do too much extra to get the screen out like you could take out the motherboard if you want technically, but so the connector for the screen, which is this guy right here, so really I think because yeah I should just fit right through, so I guess thought you could take out the motherboard if you really wanted, but this connector is thin enough that you should be able to slip it right between the board in the battery when you put the new screen in and just go from there, so you don't really need to do too much extra on the phone right now. I guess the only thing I might recommend doing in actually yeah. You know what we're going to take out the motherboard just to be safer than sorry. Just because why not I guess might as well be more thorough with the repair done right. So just disconnect all the connectors put it all out the way camera something if there's five so yeah.
Now with all that disconnected we should be able to. You know, come on the board. Go now the motherboard Chicago there Oh convenient yeah the battery connector is what was holding it down so now after that long struggle. Now that the motherboard is out of the frame and everything now we're just gonna heat up the display up front, and then we'll just pry it off and then put the new screen on, so I'll be back in a minute, I guess whenever that's done heating it up pretty well by now. So let's just get this screen off of it, so this screens already broken so no need to really worry about damaging it in any way, and that's how the display comes out.
I mean I said this one's already damaged too I kind of bit more reckless on the part right there. But this is already donen't work. It's not a big deal anyway! So you know what we got to do is clear out any debris. It might be on the side like there's a piece of glass right there. As you see, you got to make sure there's nothing on the edges or on the underneath.
So you don't damage the new screen just take off that piece of glass, the screen. It's probably her, it'll Bend these cables too much, but they are meant to bend right there flex cables, so you can bend them a little just to get them slightly to align better when you're policing the screen in that's. You know you just got to clamp it down for a few minutes and let the glue dry before you start reinstalling everything, and then you just got to go backwards from what you did earlier, and we're pretty much done the repair at this point. If you applied the screen carefully enough, you should not have broken anything. Yeah, wait.
A few moments for this to dry and I will be right back when it is ready. Go so now the screens pretty much dried on. We just have to reassemble the phone, as I said to okay start with the motherboard, should just plop back in the place. Whence it finds his little groove yeah, all that's left to do is just connect everything again display. It's actually held our fun so yeah.
Now that all the connections are in, you got the battery everything all connected. I guess you're not supposed to put on the battery before the for like connection, but these antennas don't really matter too much for that sort of thing. First, we'll put in the top. Okay just hold these back. Remember it goes in on top, so put this in first, just click that back in now we can reroute the wires they're.
Sad now just got to put the screws back in the same order. They came out after I, don't forget one piece in a very forgetting, very important piece- the speaker assembly down here you, your phones, pretty much done the pack back on once rares done now, so I already have that turned on everything. As you see, fully working Oh issues touch on the keyboard still works, so good repair, complete.
Source : AverageCanadianTech


![The BEST Phone Under Php 10,000? [Xiaomi Redmi Note 10 Unboxing]](https://img.youtube.com/vi/2Ip54mnvaZs/maxresdefault.jpg )


![Samsung Galaxy A7 [2018] with Triple Camera // A Glimpse into the Future — EOTO Tech](https://img.youtube.com/vi/Wly9Mx2whdQ/maxresdefault.jpg )


