Apple watch teardown ( battery replacement) done successfully By iSmart
Today we have here upper watch to the eight meter, so I'm going to show you how to place better on it. I have the data right here, very tiny battery small and the to do this job we'll need. Maybe this one, this cutter and me with- and this is a loop and maybe these tweezers also, we may need this pry tool and this guitar pick also. We will need a glove and a heat gun alright. So to start, we can, I remove this list. I mean this pet.
Just push the button here. We have a small button here, push and while you, while you are pushing slide it okay, so the first thing we're going to do. I will heat up the screen with the heat gun for couple minutes, but coup minutes, but coup seconds, neutral role. Don't you come up, we may vote in bathroom, make sure don't use too much food and keep like reading the heat all over the block, for maybe like 30 seconds up to warming, the difference on how hot the Big Valley alright I. Thank you -? What so, when you cannot like our check? That means it's hot enough.
After that we will use this cutter, and we would like to slide it here gently and make sure don't use any force, be nice all right. Let me try to use the sesame I. Think I need more heat with a little more okay, we'll use the ISIS em again, I hope I, don't break the LCD. Keep your fingers clear from the LCD, because, if you click like holding like this, you might like to push it down and hold. It will not come up or come off, I'm afraid to break this screen.
Okay, we will use more heat again, as you see, I'm trying the ICS mo and, at the same time, I'm trying the knife. The cutter. Alright, as you see, I, lift it up from this side and make sure don't put this thing deep inside. There are like many cables you may like to cut, and you see any see this cable, this ribbon cable here it is like a lot of lines there. If you carry just a small cut, is not going to work so make sure won't damage anything, and once you have the screen lifted like this, just like gently pull it up, but don't just lift it up all the way, because we still have like some cables connected to the LCD all right.
So it's not enough, but you see I told you. I may need this one and the tweezers and this one, but that's why I will x10 baby so now, I didn't I, don't again need them. I may need the tweezer right now, all right, so we have like small bracket here. It's on top of the cables and I still don't know how this bracket can like be disconnected from here. Also, I will try to disconnect it.
I know that this bracket need to be removed from here ensuring exactly which bracket. It's not you, this small bracket, this one. So this one is like clip and the cables are inside, so I need to move that bracket to have access to the cable, to disconnect the cable. Actually, if I'm replacing the battery I won't have to disconnect this cable button just like trying to disconnect it just to show you how to give you like a clear view on what's going on inside and how the battery going to be like, remove it or misplace it on I, don't know there may be like I. Remember, I open this before, and there must be like easy way to remove it, but we call it four bits: I'm, just like trying.
Wherever I can, you know I'm still trying I don't want to damage anything in sight? I always seem to think so. This sprocket has, like small plugs in this side, see this one, it's exactly on this side, and it has like a hook from the other side like this and drawing it like this. This way this is a prime. So this is the bracket, so the hook is from this side. It's coming like this around and small prongs on this side.
So to take it off, you start from here, and you flip it okay. So now we have some cable here. I need to disconnect. This is one I have two cables. You can use all your heads or use the tools but make sure don't damage any connection there.
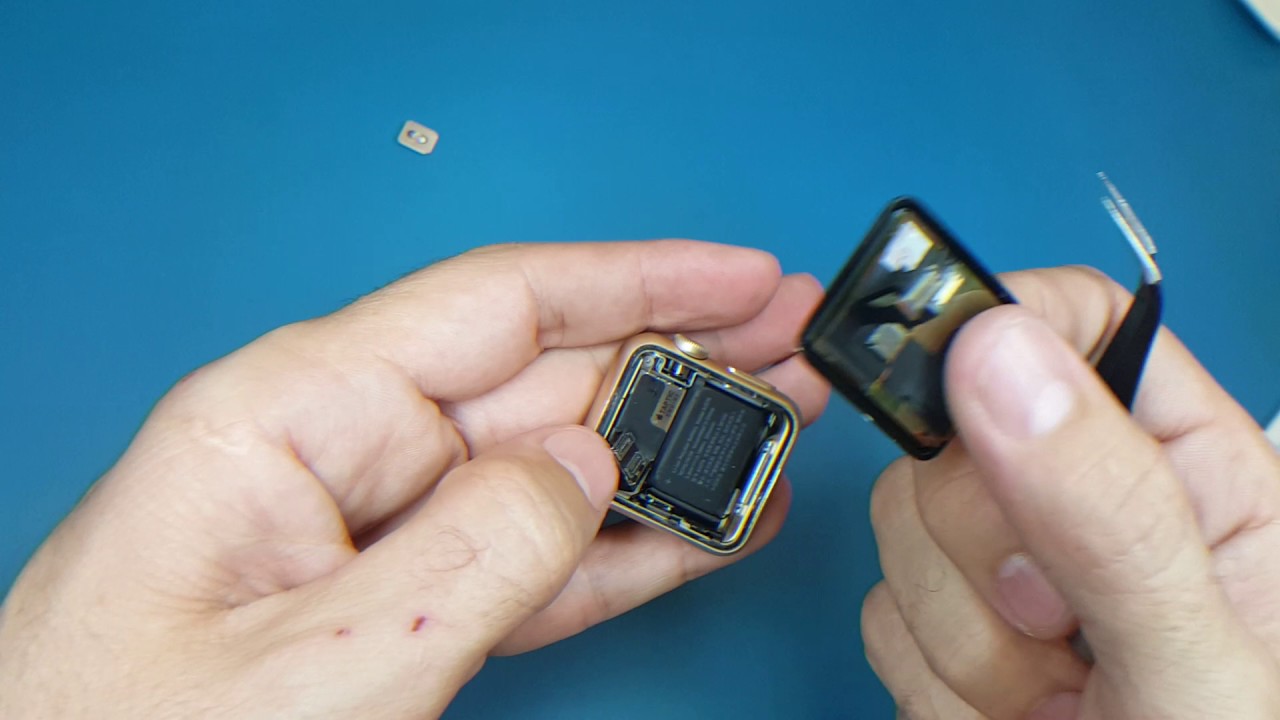
So when you let up the cable, make sure you lift it up gently see the connection here. Alright, so now is the time for the battery put the battery. You need to lift it up from here and once you have the battery like, because it's glued to the frame here once we have it listed up this way, you just need to disconnect it. It has a connection here. You need to disconnect it.
Try to use your nail to hold the first part and pull up the other part. Okay is disconnected, so this is obviously, and the new battery is right here, so until kind of disconnect I'm just going to connect it the same way you as you see, so this is the bedroom. I connect the cleavage like this all right, and I push the Cape use the battery to push the cable to connect, and was it connects. I put it back here all right, so now it's time to put this claim back same way. Furthermore, I took it off I'm, going to put this back, but I will, like the support, spoke.
The cable I support it with my nails with my tongue like this, so the Kevlar is on top of my net and I will just take this case from here and reconnect em. Okay, let me try this right. This way you see like I'm holding them. This way, I will connect the cables one by one I'm connecting the first one it's connected, and now the second one. If you see that this is the screen you like it, flip it over so after that I put it this way, but before I put it that way, I will put this bracket back and this bracket is I, told you.
It has one side here it has like a hook. You see this one and this side it should be like inside. So I will just like put it. This way, put this side first and after that, a static and is connected all right. So before I glue, this back I will just turn it on believe or not.
I, don't know from where distinct turns on, because I'm not really a big fan of these approaches. So, let's not from here not for me. We see what a shame give me. One thing, let me figure out how to turn it on alright, my friends, I think this thing is not on, yet I mean the battery is natural, so under this is the chart. I will put it in charge all right.
So what is char? What it had like some juice on it, I will finish this repair all right. My friend I'm back, it seems like this thing is taking a long time to charge. It's still charging, as you see, so I just decide to finish this repair and leave it in charge later on. So, as you see the better, it looks like it has no charge on it, so what I am going to do, and we'll just finish the repair, and they'll put it in Java and of time. Sometimes it takes like maybe 30 minutes just to turn on and after that it starts like charging normal, because sometimes if the battery is totally like empty, there is no juice on it.
That's why it takes longer to just like start anyway. So the second thing after I put the battery here. If the adhesive here is like still sticking, as in my case, you're just going to put this one back here and snap it and try to pull it up and see. If it's like going to come off easy, you see, it sticks very well, so I cannot remove it. If it doesn't, stick very well here, try to put like some adhesive or around it.
Sometimes you need to buy the adhesive, which is coming with the screen by the. It's like two three dollars online before we start doing business all right so I. That was how to replace the battery on the Apple Watch, and this is the old birthday and everything is done successfully without any damage and I hope. You like this like disappears, and if you learn something, please don't hesitate to hit the button like and if you have any questions, please leave you leave it in the comments and also don't forget to subscribe to my channel for more videos. Thanks again for watching and see you in next video.
Source : iSmart
Phones In This Article

Related Articles


Comments are disabled
Latest Articles


