50+ Tips and Tricks for iPad Pro 10.5 Inch (2017 Model) By sakitech
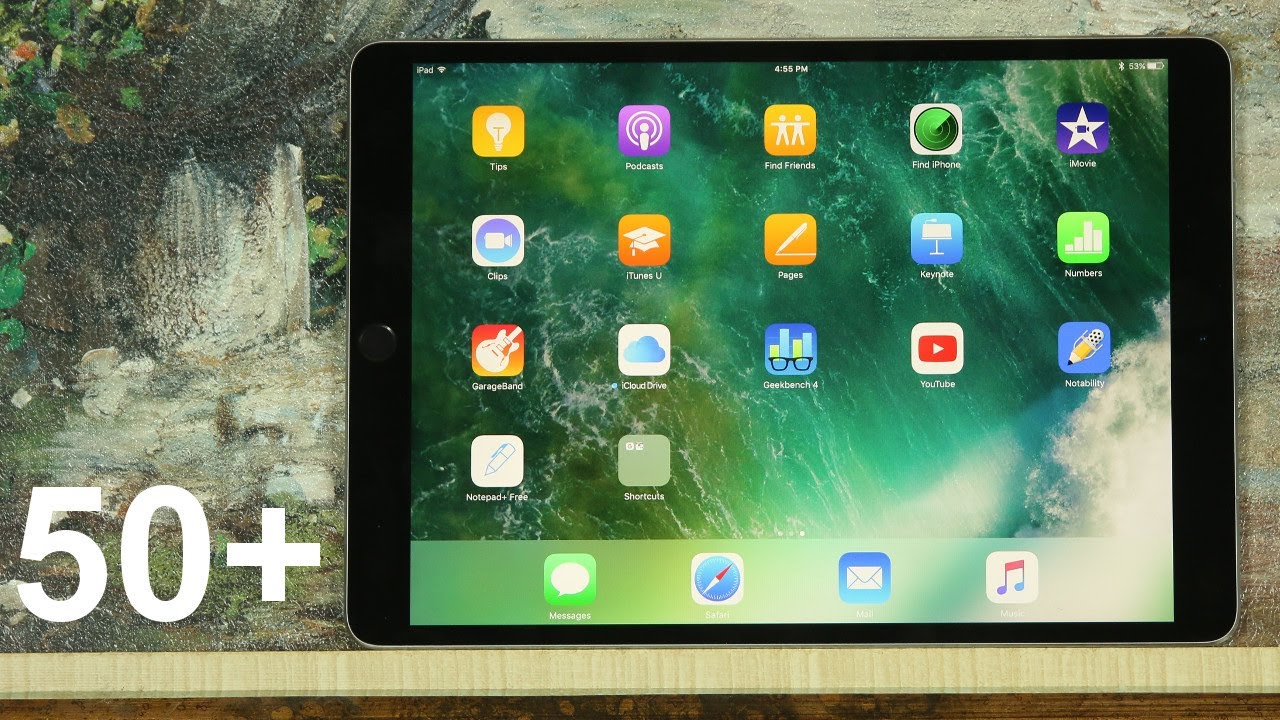
Hey there's sake here from sake, tech and in today's video I would like to share over 50 plus tips and tricks for your iPad Pro. That will enhance the use of your new, powerful iPad I want to make sure that you guys master your iPad Pro alright tip number one: how to access the spotlight search from any screen, so, let's say you're in Safari. Normally what you would have to do is you would have to be outside and you either swipe down or you swipe the left to access the spotlight search. But with this option here you can be at any window such as Safari, and all you have to do is slowly swipe down the notifications panel and the spotlight search becomes available immediately. Now this is slightly different from pulling down the notifications panel. You can do that as well and there's a spotlight search, but this way what you do is when you swipe it slowly and just stop right there.
The keyboard comes up, and you're ready to go for your search. Now let me take a quick pause really quick before we dive into the remainder of the tips and tricks. Let me announce a massive 500 product. That's right, 500, product worldwide giveaway, all you have to do- is pay shipping and handling for this I partnered with the people or at boson comm, which is this fantastic store that sells accessories for just about any of your Apple products, and they have agreed to give away 500 of the following products for iPad users, a beautiful leather sleeve for iPhone users and ultra clear iPhone case for Apple Watch users. A tempered glass screen protector for iMac users, a webcam cover and for MacBook users, a USB to USB, C adapter.
So to get a product all you have to do is go to the page in the description below click on the product. You want to add it to the cart and use the promo code, free tech to get a discounted off your order. Also, if we get four thousand likes in this video Roseann comm will add another 500 products. Now, please keep in mind that we want the most people to enjoy the giveaway. So all packages are sent individually to avoid people ordering a bunch of them in the same package.
Alright, so let's continue with the tips alright, so the next step has to do with Safari. So let's say you have multiple tabs running on Safari and you want to close them all. At the same time, it's actually very doable. So normally what you would do is you would tap on this X to close a tab. But if you have a bunch of these running, let's say you have a hundred of these tabs open, maybe 20, maybe 30 whatever all you do is tap and hold on this icon right here and wait till this option show up that says close to taps.
Now, if you had ten tabs, it would say close ten tabs. So, let's tap on that and both tabs are gone alright, so the next step s it with a notes' application. Basically, this allows you to lock down individual notes, meaning you can password protect individual notes, so only you can access them using your fingerprint or using a password. Let me show you what I mean so, let's launch the notes. Application now, as you know, we can have as many notes as you want now.
Here's a note that I just created for the sake of demonstration. It says this is private. So what if I wanted to lock this note down, so nobody else can access it. But me all you do is tap this share, icon right here and go to lock a note and from here. If you have a fingerprint security, enabled it's going to ask you to touch the touch ID sensor, to lock this note or if you haven't done, that you can simply enter the current password and that's gonna.
Allow you to lock the note. So let me just use my fingerprint, so you can see how that works. Lock, note I tap right here and boom. That lock has been added to that note. So, basically, let me just exit this area, real, quick.
Let me exit the notes, application, let's go back in and let's say, I want to access that note. As you can see, I get no information. Now that's the title, so the title is going to remain there, but you do not see the contents of the actual note. If you want to view the note you tap this, and then you simply put your fingerprint back on there, and it's going to unlock the note and show you all the contents inside absolutely fantastic, all right, so the next tip has to do with restriction. So basically you can add restrictions to your iPad and all this falls under the security umbrella.
So let me show you exactly what I'm talking about so just take a look at Safari and App Store and just remember that they are over here. Okay, let's go into the settings, really quick, let's go to general and let's go into where it says: restrictions tap on it and what I want you to do is tap on enable restrictions. Now, when you enable the restrictions for the first time, it's going to ask you to pick a passcode that is independent of your passcode that you used to unlock the iPad. This is a completely separate passcode just for restrictions for demonstration. Let's make a simple one up.
So that's zero, zero, zero! It's going to ask you to re-enter it, and now the restrictions are enabled. So basically, what it's saying here is: do you want to allow these apps to exist or not, so I can disable. Safari I can disable camera and when I go back out, as you can see, Safari and the camera app there disappeared, they've been restricted, so nobody else can use them now, if I give them my iPad and of course that's not everything that you can do, let's go back into settings really quick. Let's go back into restrictions now, when you exit the restrictions that you try to go back in. Obviously it's going to ask you to put your password in that's how it's protected, so you can disable all these things.
You can disable Siri, you can disable FaceTime and you can disable airdrop. You can also disable people from installing deleting or performing in-app purchases. So here it says in sewing applications, let's disable that let's disable deleting applications and also less disable in-app purchases. This one really helps because sometimes you give your iPad to a kid, and they go into a game, and then they go nuts. They just buy anything that they can.
So if you disable in-app purchases, that's never going to happen. Anyway. Let me go back out really quick and when you go out, as you can see, the App Store has disappeared and if I try to delete any app by tapping and holding the option, the little X symbol that shows up on top of application normally does not show up, so I cannot delete apps, install apps or even perform in-app purchases. Absolutely fantastic! Now, there's some more things going on in here: oops wrong, many restrictions. So let's go back in now that you know that restrictions is an option that you have.
You can go here, and you can look at all these different options. You can disable if you so desire. So these restrictions give you a lot of power on restricting your iPad, especially if this is something you're going to be given to your friends or family members all the time. Other people do some crazy things, alright, guys. Let's move on to the next tip, alright, the next step.
So basically, let's say you have something that you want to select for copying and pasting purposes. Normally what you would have to do is you have to tap this and hold here? That brings up that select window. Then you tap, select, and you choose and all that stuff, and sometimes it's in fact a pain in the ass to select the text. So you can copy and paste it. What you could do is you can use two fingers and put those fingers together on the keyboard and that allows you to select a given text with laser precision.
Okay, as you can see, I can select just that part, and then I can just tap on it and I can copy and paste cut whatever I want to do. Okay, so use the keyboard as a selection device. Now the next day pester with some security features, and before I go into the security features. Let me quickly show you this right here. So I'm sure everybody knows this, but when you pull this down, you've got the notifications panel.
When you pull this up, you've got the control center. Now. The funny thing is: the notifications panel often has private information on it. So it makes sense that you can access all that information when the iPad is unlocked. Okay and same with the control center, you can go in here.
You can access your lights from the home panel. You can access your music player, and you can access some controls on the iPad from the control center and again, it's natural that you can control these when the iPad is unlocked. Now what if the iPad is in fact locked? Let me lock the iPad really quick and then unlock it, not unlock you just turn it on, and I can still access the notifications panel and if somebody had sent me a message, a private message or whatever any kind of information is going to show up right here, even though the iPad is locked same with the control center, anybody can access my control center, and maybe they can go over here and turn off the lights in the living room or whatever. So to restrict this from happening. What you want to do, let me just unlock the iPad: go into the settings, go to touch ID and passcode then put your password in which I just did and make sure you scroll here and choose all the available options, so this says: allow access, one locked, and they're all enabled, so everybody can access.
My today view my notifications view Siri and home control, even when my iPad is locked, but if I disable these and now, if I turn my iPad off and let me turn it on I cannot access the today's panel, the notifications panel, now control center is still accessible, and the reason is that you have to turn that off from a different screen. So let's go back in what you want to go. Are you want to go into settings this time, instead of going to touch ID and passcode go to control center over here and again, access a lock screen, disable that option and when I turn the iPad off this time and turn it on? It's not gonna. Allow me to access the control center, so thankfully my iPad isn't a total lockdown. Now, going back into the touch, ID and passcode over here, let me put my pin another thing: I want you guys to understand this over here.
It says fingerprints, so it says finger 1. Now what is finger 1? What? If you were trying to manage your fingers? Let's say you go in here, and should delete you're trying to delete a fingerprint. You don't even know what finger you're talking about so anytime. You scan your fingerprint make sure you go in here and rename it. So this one is my left thumb, okay, so that gives me a better understanding of what fingerprint I'm about to delete or modify.
Now, while we are in this security setting, there are two things you have to make sure our hundred percent enabled now make sure the requirement passcode is set to Amino. So that means anytime. You lock your iPad, it's locked immediately. It doesn't wait for the iPad to get locked, and the other thing is at the bottom here says: erase data you can enable this option, but this option is a little dangerous, but it's also very protective. So it says if some way tries to access your iPad, and they try to keep guessing your PIN.
What they could do is at some point. They could guess that if they try all these different combinations, so this restricts them from doing that. So, basically, if they put the passcode in ten times in a row incorrectly, it's going to erase the iPad so only enable this option for maximum security and also make sure the iPad is in fact backed up. So if someone does end up messing your iPad by deleting all the data by trying to guess your password, you can at least restore it back all right. Let's move on to the next tip! So next up, let's talk about the floating menu so to enable this menu, let's go to settings and just go up, go to general and then go to accessibility.
Now, once you're in accessibility, which, whoever is your want to scroll down to where it says, assistive touch and enable this little floating menu. As soon as you do that you're going to see a little black icon on the screen that you can simply move around and put anywhere on the screen. Okay. So what are the functions of this button? There's a lot if you tap on it an expense, and it allows you to use the buttons over here to pull down the notifications panel if you want to or to pull up the control center, if you want to or if you want to use it as a home button, you can do that as well. So, if I tap this oops, if I tap this, it's going to act as a home button as well.
Just like this one over here, so tap it again and there's some other options. You can bring up Siri. If you so desire, you can tap it again, and you can go into device, and that gives you even more options. You can rotate the screen lock the screen. So if I tap this, the screen gets locked, so I could have to return that on go back in here, absolutely fantastic and the thing with this menu is, you can actually, if I go to device, I can tap on more and I can even take a screenshot.
I can tap this, and then we'll take a screenshot of the screen I'm looking at the time, but you can go back into the settings, and you can customize the top-level menu, so I can take off all the icons if I wanted to and just add one of them so tap this and just pick something that you want to use. Let's say Siri so now, I can use this as a single function. Software touch button accessible from any screen, I tap this and that brings up Siri. Okay again, if you go back into settings, you can choose any option that you want that is listed here, so that is the floating menu. Let's move on to the next tip now a couple other things you can do in the accessibility menu also is, let's say, you're looking at the text, and it's not bold enough for you.
You guys can actually just enable that and that just immediately Bold in's all the text on the iPad. Now, when you do tap this bold and text icon, it's going to ask you to restart your iPad, and once you restart the iPad, it's going to need the text everywhere across the iPad is gonna. Look like this over here see how that is bolded, so it's going to convert just to that. So let me cancel that for now. The other thing you can do is when I pull down the notifications panel, as you can see them a sense of translucency, so you can see through the notifications panel to whatever is in the back, so I can see that I'm in the settings screen in the translucence way.
So if what I could do is I could actually increase the contrast of the screen and that translucency that transparency actually disappears. If it's something that is bothering you, okay, so I know a couple of people that didn't like that. So this is an option here to simply change that to a solid block of color, alright and again within this menu. There's an amazing little option. It's that speech button here.
So what you want to do is you can do two things. You can actually allow the iPad to talk to you, so it not talks to you, I'm, sorry to dictate stuff to you. So there are two options for that. The first one is spoken, selection, okay, so let me just enable this and what's going to happen is lets me. Let me go back into the notes over here and lets us select a block of text.
Let's just do select all over here now after I do a selection process of the text, the new option that says speak and if I tap on the speed this script can be read. Even a book can be read to you with this option. It's gonna actually go ahead and read it to me: it's going to dictate the selected text for me now. The other option that is right underneath the speak selection is the speak screen. So if I enable this, what I could do is let's go to a website really quick.
Now, let's just cancel this out, let's go to Google, so all you do. Are you swipe with two fingers from top to bottom, and it brings up a apeak selection? It starts to read the whole thing to you. So let me just show you what it looks like a fast way to browse on iPad Chrome is a fast, simple answer. So it's reading this text over here. So if this was an e-book and if you want like that, it's going to read the whole e-book to you.
You can play paragraphs. Therefore, you can pause. You can increase or decrease that side of the speech and all that good stuff. When you're done you tap on X and that thing disappears alright. So these are the options that you have hiding under accessibility now.
The next thing I want to talk about is the camera now believe it or not? Your iPad Pro 10.5 comes with a fantastic camera. This is the same camera. You can find on the iPhone 7, which is a world-class camera, so it was only natural that you guys know exactly what you can do with the camera. Now, when you launch the camera, not much is going on. It's very easy.
You know you can take photos, you can switch the video slow-motion shots and all that that's pretty straightforward, but you do have some options. You can actually customize by going into these settings. So if you go into the settings over here and if you scroll down to it, says photos and camera, you can go right in and here's what I want to really talk about. Now we're going to skip these things, but this is the camera settings right here now, first and foremost, you can enable a grid which allows you to better align pictures. So this gives you a 2x2 grid over here, so you can better align pictures when you're taking a picture and the other things are very important to things is record video.
So if you're going to record video, you actually have four different options. Okay, so you can record at 720p at 30 frames per second or 1080p at 30 frames per second, which is a default option. So if you never change this, this is the quality you were getting at all times, but you can do much better than that. You can go to 1080p at 60 frames per second, which gives you an extremely smooth and stable video when you record it in this format. Now it's going to take a little more space on your iPad, but it's worth it.
The other thing is obviously or iPad is capable of recording in 4k at 30 frames per second, so make sure you guys are aware of all these options. Now, one more thing, let's say: I picked a 4k option. If I go back into my camera, if I scroll over to my video now, it's gonna actually tell you that it's in 4k mode on the top, it says 4k. So that's another way to tell what's happening at a given moment. If I choose 1080p at 60 frames per second and go back in, it is gonna, say HD, which is 1080p, and it says 60 which stands for 60 frames per second now, if I go back over here at the bottom, your iPad is also capable of recording slow motion, video, and you can do 720p at 240 frames per second or 1080p at 120 frames per second, if I go back here to the camera, again go to slow-motion so right now it's at 720p at 240 frames per second, but if I were to go back in here and choose the other option and if I go back into my camera, app on the top it'll say 120 that stands for 120 frames per second at high definition.
Alright, so make sure you are aware of these facts now. One important option you should be aware of is: if you scroll down over here, I'm going to scroll up, it says iCloud photo library. So basically any time you take a photo. If you enable this option any time you take a photo that photo gets uploaded to your iCloud automatically. Alright, just remember that you can actually choose to optimize the iPad storage or download and keep the original images.
So you take a photo and with this option it actually keeps the original photo on your iPad and also on iCloud. But if you go with this option, it's going to reduce the quality of the images that are on the iPad, which is going to take less space on the iPad, but it's going to upload the quality images to iCloud okay. So it's a little tricky, but it's something you should be aware of all right, so the next tip has to its Syria. So let me just give you a very quick example: I'm sure you guys know what to do with Syria a lot, but there are some things. A lot of people still don't know about.
So if I pull down the control center, for example, I can use this these toggles here these quick toggles to disable Bluetooth or maybe enable Bluetooth. What I could do with Siri is I can actually enable and disable settings on and off by using series. So watch this Siri disables my Bluetooth. So, as you can see, Siri turned off Bluetooth and I can actually turn it on if I wanted to so hey Siri turns on my Bluetooth, absolutely fantastic. Okay! So make a make sure that you are aware that you can do all these little things with Siri.
You can also toggle Wi-Fi on and off and all that good stuff, all right. So the next up. Let's talk about multitasking on your iPad and there are three ways you can multitask on the iPad. The easiest way is through Safari. So let's say you are in Safari.
Let me just go to amazon. com to demonstrate this better and let's say that you want to do split screen, safari multitasking, so you can do you can have two windows of safari side-by-side at the same time, so let's say you're over here, and you want to stay on this website. But you also want to check what's happening over here on a link, so you press and hold on the link and what's going to happen, it's going to give you an option that says open and split view if you click that it's going to open that window. In a split view, so you can keep looking over here, and you can also keep browsing on this part of the on the website. So this is safaris own split-screen multitasking.
Now what if I want to do multitasking between two different apps? This is a very easy to do. So all you do so, let's go back into Safari. This is a regular view and let's say that as I'm looking at Safari and I saw some less s, off-price I want to make a quick calculation. I'm going to do multitasking right. So the first thing you can do is the slide over multitasking.
So you slide over, and then you can come here, and you can choose any app that you want, so I don't have a calculation right now, but let's say I want to listen to some I just want to launch some music as I'm browsing the web. I don't want to exit the Safari web browser I just want to do it from here. So I tap this, and I choose something I start playing it from here now. The thing with this is a slide overview, so you can actually push this away or pull it in as you please, if you tap here, it also goes away. So what happens is when you pull this in this screen is deactivated.
This is the active screen, so it's for a quick look, and then you move all right and by the way, if you're in the slide overview, you can pull down to switch between apps. So let's say I want to go over here and take a quick note, blah-blah-blah-blah, and then I can just get rid of this okay. So that's slide over multitasking. Now what if I want split screen multitasking, where I can interact with both windows? At the same time, all you do is bring in any app that you want from the site and then, as you can see, there's a little line over here you tap on that line and that activates the split screen multitasking now I can actually you know, resize the windows half-and-half if I wanted to I can work over here and I can continue working over here. Okay, so the same I can be watching a video on this site and I could be browsing on a website over here, not bad at all.
Unless I'm done with the notes' application, all I do is I swipe it away. Oops I'm, sorry, bromine from the middle here you just swipe it away, and it's gone. I could have swiped this way to get rid of Safari as well. Okay, so that's a split screen multitasking in Safari slide overview and also split screen. Multitasking on your iPad and the final tip I wanna talk about is something I use regularly.
So let me go to Safari and let me go to Google. Calm. Calm is a website I. Was it a lot? Ok. So what I like to do is tap on the share button and choose the option that says add to home screen.
Then it allows me to pick an icon name and a link, and then I click Add, and now it's right here. So let me exit Safari for a minute and let's say I want to go to Google. Instead of going to Safari and type in Google I. Just tap on this and boom, it takes me straight to Google now, on top of this I'd like to do something even better, so I'd like to go to amazon. com, for example, that's also a website I.
Was it a lot I do the same thing add to home screen choose a name for the website: Amazon click Add! Now, that's all my well, my screen as well. What I could do is I like to grab all these and to put them in their own little folders, okay, so from here it can be bookmarks, it can be shortcuts or whatever, but they're very conveniently placed on your home screen from here. I can go to my quickly my most frequently visited websites and very easily alright. So that was the last step, but let me just throw in a bonus tip, really quick. If you pull down the notifications panel, if you want to get rid of notifications one by one, then you can do things like this, and you can choose clear.
You can do view whatever you can also do the same thing over here. You can tap on view. It's going to bring up the notification details. You can clear it up, but let's say you have hundreds of notifications, and you want to get rid of them at the same time without having to individually swipe them away one by one. All you do is press and hold that X symbol, and then, when clear comes up, you tap on it, and it basically clears everything.
There could be a hundred notifications. It will swipe them all the way, alright, alright. So that brings us to the end of this video I hope you guys learn a bunch of great tips to enjoy your iPad Pro 10.5. Much better, now make sure to subscribe to sake, tech and give this video a thumbs up. Also do not forget to follow me on Twitter and Instagram.
At sake, tech online guys have a fantastic day.
Source : sakitech
Phones In This Article
Related Articles


Comments are disabled
Latest Articles


