M1 iPad Teardown: Inside the New XDR Display! By iFixit
The M1 system seems to be making its way into every Apple product, but perhaps most excitingly it has found its way into the 2021 iPad Pro. That officially puts this iPad on par with the latest MacBook Air, Pro, and iMac in terms of computing power! So… now it’s a computer? But the M1 isn’t even the most exciting upgrade: the 12.9 inch iPad Pro now boasts a fancy display technology called mini-LED, which is what we’re really interested in today. kad you’ll need heat. A few minutes on a heat pad loosens the display adhesive, and then a heavy duty suction cup makes a perfect gap for an opening pick. Next, some careful slicing frees the display. Underneath, three cables connect it to the logic board.
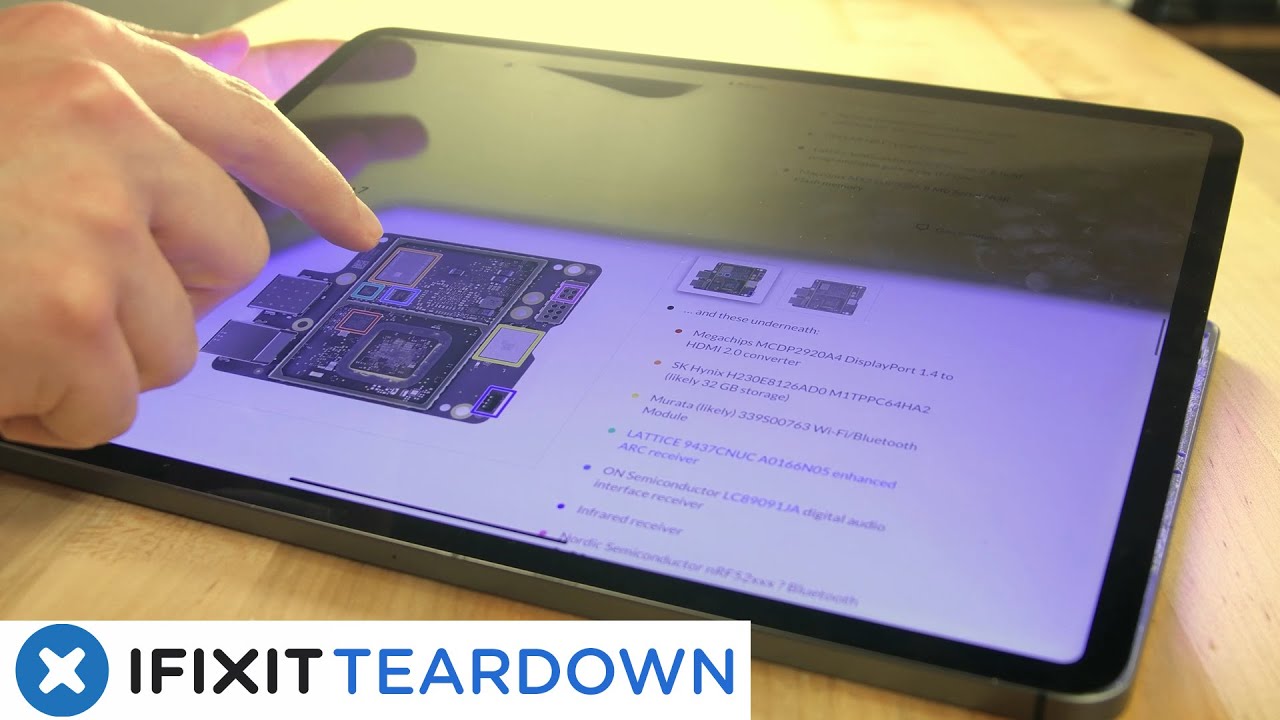
The front-facing sensors connect at the top of the board, then the four display cable connectors are under some thermal stickers in the lower half. I’ll set the display aside for a minute, so we can make sure they haven’t radically changed anything in here to fit the M1 inside. On the surface, things look mostly similar, but there are a few changes: New 5G antennas lurk on the edges of the frame, the dual-cell battery has a new 40.33 wh capacity, and of course, underneath all this thermal paste is the now-familiar M1 system on chip, next to its integrated 8GB of memory. One upgrade worth digging out is the new front-facing camera, now featuring an ultra-wide 122 degree field of view, enabling a feature Apple is calling “center stage,” which uses machine learning to crop into the ultra-wide image and track you as you move around the frame. Our friends at Halide took a fascinating deep dive into all the M1 cameras, which you can read at the link in the description below.
But let’s get back to that display! The new XDR display is ever-so-slightly thicker than last generation’s liquid retina display, maybe half a millimeter or so, but quite a bit heavier, weighing in at 285 grams. To separate the display, I’m going to heat it up and try to get a tool between the LCD and the diffuser layers behind it. Luckily, to see the backlight in action, we don’t need to separate anything from the glass! First, though, I’ll heat up the front-facing sensors and un-stick them so they’re not in the way of my prying. Once I have the pick between the right layers, only tape and light adhesive stand in my way. With our backlight separated, I hook the display back up to the logic board to see if it’s still working, and it is! With that bit of luck, we can show you exactly how this new backlight works.
Before we show you that though, here’s a quick explainer on backlight technology, in case your display knowledge is a little rusty! The short and simple version is most small-screened devices that haven’t moved on to OLED tech have a backlight that’s set off to one side, like this. Behind the glass and RGB pixels is a single row of dimmable LEDs that light up the screen so you can see what the pixels are doing. Mini-LED displays, on the other hand, like the one in the new 12.9” iPad, use a giant grid of tiny LEDs directly underneath the screen that can be individually controlled. This means the screen can get brighter, but also, more importantly, that the LEDs positioned where the pixels on the screen are black can be effectively “off,” greatly increasing contrast. So, back to our real iPad.
You can see here as I separate the screen from the backlight, that not only are the pixels on the screen changing, but the backlight underneath with its local dimming zones is changing too. This is also just a friendly reminder that display technology is crazy cool and intricate, and displays are a big part of why devices are so expensive these days. Which is all the more reason they should be easily replaceable! Under a microscope, you can see that each of the 2596 local dimming zones is a little square with 4 tiny LEDs inside. Here’s a grain of rice for scale. Zooming all the way in, you can see the tiny specs are indeed LEDs! According to Apple there are over 10,000 of these on this backlight.
You’re going to have to trust them, because… we’re not going to count them all. By contrast (no pun intended), just as we demonstrated earlier, the non-XDR iPad displays have a single strip of LEDs along one edge of the screen that serve as a backlight. These are much bigger than the mini-LEDs, and aren’t controlled individually, because, well, that would just look like a broken display! Since we didn’t make it all the way through this iPad today, we’re not going to give it a repairability score just yet. But it is safe to say at least the screen replacement procedure hasn’t changed much. Heat, prying, and patience are all necessary to complete the task, and it’s nerve-wracking if you’re just trying to get in for a battery replacement.
Coolness factor, on the other hand, for the new XDR display, is 10/10.
Source : iFixit
Phones In This Article
Related Articles


![Imilab EC2 - Outdoor Smart Security camera for Xiaomi Mi Home? Full Walkthrough Review [Xiaomify]](https://img.youtube.com/vi/rlIJSKsY8Ek/maxresdefault.jpg )

Comments are disabled
Latest Articles


